Chevrolet Sonic Repair Manual: Battery Negative Cable Disconnection and Connection
|
Callout |
Component Name |
|---|---|
Preliminary Procedures
|
|
|
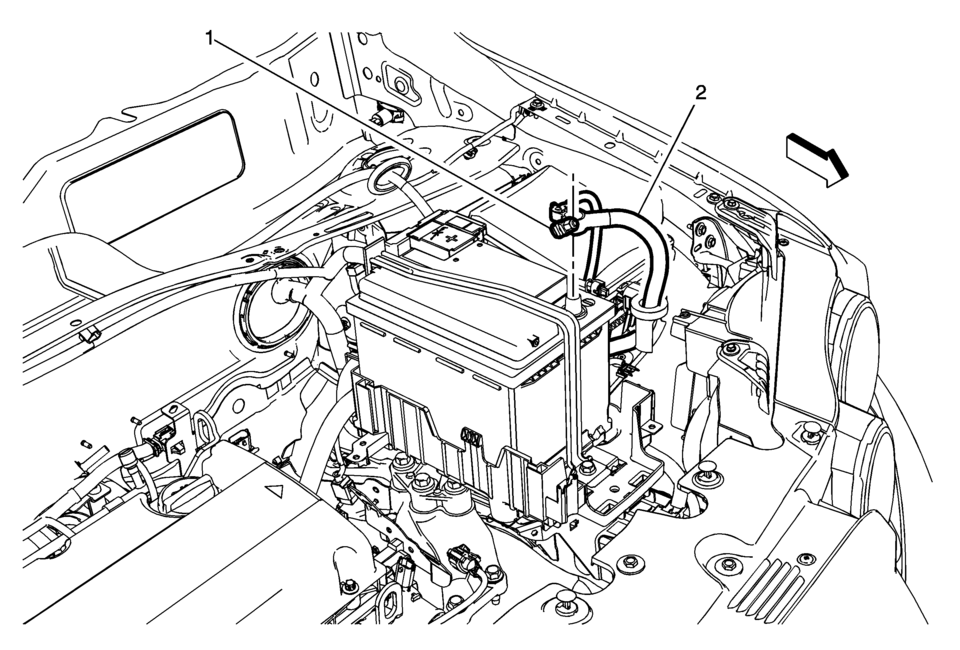
1 |
Battery Negative Cable Fastener Warning: Refer to Battery Disconnect Warning. Caution: Refer to Fastener Caution.
4.5 Y (40 lb in) |
|
2 |
Battery Negative Cable Procedure
|
 Battery Inspection/Test
Diagnostic Instructions
Perform the Diagnostic System Check - Vehicle prior to using this diagnostic
procedure.
Review Strategy Based Diagnosis for an overview of the diagnostic a ...
 Battery Negative Cable Replacement
Battery Negative Cable Replacement
Callout
Component Name
Preliminary Procedures
Disconnect the battery current sensor connector.
...
Other materials:
Accessories and Modifications
Adding non-dealer accessories or making modifications to the vehicle can affect
vehicle performance and safety, including such things as airbags, braking, stability,
ride and handling, emissions systems, aerodynamics, durability, and electronic systems
like antilock brakes, traction control, a ...
Engine Oil
To ensure proper engine performance and long life, careful attention must be
paid to engine oil. Following these simple, but important steps will help protect
your investment:
Always use engine oil approved to the proper specification and of the proper
viscosity grade. See ŌĆ£Selecting th ...
Wheel Replacement
Replace any wheel that is bent, cracked, or badly rusted or corroded. If wheel
nuts keep coming loose, the wheel, wheel bolts, and wheel nuts should be replaced.
If the wheel leaks air, replace it. Some aluminum wheels can be repaired. See your
dealer if any of these conditions exist.
Your de ...

0.0059