Chevrolet Sonic Repair Manual: Plastic Collar Quick Connect Fitting Service
- Removal Procedure
-
- Bartholomew?€‰(1)
- Q Release?€‰(2)
- Squeeze to Release?€‰(3)
- Sliding Retainer?€‰(4)
- Global Connect?€‰(5)
- TI Loc?€‰(6)
- Safe Lock?€‰(7)
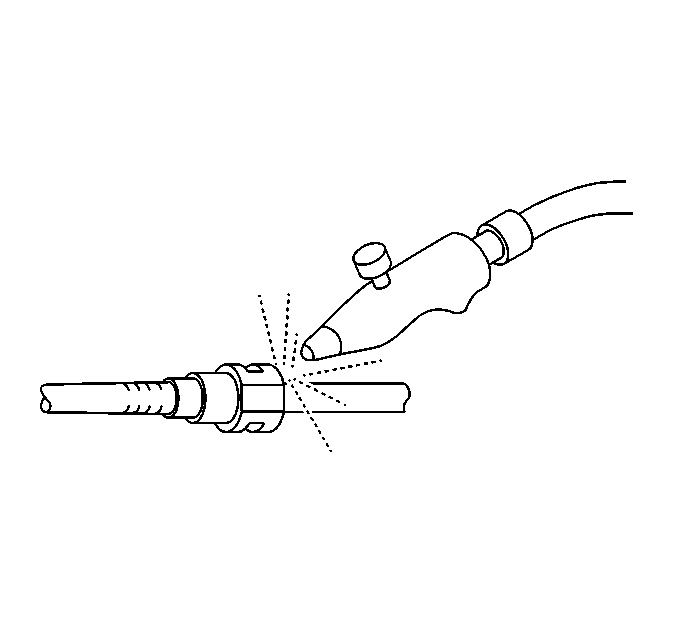
- Using compressed air, blow any dirt out of the quick-connect fitting.
- This step applies to Bartholomew style connectors ONLY. Squeeze the plastic quick-connect fitting release tabs.
- This step applies to Q Release style connectors ONLY. Release the fitting by Pushing the tab toward the other side of the slot in the fitting.
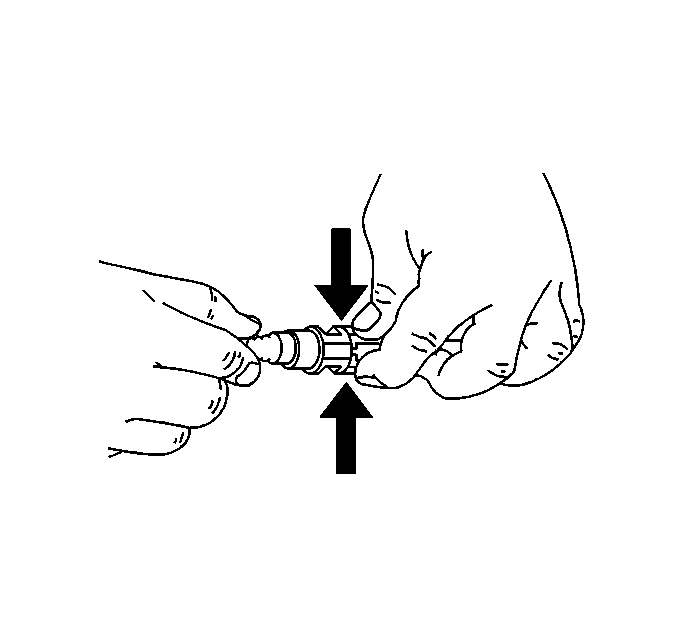
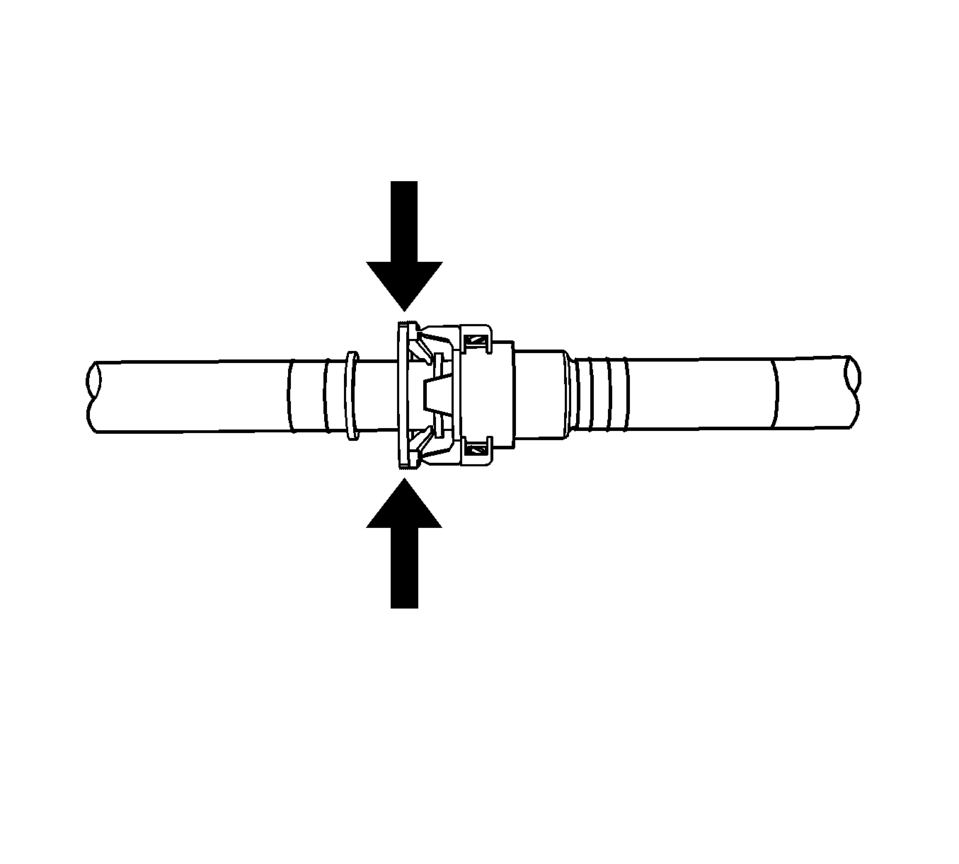
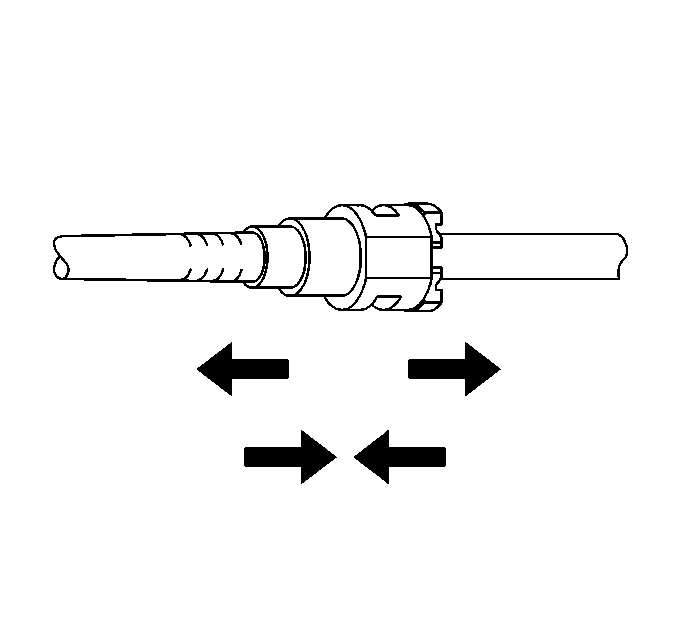
- This step applies to Squeeze to Release style connectors ONLY. Squeeze where indicated by arrows on both sides of the plastic ring surrounding the quick-connect fitting.
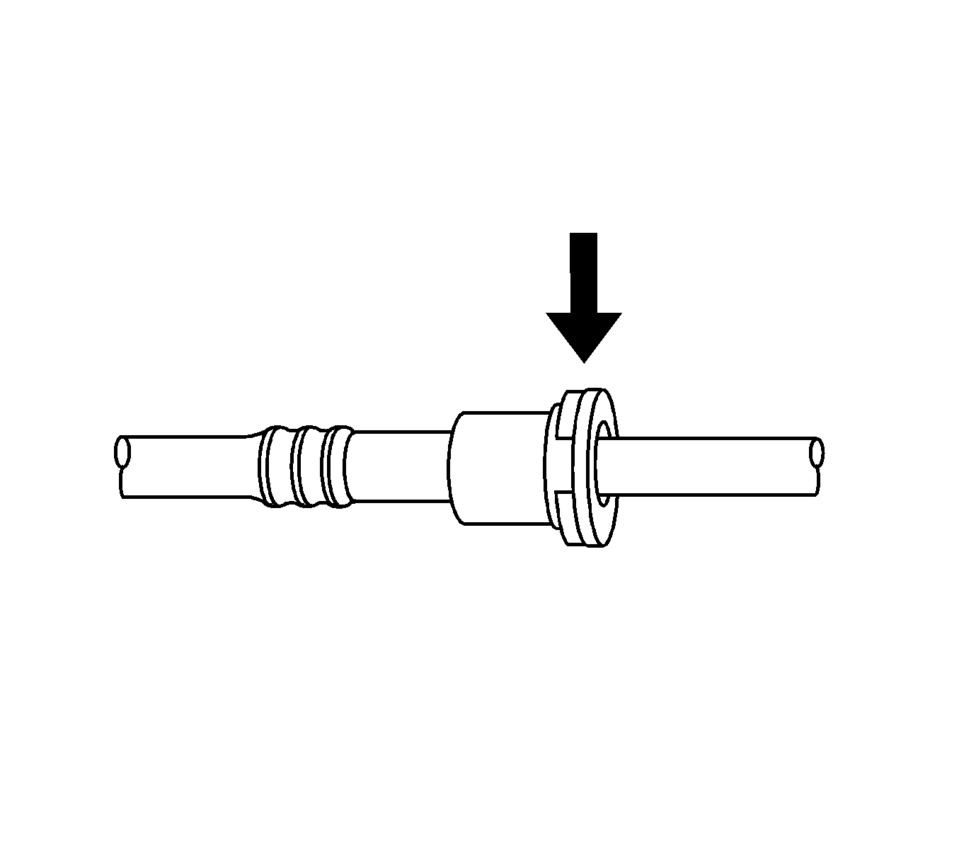
- This step applies to Squeeze to Release style connectors ONLY. Push in the male side slightly in order to slide the retainer away from the retainers, squeeze where indicated by arrows on both sides of the plastic ring surrounding the quick-connect fitting.
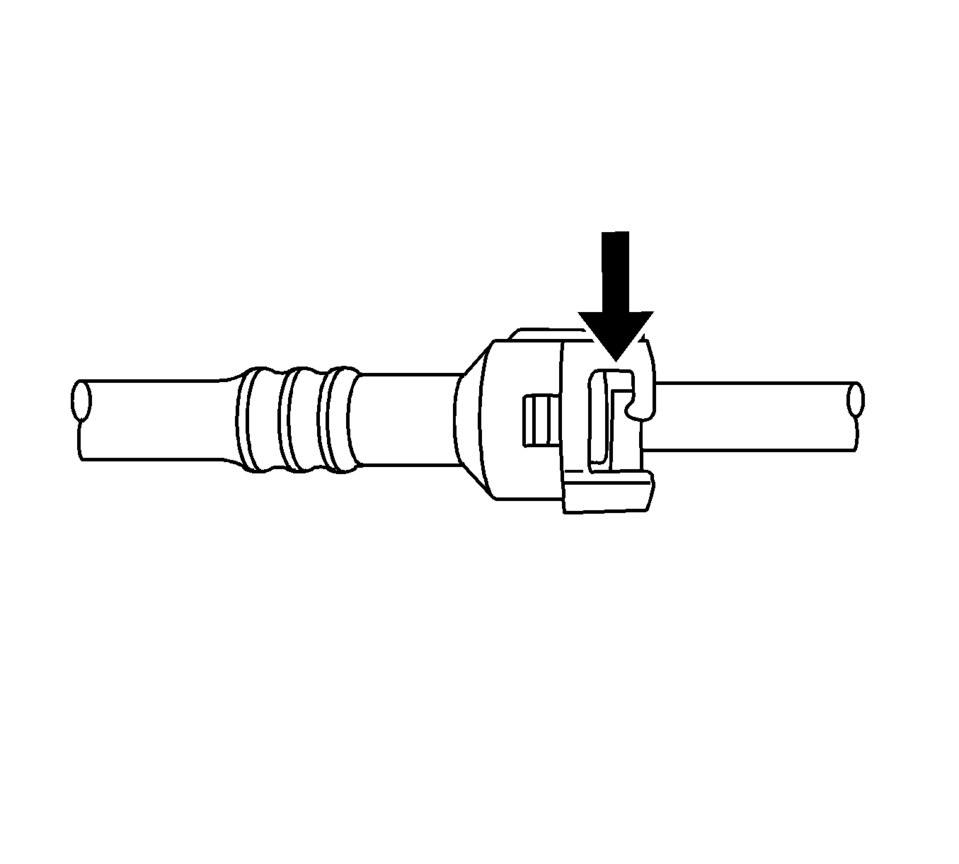
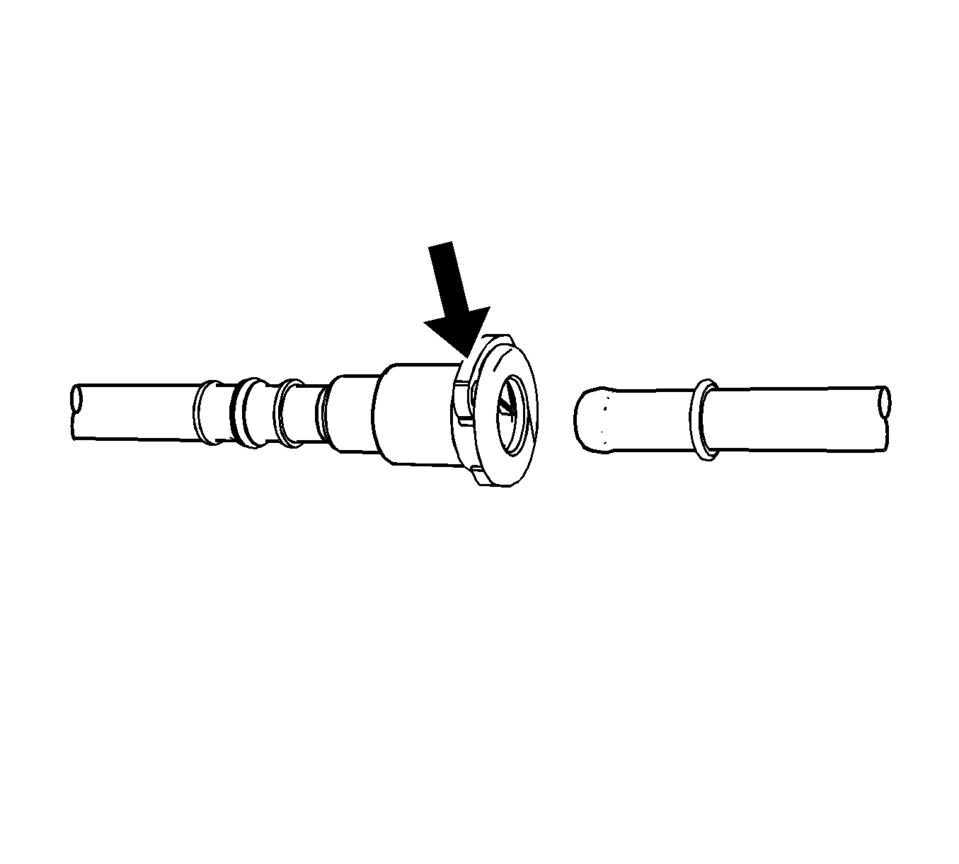
- This step applies to Sliding Retainer style connectors ONLY. Release the fitting by pressing on one side of the release tab causing it to push in slightly. If the tab doesn't move try pressing the tab in from the opposite side. The tab will only move in one direction.
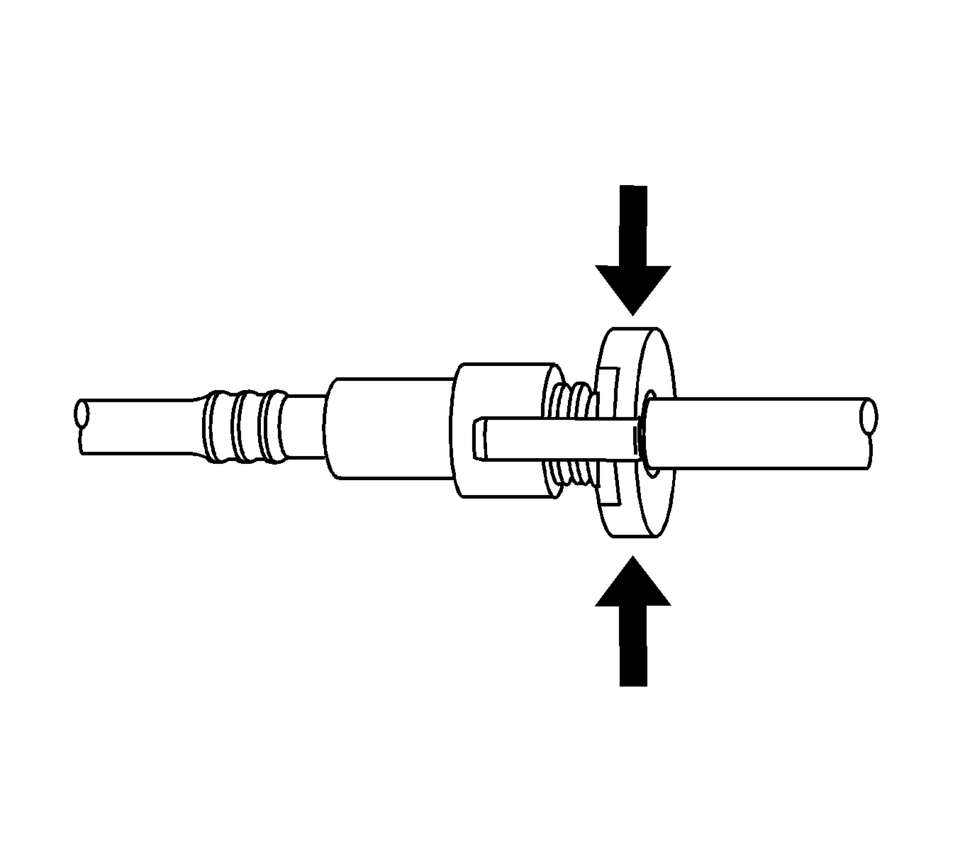
- This step applies to the Global Connector style only. Push the connector toward the tube in order to release the pressure. Press and hold down the release mechanism, and pull the connector straight out.
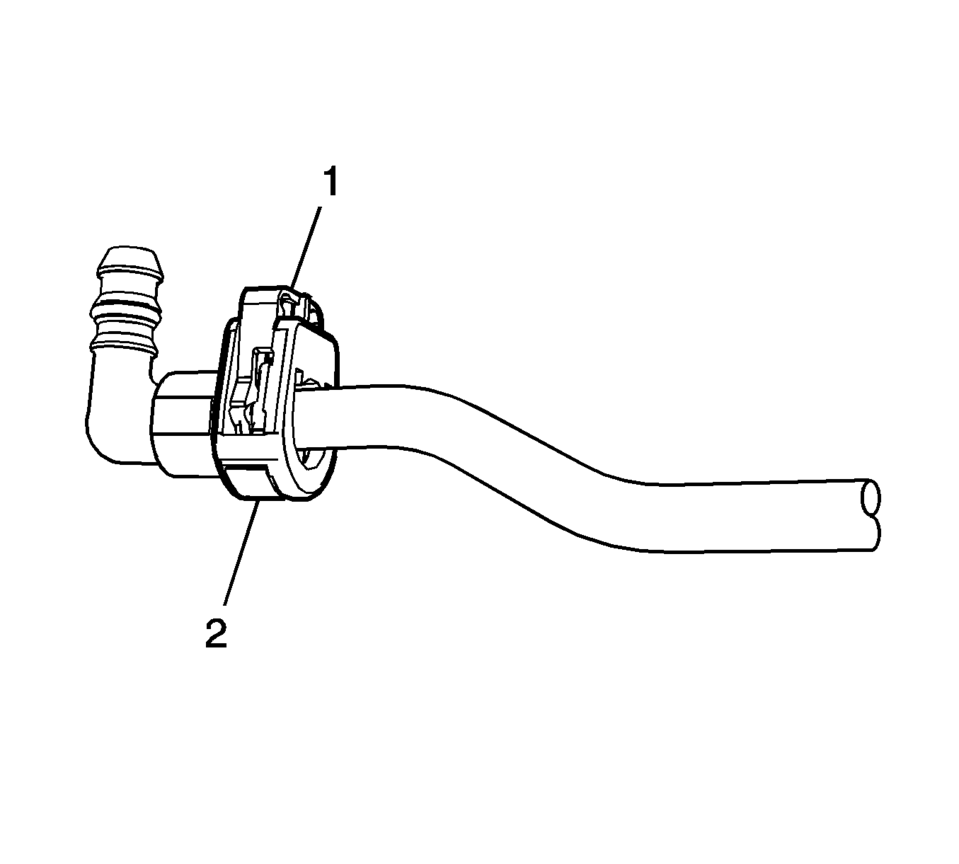
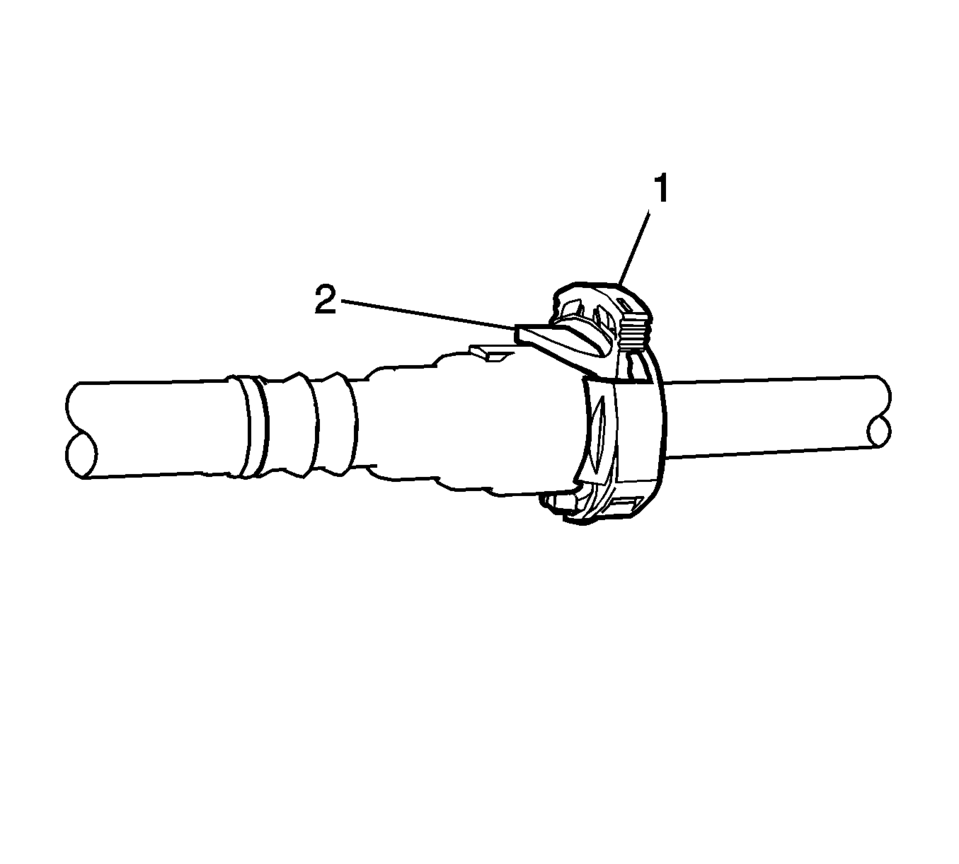
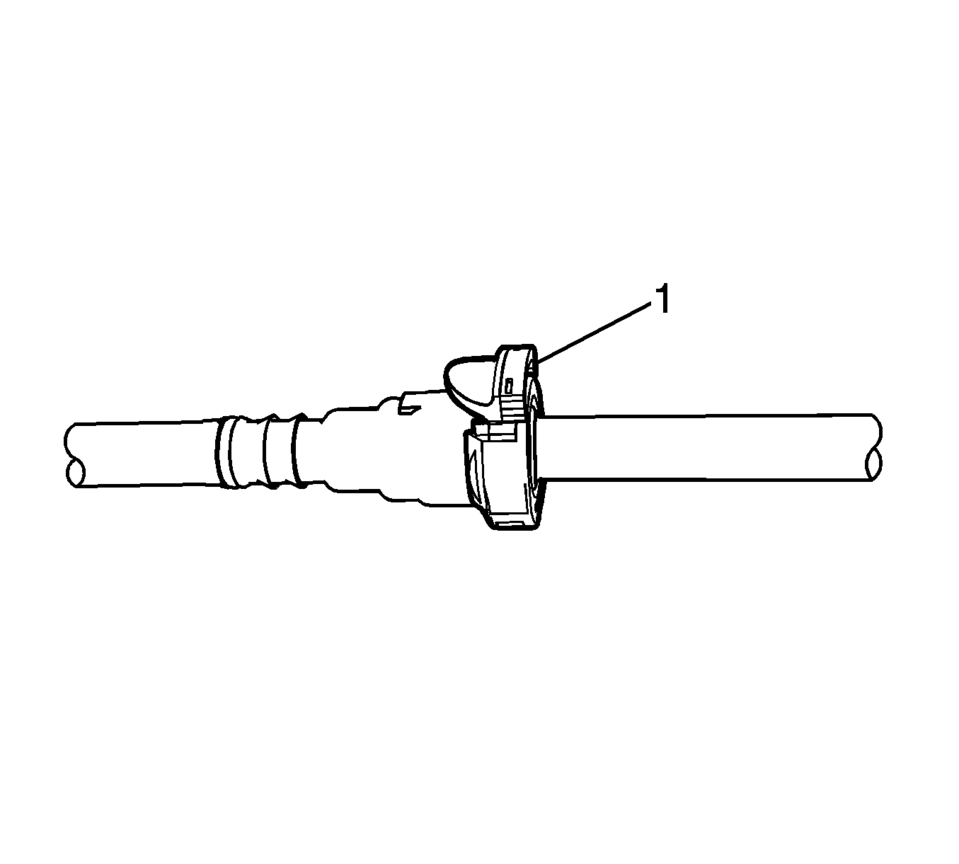
- This step applies to the TI Loc style only. Push the connector toward the tube in order to release the pressure. Release the redundant latch?€‰(1)?€‰with two fingers or a flat bladed tool. Then press and hold down the bottom release mechanism?€‰(2)?€‰and pull the connector straight out.
- This step applies to the Safe Lock style only. Push the connector toward
the tube in order to release the pressure. Release the second latch?€‰(1)?€‰with
two fingers. Then press and hold down the bottom release mechanism?€‰(2)?€‰and
pull the connector straight out.
Warning:
Refer to Relieving Fuel Pressure Warning.
- Using a clean shop towel, wipe off the male pipe end.
- Inspect both ends of the fitting for dirt and burrs.
- Clean or replace components as necessary.

Warning:
Refer to Gasoline/Gasoline Vapors Warning.
Note:
There are several types of Plastic Collar Fuel and Evaporative Emission Quick Connect Fittings used on this vehicle.
The following instructions apply to all of these types of Plastic Collar Quick Connect Fittings except where indicated.
- Installation Procedure
-
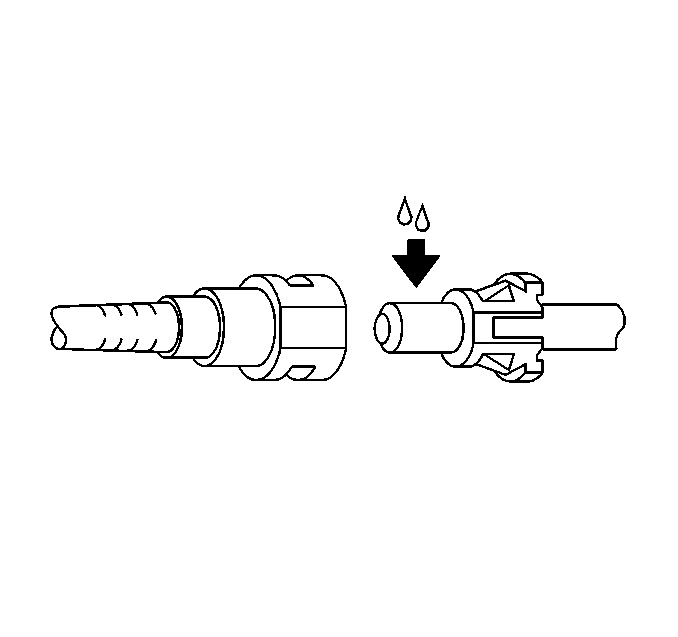
- Apply a few drops of clean engine oil to the male pipe end.
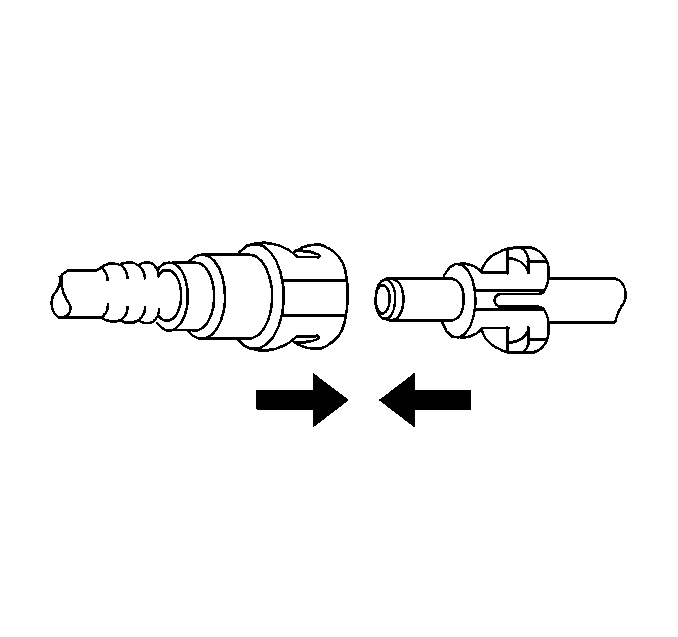
- Push both sides of the quick-connect fitting together in order to cause the retaining feature to snap into place.
- Pull on both sides of the quick-connect fitting to make sure the connection is secure.
- Insert the tube in the connector until the retainer snaps in place.
- Push down on the redundant latch?€‰(1)?€‰until it is fully engaged and snapped into position.
- Insert the tube in the connector until the retainer snaps in place.
- Push down on the second latch?€‰(1)?€‰in order to secure the connection.
- Inspect for leaks using the following procedure:
- Turn the ignition ON, with the engine OFF for 2 seconds.
- Turn the ignition OFF, for 10 seconds.
- Turn the ignition ON, with the engine OFF for 2 seconds.
- Turn the ignition OFF.
- Inspect for leaks.
 Plastic Collar Quick Connect Fitting Service
Removal Procedure
Warning: Refer to Gasoline/Gasoline Vapors Warning.
Note: There are several types of Plastic Collar Fuel and Evaporative
Emission Quick Co ...
 Plastic Identification and Refinishing Systems
Plastic Identification and Refinishing Systems
Identifying Symbol?€“ Old Symbol in ( )s
Chemical Composition or Plastic Family Name
Typ ...
Other materials:
Safety Belt Reminders
Driver Safety Belt Reminder Light
There is a driver safety belt reminder light on the instrument cluster.
When the vehicle is started, this light flashes and a chime may come on to remind
the driver to fasten their safety belt. Then the light stays on solid until the
belt is buckled. This cy ...
Fuel Pump Flow Control Module Replacement
Fuel Pump Flow Control Module Replacement
Callout
Component Name
Preliminary Procedures
Disconnect the battery negative cable. Refer to Battery Negative
Cable Disconnection and Connection.
Remove the right rear compartmen ...
About microSD card
WARNING
Never allow children to handle or play with the microSD card used in your
Nissan Armada. Due to its small size, accidental swallowing may occur, which can
lead to choking, serious injury, or even life-threatening situations.
NOTE:
If the microSD card is removed from the Nissan Armada ...

0.0059