Chevrolet Sonic Repair Manual: Positive Crankcase Ventilation Hose/Pipe/Tube Replacement
- Removal Procedure
-
- Remove the air cleaner outlet duct. Refer to Air Cleaner Outlet Duct Replacement.
- Open the 2 positive crankcase ventilation pipe retainer clips (2) and (3).
- Remove the positive crankcase ventilation pipe from the intake manifold.
- Loosen the charger air bypass valve pipe clamp (3).
- Remove the charger air bypass valve pipe from turbocharger.
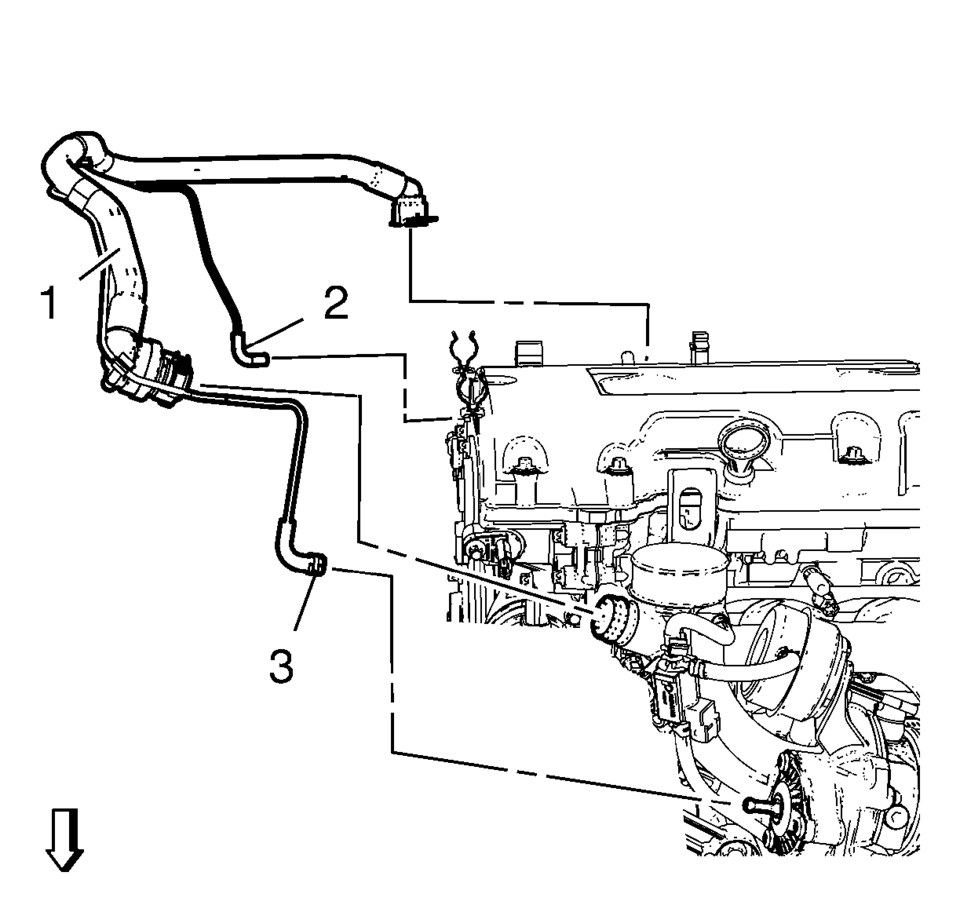
- Remove the charger air bypass valve pipe (2) from turbo charger wastegate regulator solenoid valve.
- Disconnect the positive crankcase ventilation pipe from turbocharger.
- Unclip and remove the positive crankcase ventilation pipe assembly (1) from the camshaft cover retainer clips.
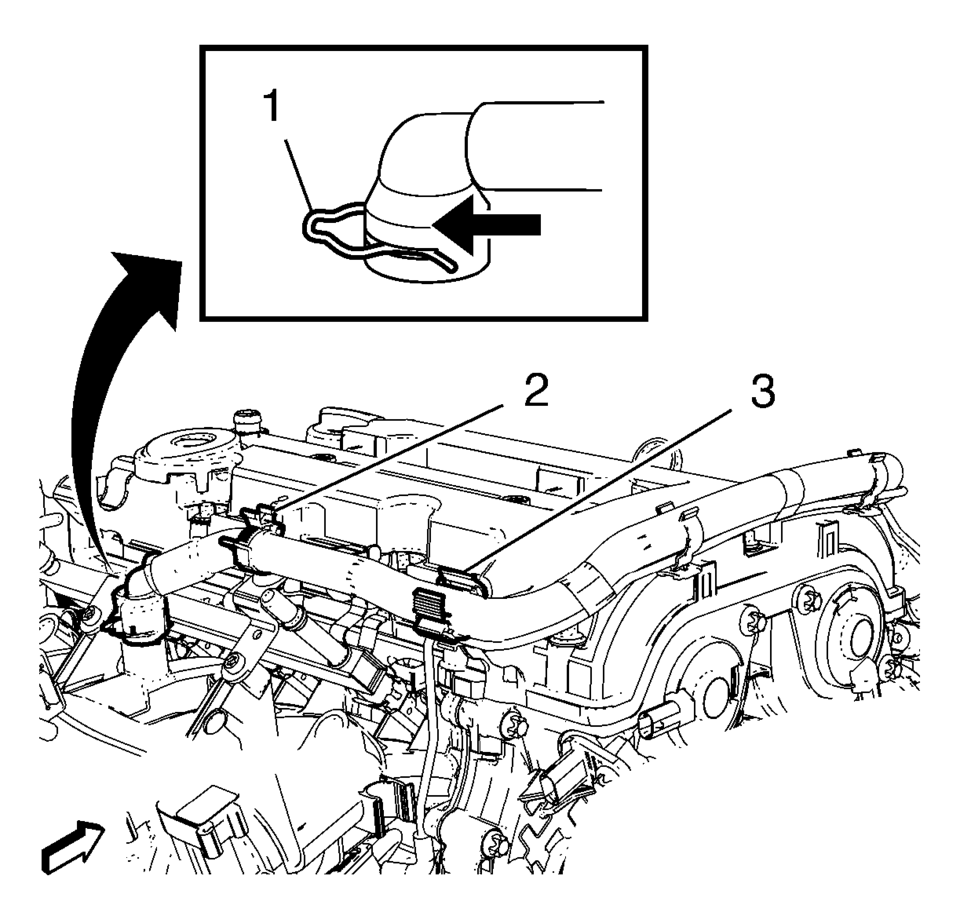
Note:
Move retainer clamp (1) in direction of the arrow.
- Installation Procedure
-
- Install the positive crankcase ventilation pipe assembly (1) to the camshaft cover retainer clips.
- Connect the positive crankcase ventilation pipe to turbocharger.
- Install the charger air bypass valve pipe (2) to turbo charger wastegate regulator solenoid valve.
- Install the charger air bypass valve pipe to turbocharger.
- Fasten the charger air bypass valve pipe clamp (3).
- Install the positive crankcase ventilation pipe to the intake manifold and fix with retainer clamp (1).
- Clip in the positive crankcase ventilation pipe to the 2 retainer clips (2) and (3).
- Install the air cleaner outlet duct. Refer to Air Cleaner Outlet Duct Replacement.
 Crankcase Ventilation System Inspection/Diagnosis
Results of Incorrect Operation
A plugged positive crankcase ventilation (PCV) orifice or hose may cause
the following conditions:
Rough idle
Stalling or slow idle speed
Oil le ...
 Positive Crankcase Ventilation Pipe Installation
Install the positive crankcase ventilation tube (2).
Connect the 2 positive crankcase ventilation tube connectors (1).
Clip in the ECM wiring harness guide (3) t ...
Other materials:
Special Tools
Illustration
Tool Number/ Description
BO-24402-A
J-24402-A
Glass Sealant Cold Knife Remover
equalizermagnum
BO-39032
J-39032
Stationary Glass Removal Tool
...
Outside Rearview Mirror Housing Rear Cover Replacement
Outside Rearview Mirror Housing Rear Cover Replacement
Callout
Component Name
Preliminary Procedures
Remove the outside rearview mirror glass. Refer to Outside Rearview Mirror
Glass Replacement.
1
...
Caster Description
Caster is the tilting of the uppermost point of the steering axis either forward
or backward, when viewed from the side of the vehicle. A backward tilt is positive (+)
and a forward tilt is negative (−). Caster influences directional control of the
steering but does not a ...

0.007