Chevrolet Sonic Repair Manual: Radiator Replacement (LUV)
- Removal Procedure
-
- Remove the air cleaner outlet duct. Refer to Air Cleaner Outlet Duct Replacement.
- Remove the front compartment front insulator cover. Refer to Front Compartment Front Insulator Cover Replacement.
- Remove the engine coolant fan shroud. Refer to Engine Coolant Fan Shroud Replacement
- If equipped with an automatic transmission remove the transmission cooler lines. Refer to Fluid Cooler Inlet Hose Replacement and Fluid Cooler Outlet Hose Replacement.
- Drain the engine coolant. Refer to Cooling System Draining and Filling.
- Remove the radiator inlet hose from the radiator. Refer to Radiator Inlet Hose Replacement.
- Remove the radiator outlet hose from the radiator. Refer to Radiator Outlet Hose Replacement
- Remove the front bumper fascia assembly. Refer to Front Bumper Fascia Replacement.
- Remove the radiator upper air baffle. Refer to Radiator Air Baffle Replacement
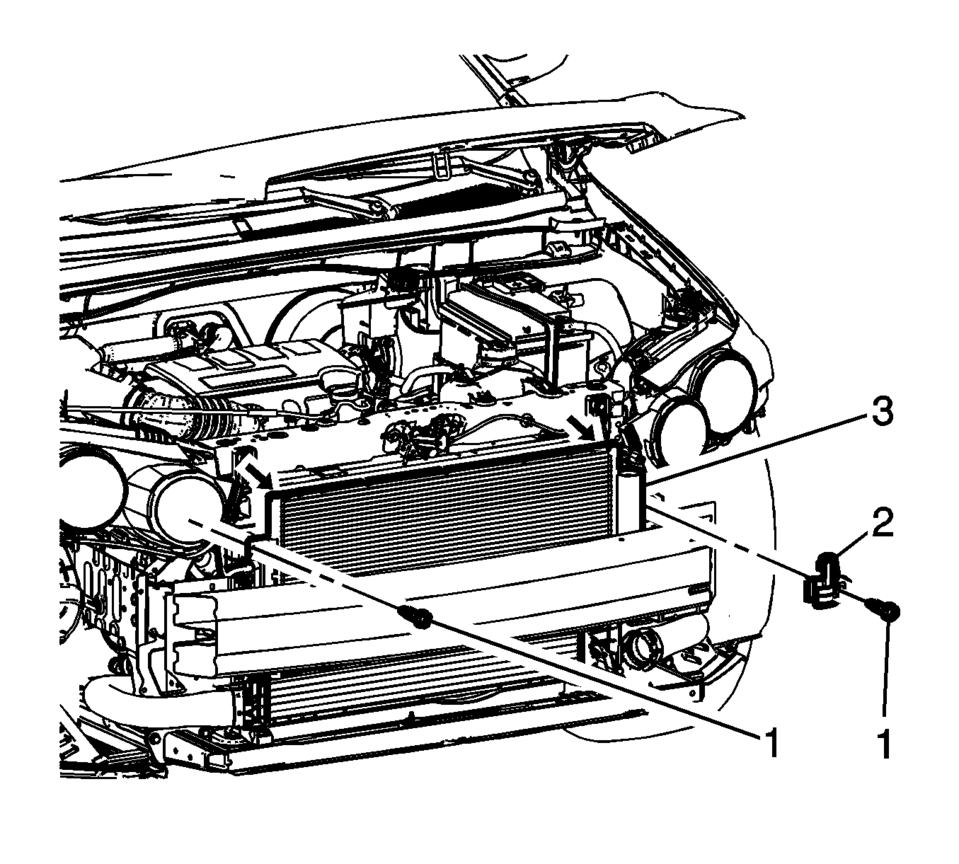
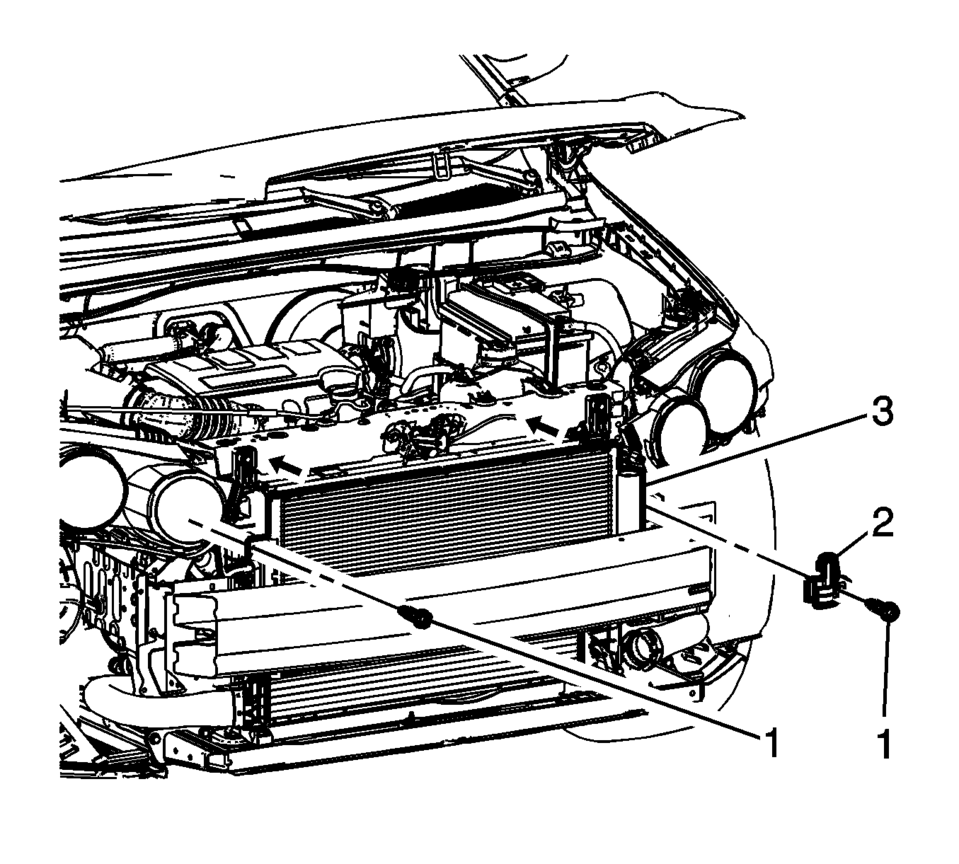
- Remove the three air conditioning condenser bracket fasteners (1) and bracket. (2).
- Release the clips securing the air conditioning condenser (1) to the radiator and pull the condenser (1) forward as far as possible.
- Support the air conditioning condenser assembly.
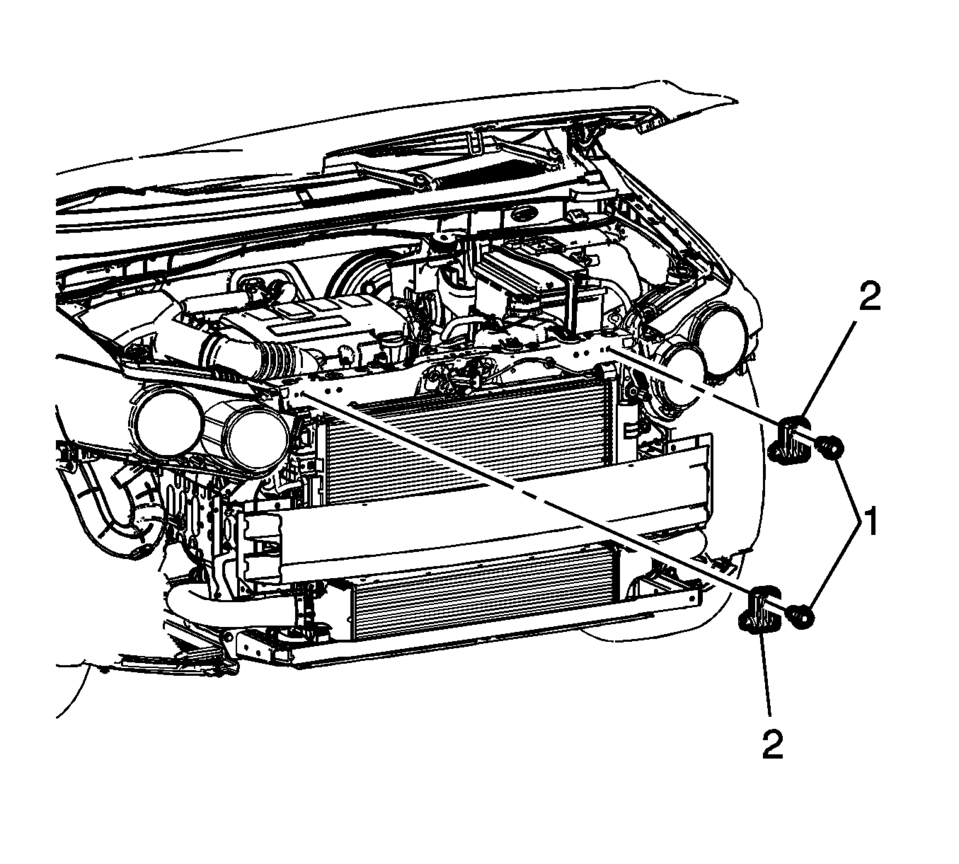
- Remove the radiator upper bracket fasteners (1) and brackets (2).
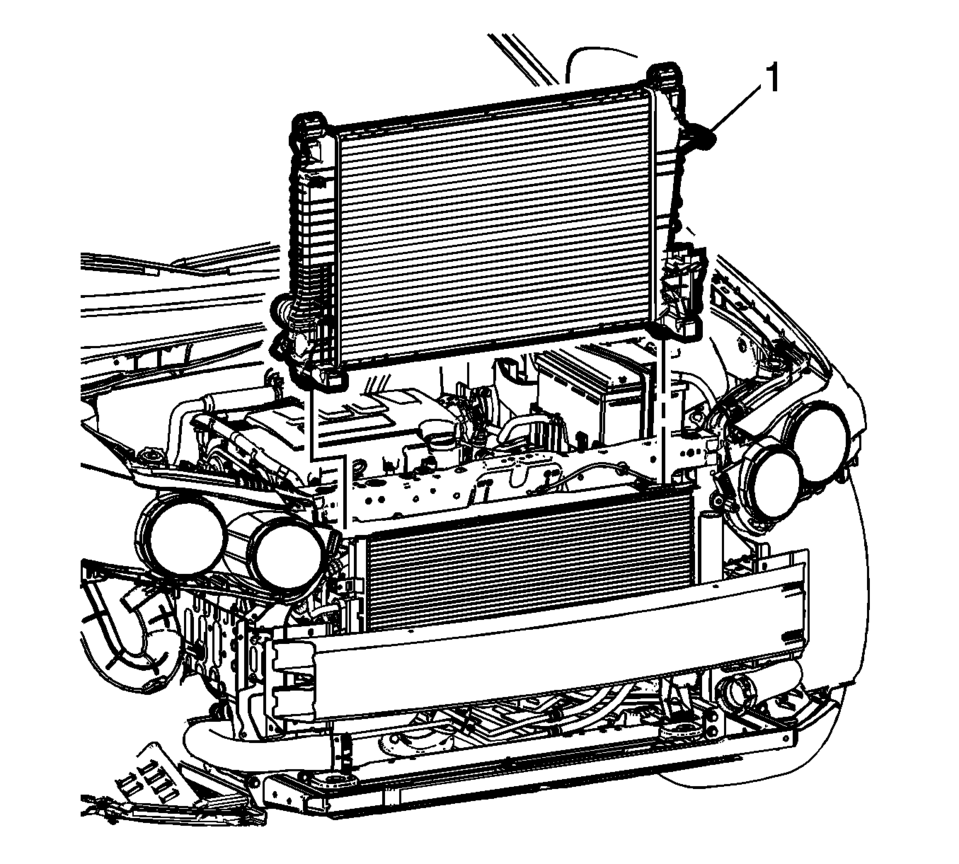
- Remove the radiator assembly from the vehicle.
- Remove the following components from the radiator assembly (1).
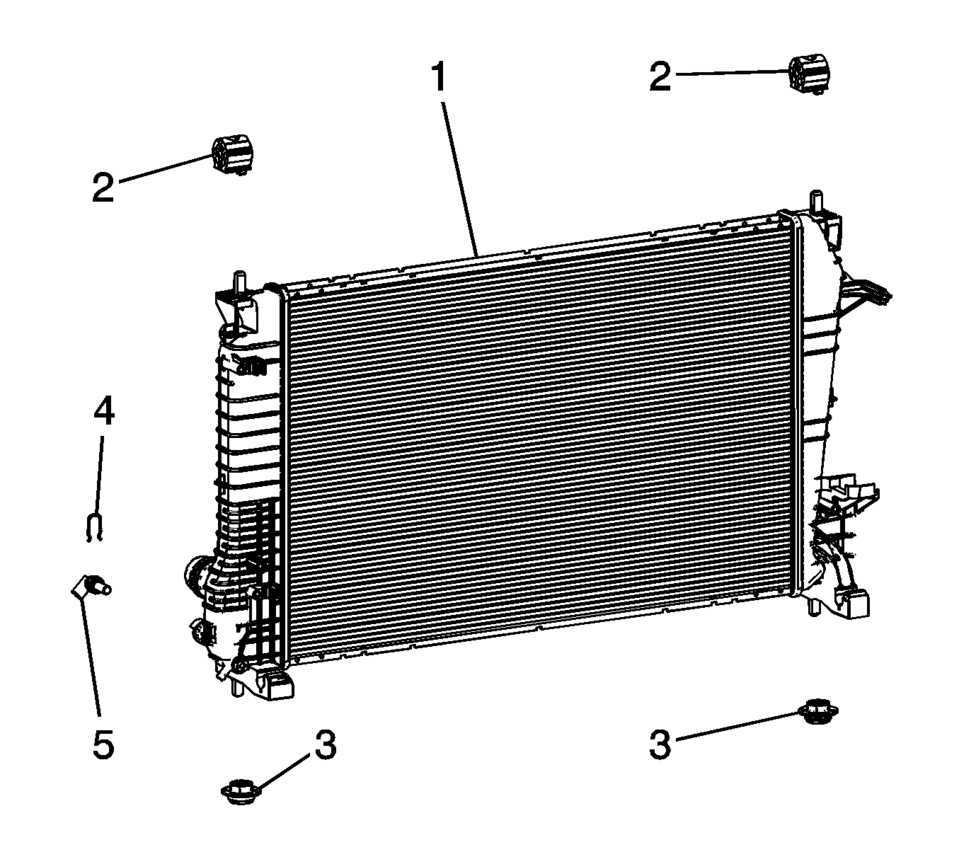
- Radiator upper insulators (2) (Qty:2)
- Radiator lower insulators (3) (Qty: 2)
- Radiator temperature sensor (5) and retainer clip (4)
- Installation Procedure
-
- Install the following components to the radiator assembly (1).
- Radiator upper insulators (2) (Qty:2)
- Radiator lower insulators (3) (Qty: 2)
- Radiator temperature sensor (5) and retainer clip (4)
- Install the radiator assembly into the vehicle.
Caution:
Refer to Fastener Caution.
- Install the radiator upper brackets (2) and bracket fasteners (1) tighten the bracket fasteners to 9Y(80 lb in)
.
- Position the air conditioning condenser (1) to the radiator, and push inward securing the air conditioning condenser to the radiator assembly.
- Install the air conditioning condenser bracket (2) and the air conditioning condenser fasteners (1) .
- Install the radiator upper air baffle. Refer to Radiator Air Baffle Replacement
- Install the front bumper fascia assembly. Refer to Front Bumper Fascia Replacement.
- Install the radiator outlet hose from the radiator. Refer to Radiator Outlet Hose Replacement
- Install the radiator inlet hose from the radiator. Refer to Radiator Inlet Hose Replacement.
- If equipped with an automatic transmission install the transmission cooler lines. Refer to Fluid Cooler Inlet Hose Replacement and Fluid Cooler Outlet Hose Replacement.
- Install the engine coolant fan shroud. Refer to Engine Coolant Fan Shroud Replacement
- Install the front compartment front insulator cover. Refer to Front Compartment Front Insulator Cover Replacement.
- Install the air cleaner outlet duct. Refer to Air Cleaner Outlet Duct Replacement.
 Radiator Replacement (LDE LUW)
Radiator Replacement
Callout
Component Name
Preliminary Procedures
Drain the coolant. Refer to Cooling System Draining and Filling. ...
 Radiator Surge Tank Outlet Hose Replacement (LDE LUW)
Radiator Surge Tank Outlet Hose Replacement
Callout
Component Name
Preliminary Procedure
Drain the coolant. Refer to Cooling Sy ...
Other materials:
DIC Operation and Displays
The DIC has different displays which can be accessed by using the DIC buttons
on the turn signal lever on the left side of the steering wheel. The DIC displays
trip, fuel, and warning messages if a system problem is detected. See Trip Computer and Vehicle Messages.
DIC Buttons
1. SET/C ...
Automatic Transmission Flex Plate Installation
Special Tools
EN-652 Automatic Transmission Flex Plate Holder
For equivalent regional tools, refer to Special Tools.
Clean the automatic transmission flex plate bolt threads.
Install the automatic transmission flex plate (2) and the EN-652
holder to hold the automatic trans ...
Timing Belt Adjustment
Special Tools
EN-652 Flywheel Holder
EN-6333 Locking Pin
EN-6340 Locking Tool
EN-6628-A Locking Tool
EN-45059 Torque Angle Sensor Kit
For equivalent regional tool, refer to Special Tools.
Removal Procedure
Remove the timing belt upper front cover. Refer to Timing Bel ...

0.0061