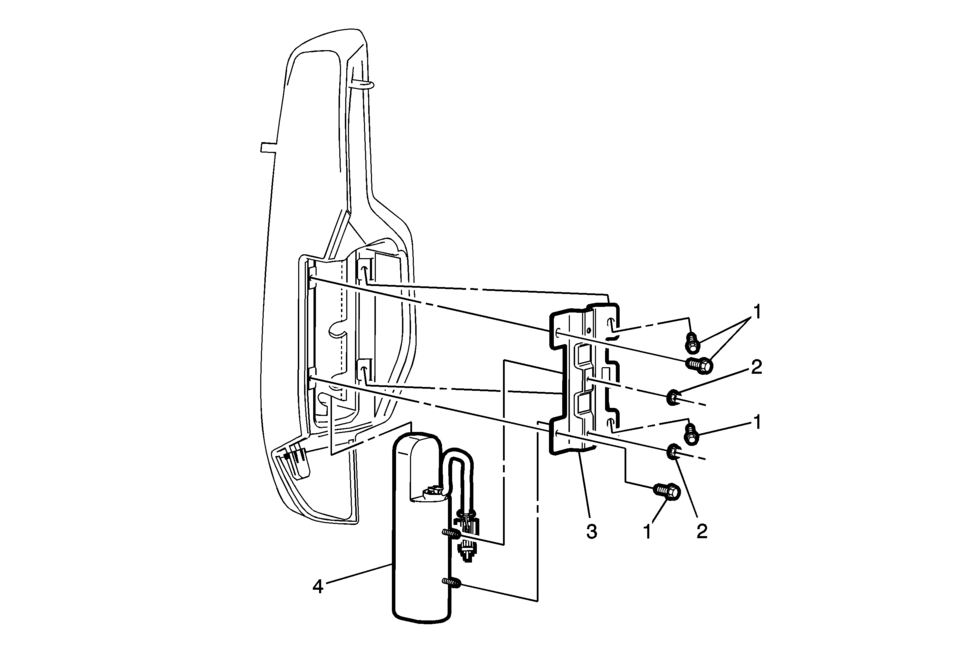
Chevrolet Sonic Repair Manual: Rear Seat Outboard Seat Back Airbag Replacement
|
Callout |
Component Name |
|---|---|
|
Warning: Following the deployment of a rear seat side air bag, inspect the following parts for damage. Replace these parts if necessary:
Failure to do so may cause future personal injury.
|
|
|
1 |
Rear Seat Side Inflatable Restraint Module Bracket Bolt (Qty:?€‰4) Caution: Refer to Fastener Caution.
3.5?€‰Y (31?€‰lb?€‰in) |
|
2 |
Rear Seat Side Inflatable Restraint Module Nut (Qty:?€‰2) Caution: Refer to Fastener Caution.
3.5?€‰Y (31?€‰lb?€‰in) |
|
3 |
Rear Seat Side Inflatable Restraint Module Bracket |
|
4 |
Rear Seat Side Inflatable Restraint Module Procedure
|
 Instrument Panel Lower Airbag Replacement - Passenger Side
Instrument Panel Lower Airbag Replacement - Passenger Side
Callout
Component Name
Warning: Refer to SIR Inflator Module Handli ...
 Replacing Airbag System Parts after a Crash
Warning: A crash can damage the airbag systems in the vehicle. A damaged
airbag system may not work properly and may not protect you and your passenger(s)
in a crash, resulting in serious inj ...
Other materials:
Front Side Door Window Regulator Handle Replacement
Front Side Door Window Regulator Handle Replacement
Callout
Component Name
1
Front Side Door Window Regulator Handle Clip
Procedure
Use the appropriate tool, remove the clip from handle.
2
...
Stabilizer Shaft Replacement
Removal Procedure
Remove the intermediate steering shaft lower bolt. Refer to Intermediate
Steering Shaft Replacement.
Raise and support the vehicle. Refer to Lifting and Jacking the Vehicle.
Remove the tire and wheel assembly. Refer to Tire and Wheel Removal
and Inst ...
Break-in schedule
CAUTION
During the initial 1,200 miles (2,000 km), it is essential to follow these
guidelines carefully to ensure optimal engine performance, long-term durability,
and maximum efficiency of your Nissan Armada.
Ignoring these break-in recommendations for your Nissan Armada may lead to
prematu ...

0.0066