Chevrolet Sonic Repair Manual: Rear Seat Outboard Seat Back Airbag Replacement
|
Callout |
Component Name |
|---|---|
|
Warning: Following the deployment of a rear seat side air bag, inspect the following parts for damage. Replace these parts if necessary:
Failure to do so may cause future personal injury.
|
|
|
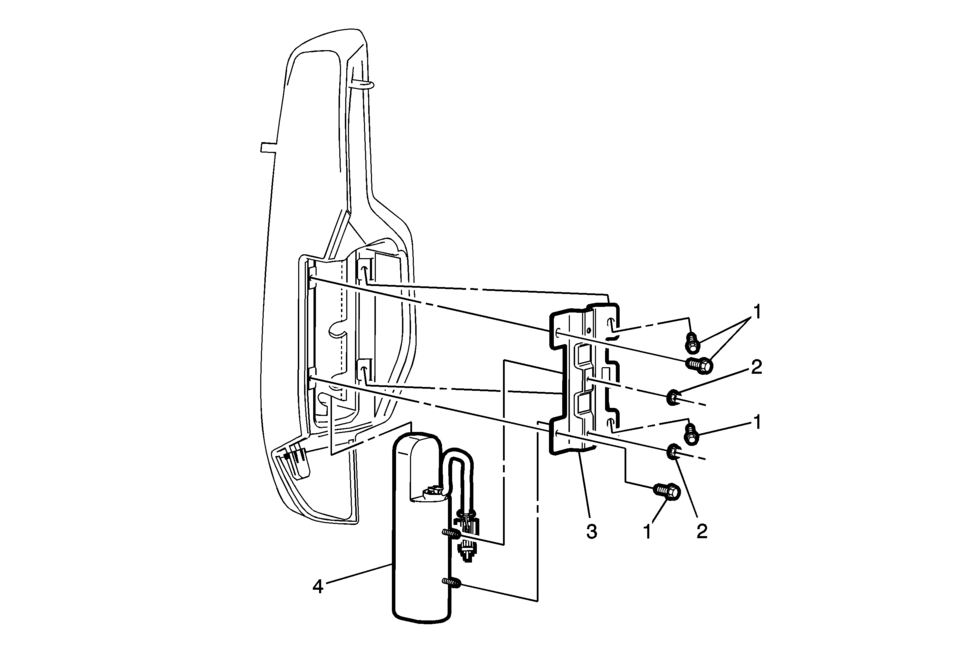
1 |
Rear Seat Side Inflatable Restraint Module Bracket Bolt (Qty:?€‰4) Caution: Refer to Fastener Caution.
3.5?€‰Y (31?€‰lb?€‰in) |
|
2 |
Rear Seat Side Inflatable Restraint Module Nut (Qty:?€‰2) Caution: Refer to Fastener Caution.
3.5?€‰Y (31?€‰lb?€‰in) |
|
3 |
Rear Seat Side Inflatable Restraint Module Bracket |
|
4 |
Rear Seat Side Inflatable Restraint Module Procedure
|
 Rear Seat Latch Replacement
Rear Seat Latch Replacement
Callout
Component Name
Preliminary Procedures
Remove the rear seat back cushion. Refer to Rear Seat Bac ...
 Wipers, Washers
...
Other materials:
Brake System Warning Light
The vehicle brake system consists of two hydraulic circuits. If one circuit is
not working, the remaining circuit can still work to stop the vehicle. For normal
braking performance, both circuits need to be working
If the warning light comes on, there is a brake problem. Have the brake system
...
Case Porosity Repair
Some external leaks are caused by case porosity in non-pressurized areas.
Thoroughly clean the area to be repaired with a cleaning
solvent. Air dry the area.
Warning: Epoxy adhesive may cause skin irritations and eye damage.
Read and follow all information on the container label a ...
How to enable/disable the sonar system
Vehicle information display
Steering-wheel-mounted control (right side)
The Nissan Armada sonar system is automatically activated when the ignition is
in the ON position and the transmission is placed in D (Drive) or R (Reverse), ensuring
immediate assistance during low-speed maneu ...

0.0071