Chevrolet Sonic Repair Manual: Rear Side Door Outer Panel Replacement
- Removal Procedure
-
- Disable the SIR System. Refer to SIR Disabling and Enabling.
- Disconnect the negative battery cable. Refer to Battery Negative Cable Disconnection and Connection.
- Remove the rear side door. Refer to Rear Side Door Replacement.
- Remove the rear side door outside handle. Refer to Rear Side Door Outside Handle Replacement.
- Remove the sealers and anti-corrosion materials from the repair area, as necessary. Refer to Anti-Corrosion Treatment and Repair.
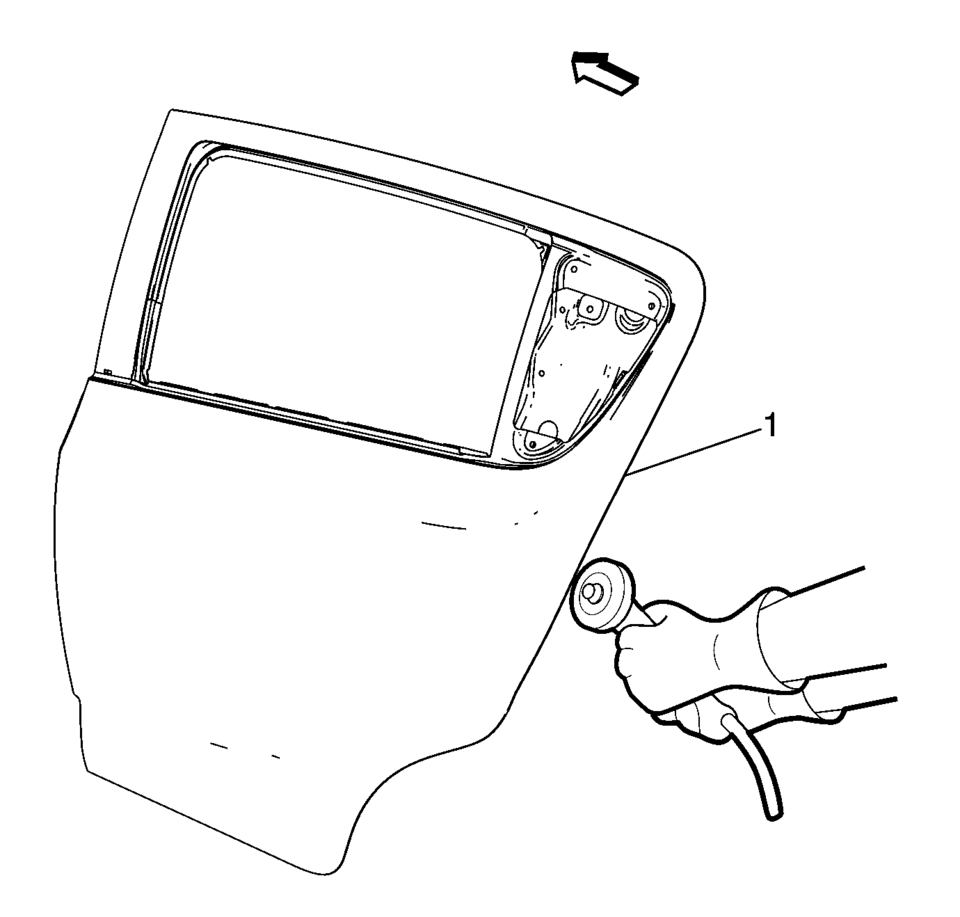
- Grind the edges of the rear side door outer panel (1) to separate the outer door panel from the door shell.
- Remove the rear side door outer door panel (1).
- Remove the sealers and anti-corrosion materials from the repair area, as necessary. Refer to Anti-Corrosion Treatment and Repair.
- Straighten the edges of the door shell.
Warning:
Refer to Glass and Sheet Metal Handling Warning.
Note:
According to different corrosion warranties, only the regional mandatory joining methods are allowed.
Warning:
Inspection of the door guard beam for damage must be performed before replacement of the door outer panel. If damage to the door guard beam is found the door must be replaced. Failure to do so may compromise the structural integrity of the vehicle and may cause personal injury if the vehicle is involved in a collision.
- Installation Procedure
-
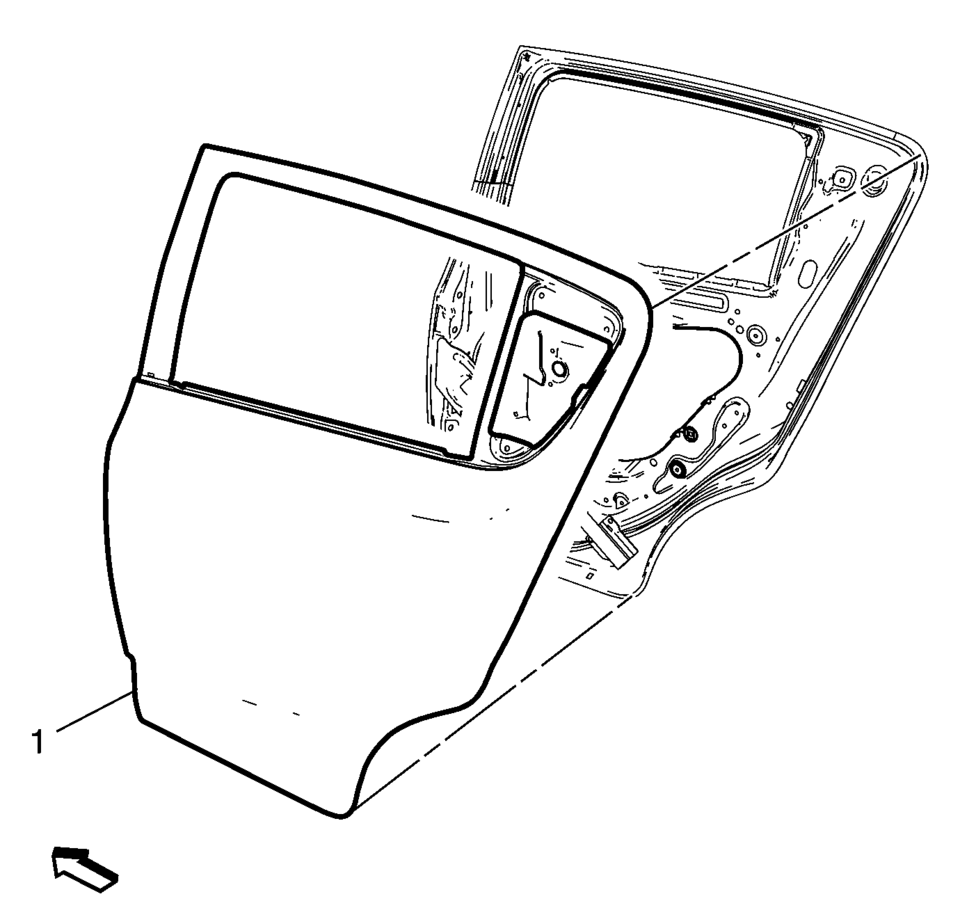
- Align the rear side door outer panel.
- Verify the fit of the rear side door outer panel.
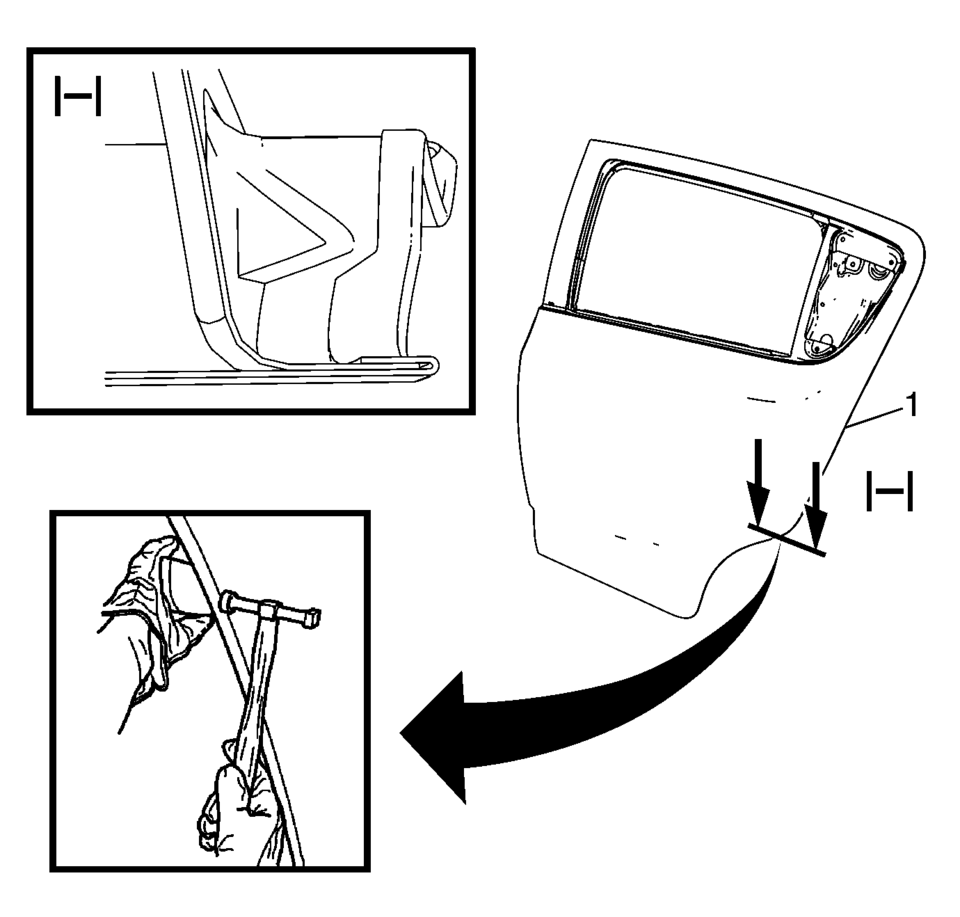
- Clamp the rear side door outer panel (1) into position.
- Continue to hammer in stages along the hem flanges (1).
- Apply the sealers and anti-corrosion materials to the repair area, as necessary. Refer to Anti-Corrosion Treatment and Repair.
- Install the rear side door outside handle. Refer to Rear Side Door Outside Handle Replacement.
- Install the rear side door. Refer to Rear Side Door Replacement.
- Paint the repaired area. Refer to Basecoat/Clearcoat Paint Systems.
- Install all related panels and components.
- Connect the negative battery cable. Refer to Battery Negative Cable Disconnection and Connection.
- Enable the SIR system. Refer to SIR Disabling and Enabling.
 Rear Side Door Opening Floor Carpet Retainer Replacement
Rear Side Door Opening Floor Carpet Retainer Replacement
Callout
Component Name
Preliminary Procedure
Remove the rear seat cush ...
 Rear Side Door Replacement
Rear Side Door Replacement
Callout
Component Name
Warning: Refer to SIR Warning.
Preliminary Procedures
Mark the l ...
Other materials:
Front Disc Brake Pads Replacement
Removal Procedure
Warning: Refer to Brake Dust Warning.
Note: Always replace disc brake pads in axle sets.
Inspect the fluid level in the brake master cylinder reservoir.
If the brake fluid level is midway between the maximum-full point and
the minimum allowab ...
Gears Cleaning and Inspection (Gen 1)
Gears
Warning: Wear safety glasses to avoid injury when using compressed
air or any cleaning solvent. Bodily injury may occur if fumes are inhaled
or if skin is exposed to chemicals.
Clean the following gears in a suitable solvent and
air dry all the p ...
NissanConnect Owner's Manual
QR code (U.S. only)
The Nissan Armada NissanConnect Owner’s Manual can be conveniently accessed by
scanning the QR code shown above (U.S. models only) or by using the printed manual
included with your vehicle.
This comprehensive Nissan Armada digital guide provides detailed explanations ...

0.0049