
Chevrolet Sonic Repair Manual: Rear Side Door Window Weatherstrip Replacement (Sedan)
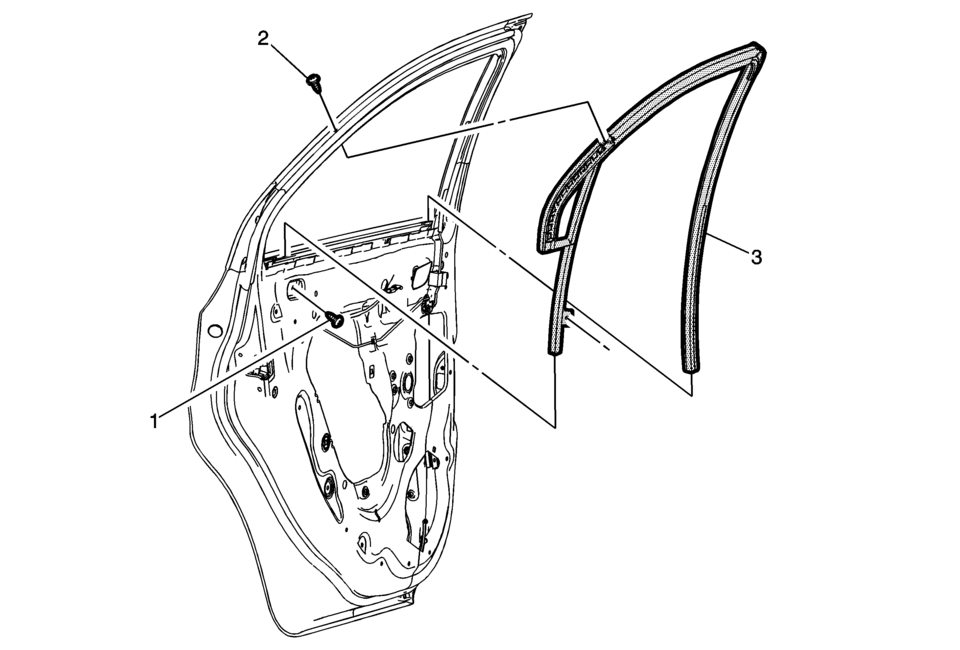
|
Callout |
Component Name |
|---|---|
Preliminary Procedures
|
|
|
1 |
Rear Side Door Window Weatherstrip Lower Bolt Caution: Refer to Fastener Caution. Procedure
Remove the rear side door water deflector. Tighten
9?€‰Y (80?€‰lb?€‰in) |
|
2 |
Rear Side Door Window Weatherstrip Upper Screw Procedure
3?€‰Y (27?€‰lb?€‰in) |
|
3 |
Rear Side Door Window Weatherstrip Procedure
|
 Rear Side Door Window Weatherstrip Replacement (Hatchback)
Rear Side Door Window Weatherstrip Replacement
Callout
Component Name
Preliminary Procedure
Remove the rear side door window . ...
 Remote Control Door Lock Receiver Programming and Setup
Diagnostic Aids
The remote control door lock receiver only functions as an antenna, receiving
the signals sent by the keyless entry transmitter and forwarding them to the
body control m ...
Other materials:
Automatic Headlamp System
When it is dark enough outside and the exterior lamp control is in the automatic
position, the headlamps come on automatically. See Exterior Lamp Controls.
The vehicle has a light sensor on top of the instrument panel. Make sure it is
not covered, or the headlamps will be on when they are not ...
Hood
To open the hood:
1. Pull the hood release handle inside the vehicle. It is located on the lower
left side of the instrument panel.
2. Go to the front of the vehicle and move the secondary hood release lever toward
the right side of the vehicle.
3. Lift the hood and release the hood pro ...
Engine compartment
The engine compartment of the Nissan Armada houses the powerful VR35DDTT engine
and essential service components. Regular inspection of these elements helps maintain
optimal performance and long-term reliability.
Window washer fluid reservoir
Fuse/fusible link holder
Engine oil fille ...

0.0061