Chevrolet Sonic Repair Manual: Seat Belt Latch Stop Installation
|
Callout |
Component Name |
|---|---|
Preliminary Procedure
|
|
|
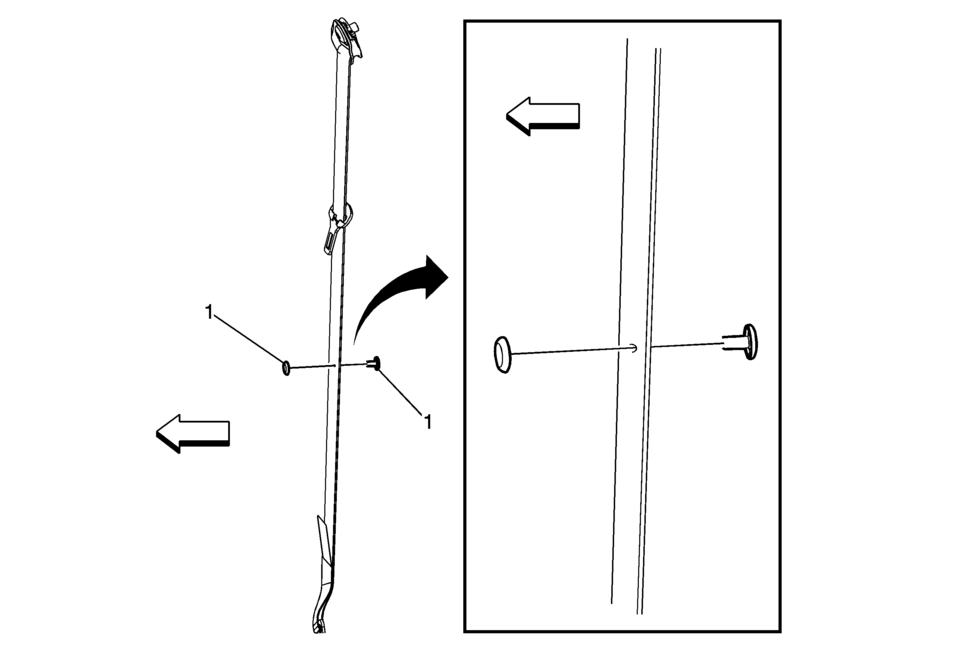
1 |
Seat Belt Stop Button Procedure
Tip: Ensure the male half of the stop button is facing forward in the vehicle in order to ensure the stop button will not snag customers clothing. |
 Instrument Panel Upper Compartment Door Latch Replacement
Instrument Panel Upper Compartment Door Latch Replacement
Callout
Component Name
1
Instrument Panel Upper Compartment Do ...
 Hood Assembly
...
Other materials:
Connection Settings
Select and the following may display:
Bluetooth Settings
Change Ringtone
Ringtone Volume
Bluetooth Settings
Select this feature to:
Connect, disconnect, or delete a device
Change or set a Personal Identification Number (PIN)
Turn on or off the Bluetooth connection
Check the dev ...
Generator Pulley Replacement (LUV)
Generator Pulley Replacement
Callout
Component Name
Preliminary Procedure
Remove the generator. Refer to Generator Replacement.
1
Generator Pulley Nut Cap
2
Generator Pul ...
Basic information
WARNING
Failure to properly follow all warnings and operating instructions for the
Rear Automatic Braking (RAB) system in the Nissan Armada may result in serious injury
or even fatal accidents.
The Nissan Armada RAB system is designed as a supplemental driver assistance
feature and shoul ...

0.0064