Chevrolet Sonic Repair Manual: Transmission Assemble (Gen 1)
Special Tools
- 3-9506289 Universal Adapter
- R-0007758 Holding Fixture
- S-9407197 Differential Rotating Tool
- S-9407198 Differential Bearing Race Wrench
For equivalent regional tools, refer to Special Tools.
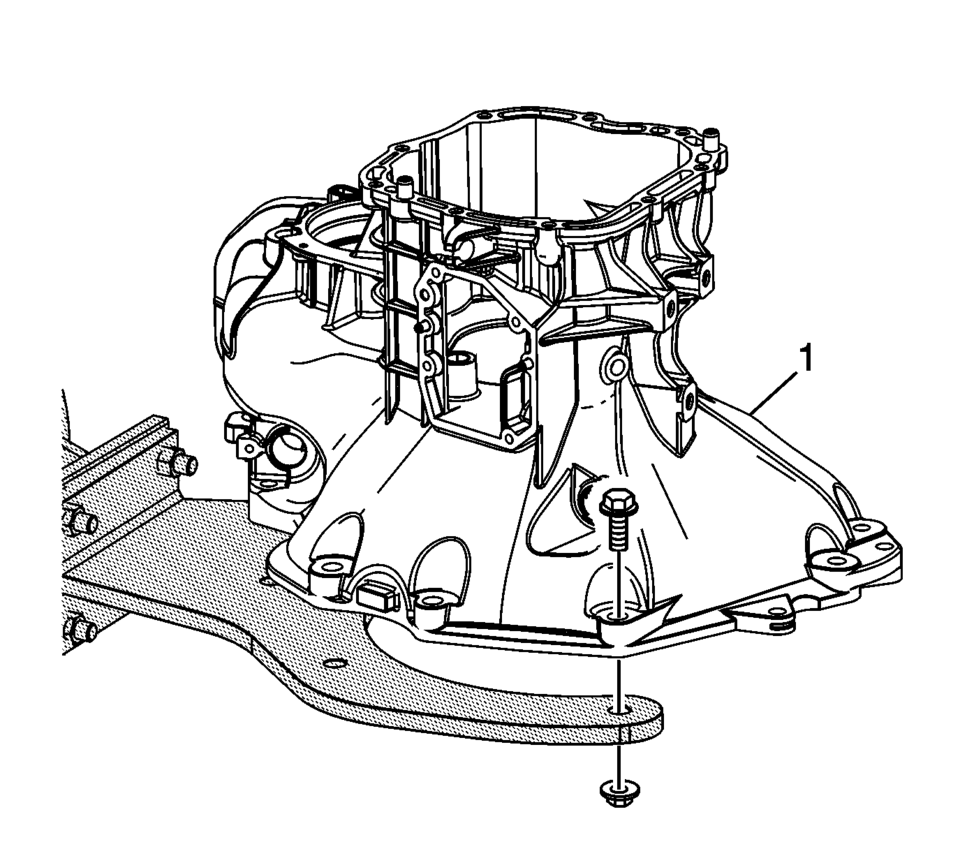
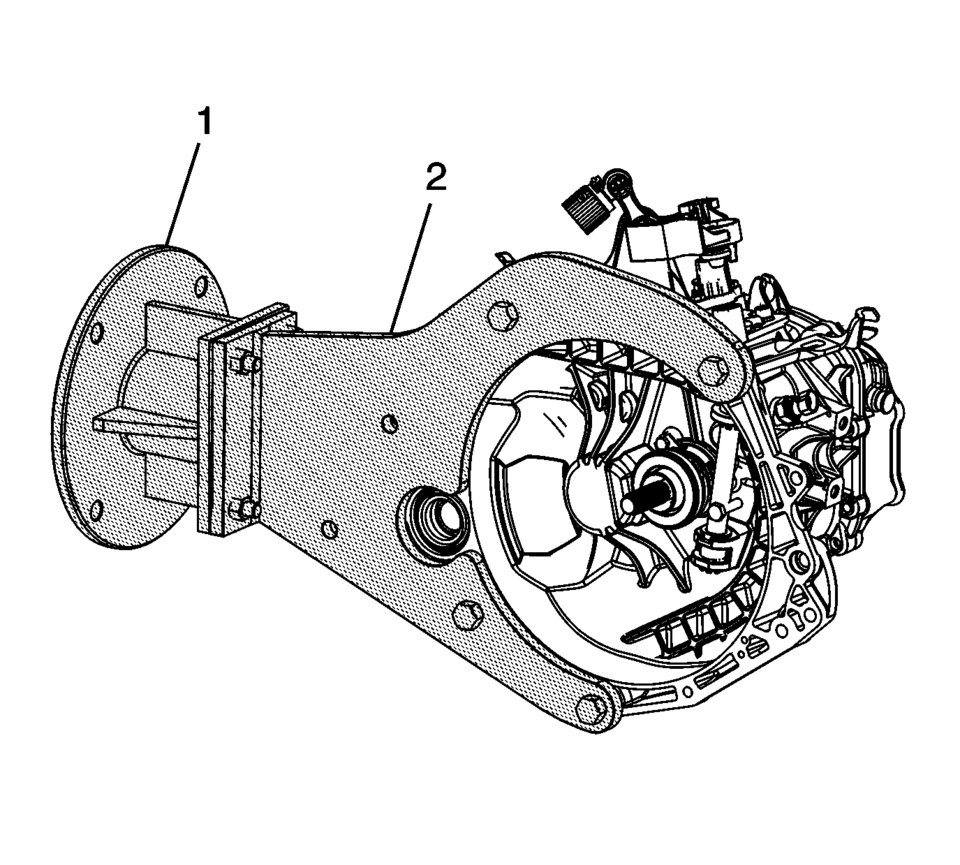
- Install the clutch and differential housing assembly (1) onto the R-0007758 holding fixture.
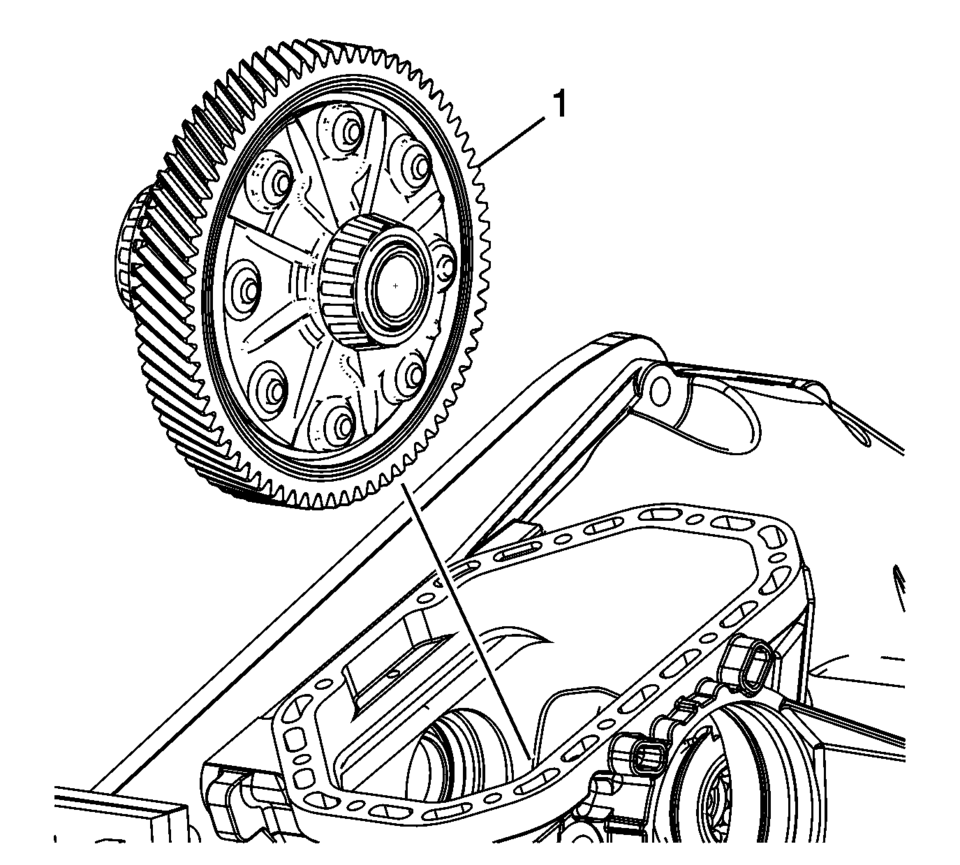
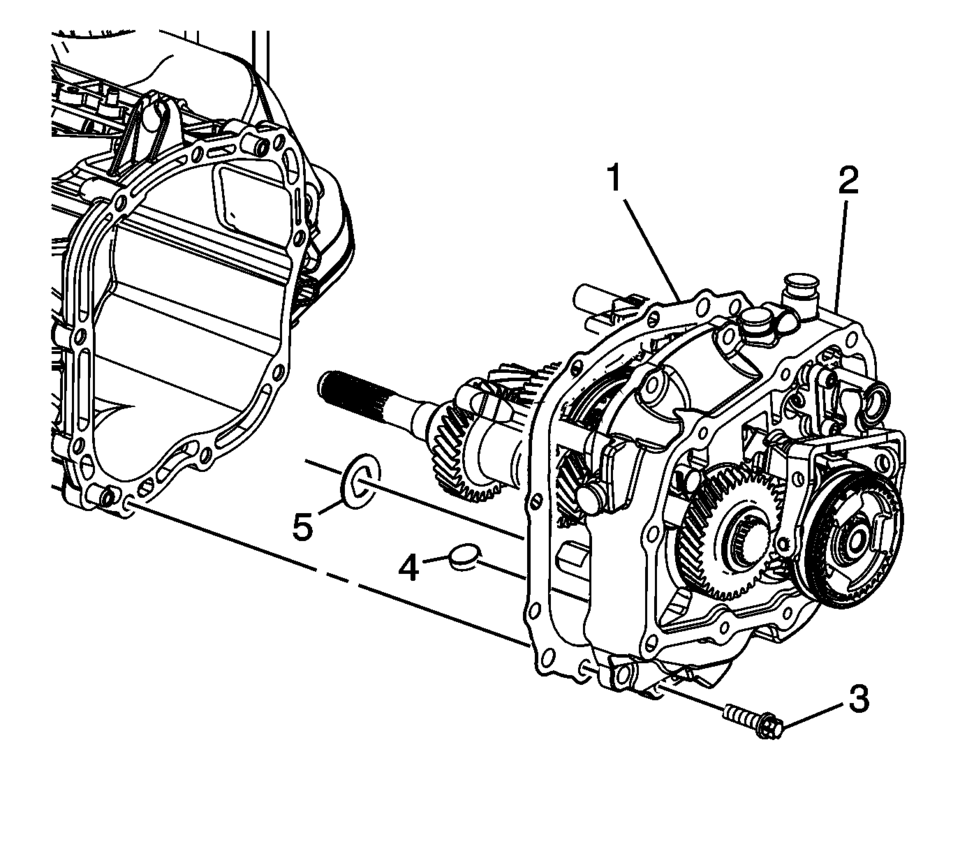
- Install the front differential carrier (1).
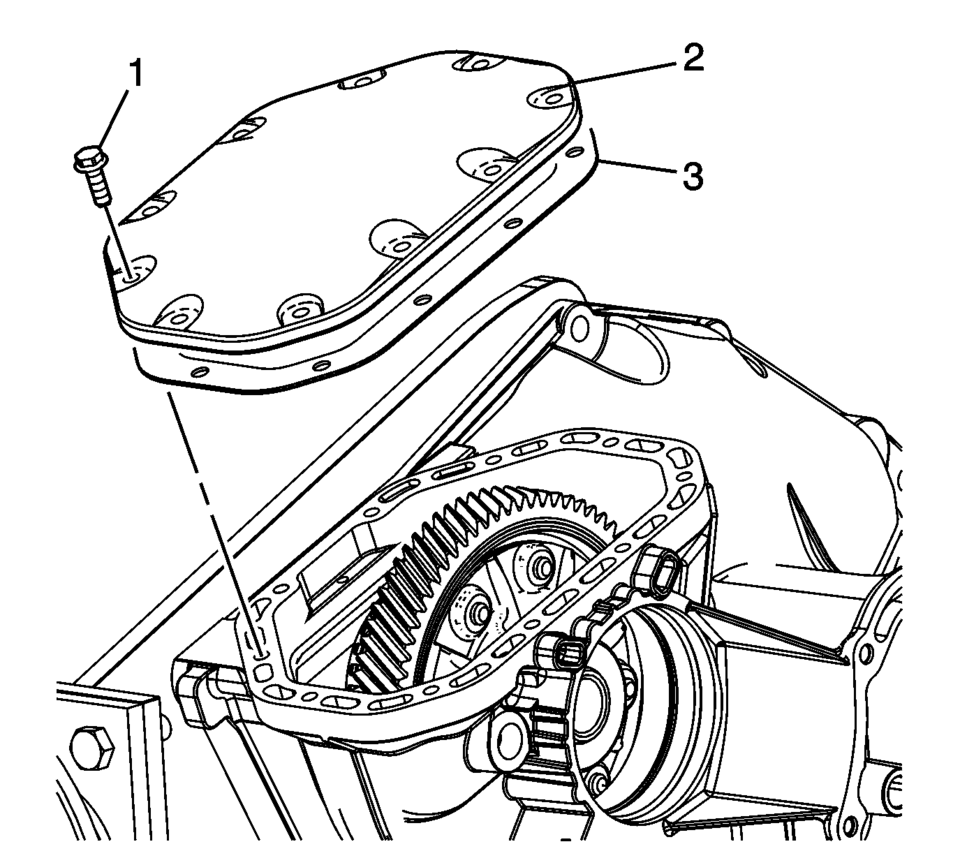
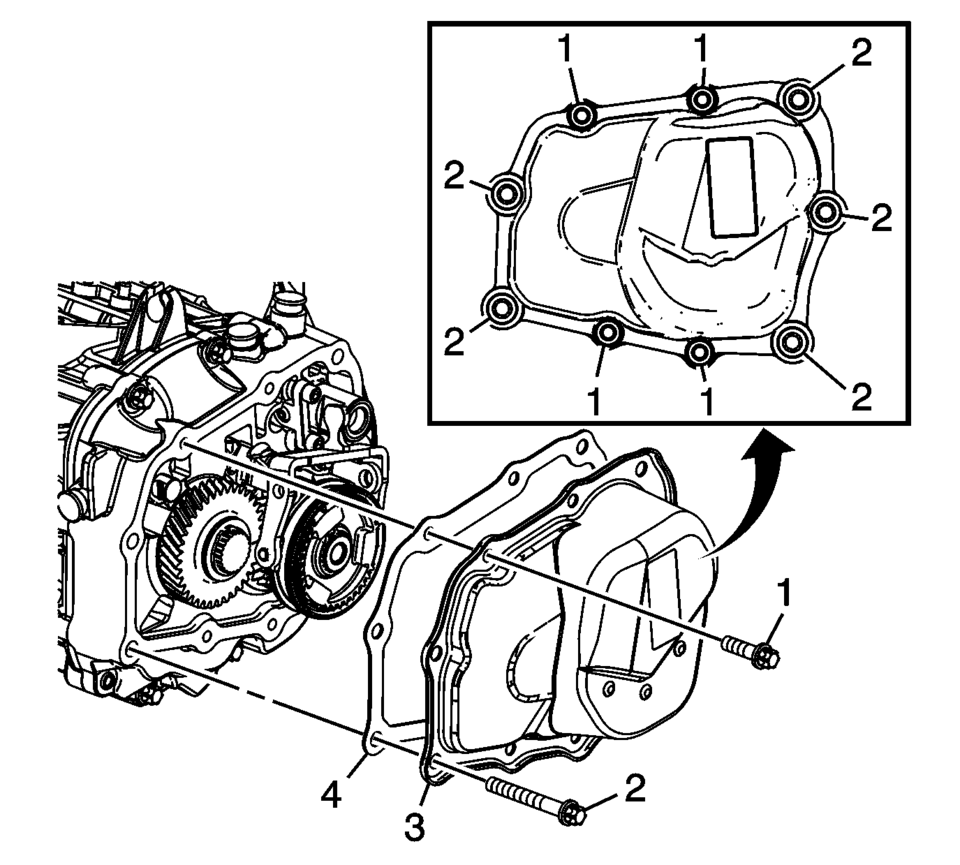
- Install the gasket (3) and differential carrier cover (2).
- Install the front differential carrier cover bolts (1).
Tighten to 7 Y (61.96 lb in)
.
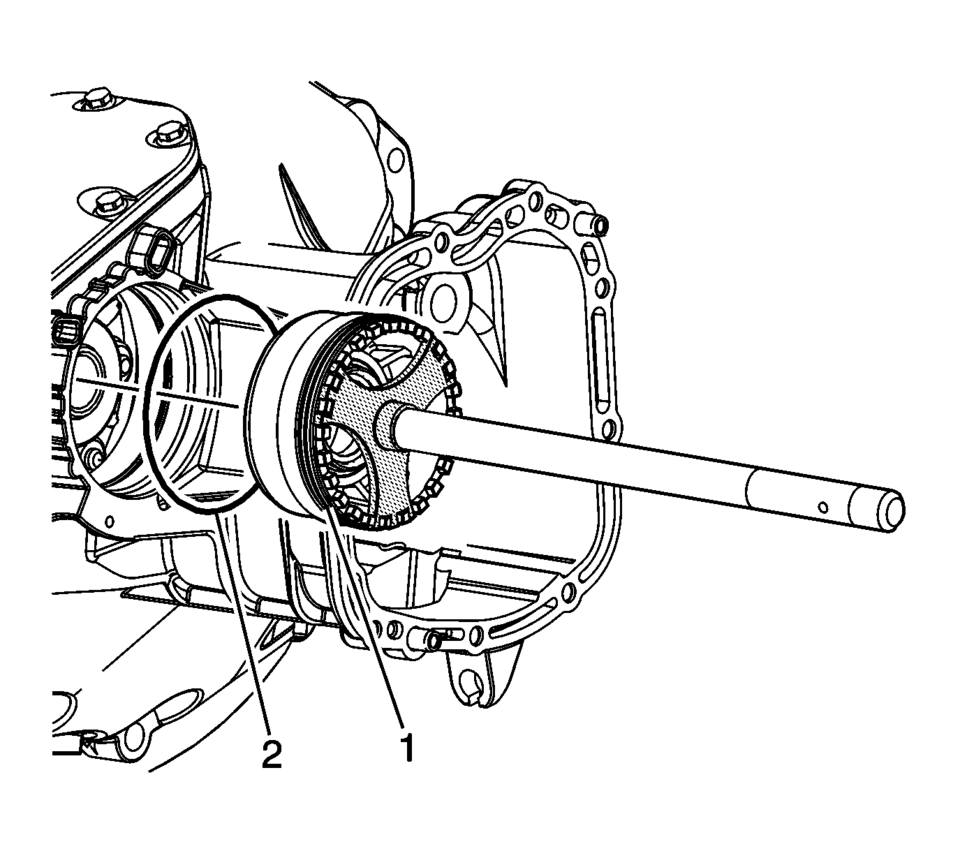
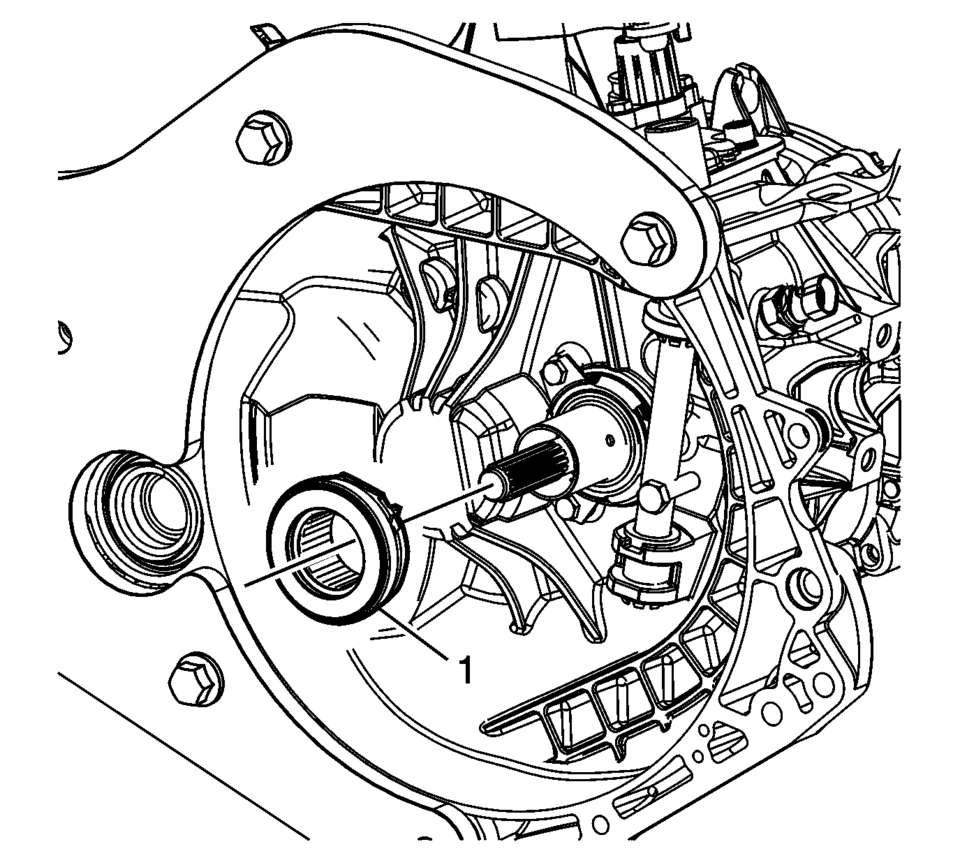
- Lubricate the O-ring seal (2) with multipurpose grease and install onto the differential bearing adjuster (1).
- Lubricate the threads on the differential bearing adjuster with multipurpose grease.
- Using S-9407198 differential bearing race wrench install the front differential bearing adjuster (1).
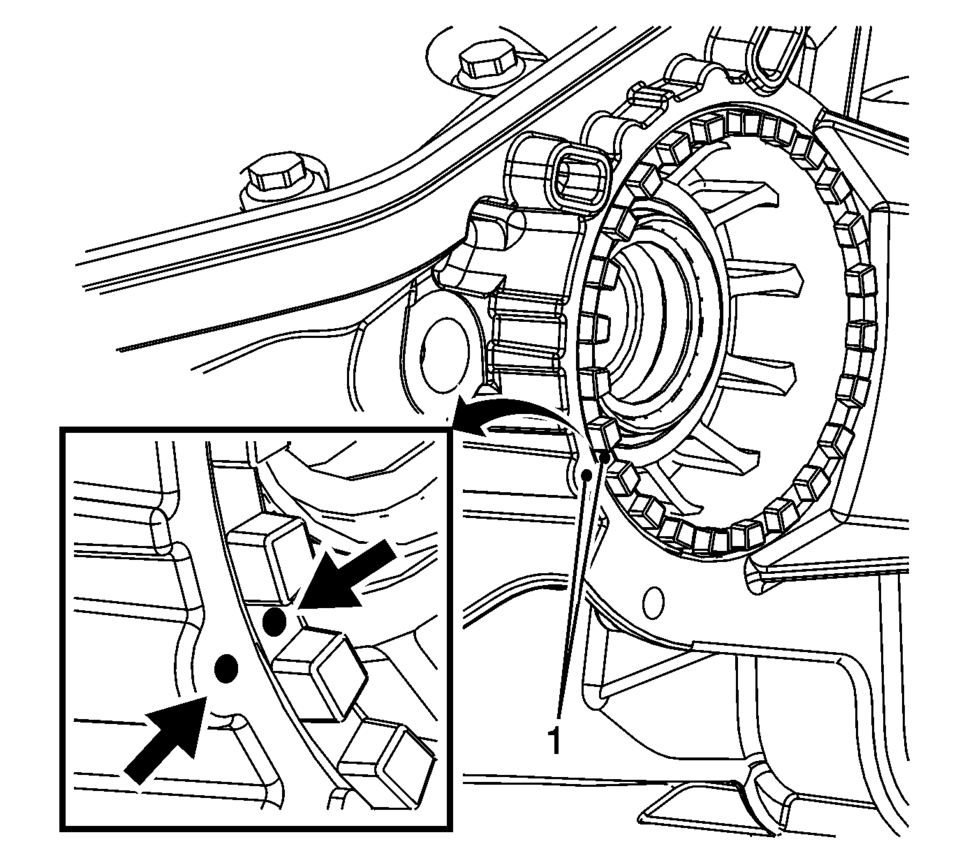
- Align marks on the differential bearing adjuster and case (1).
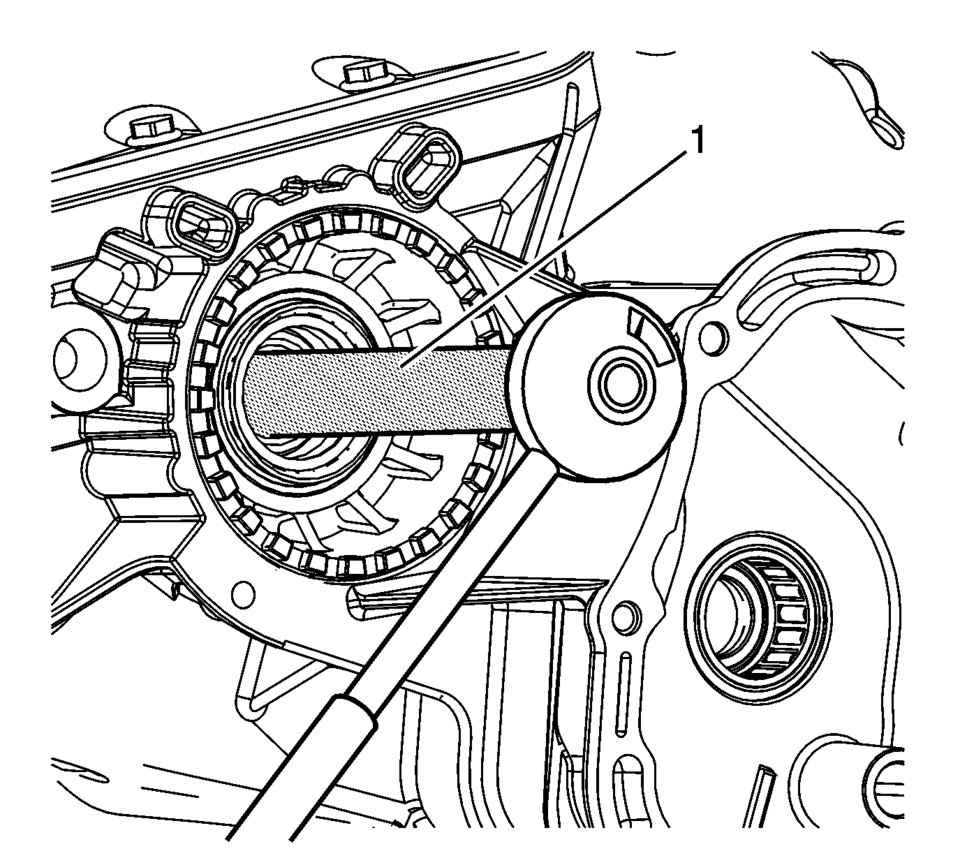
- Using the S-9407197 differential rotating tool and a torque wrench, rotate the differential (1) 1 revolution per second.
- The breakaway bearing torque should be:
Note:
If all the components are re-used align adjuster to marks. If any component was replaced go to the next step.
Note:
If no components were replaced, the bearing adjuster can be aligned to the marks. If any component was replaced, the following procedure must be performed.
- Re-use bearing ?#8201;60?00 Ncm
- New Bearing ?#8201;150?10 Ncm

.
.
.
.
.
.
.
 Thrust Washer and Bearing Cleaning and Inspection
Warning: Wear safety glasses to avoid injury when using compressed
air or any cleaning solvent. Bodily injury may occur if fumes are inhaled
or if skin is exposed to chemicals.
...
 Transmission Assemble (Gen 2)
Special Tools
3-9506289 Universal Adapter
R-0007758 Holding Fixture
S-9407197 Differential Rotating Tool
S-9407198 Differential Bearing Race Wrench
For equivalent regional tools, refer ...
Other materials:
Remote Lock, Unlock, Start
Select Remote Lock, Unlock, Start and the following may display:
Remote Unlock Feedback
Remote Lock Feedback
Remote Door Unlock
Remote Unlock Feedback
When on, the exterior lamps will flash when unlocking the vehicle with the RKE
transmitter.
Select On or Off.
Remote Lock Feedback
T ...
Front Side Door Lock Cylinder Coding (Free Wheeling)
Special Tools
BO-49753 Assembly Tool
The door lock cylinder uses 8 of the 8 cut positions. The tumbler positions are
staggered from side to side, 4 on one side and 4 on the other, are not self-retaining,
and are not snap in.
Note: All lock cylinders for side milled keys ha ...
Front Compartment Fuse Block Replacement
Removal Procedure
Disconnect the battery negative cable. Refer to Battery Negative Cable
Disconnection and Connection.
Remove the junction block cover (1).
Remove the positive battery cable nut (1) from the junction block.
Remove the pos ...

0.0057