Chevrolet Sonic Repair Manual: Starter Replacement (LUW)
- Removal Procedure
-
- Disconnect the negative battery cable. Refer to Battery Negative Cable Disconnection and Connection.
- Raise and support the vehicle. Refer to Lifting and Jacking the Vehicle.
- Remove the drivetrain and front suspension frame skid plate. Refer to Drivetrain and Front Suspension Frame Skid Plate Replacement.
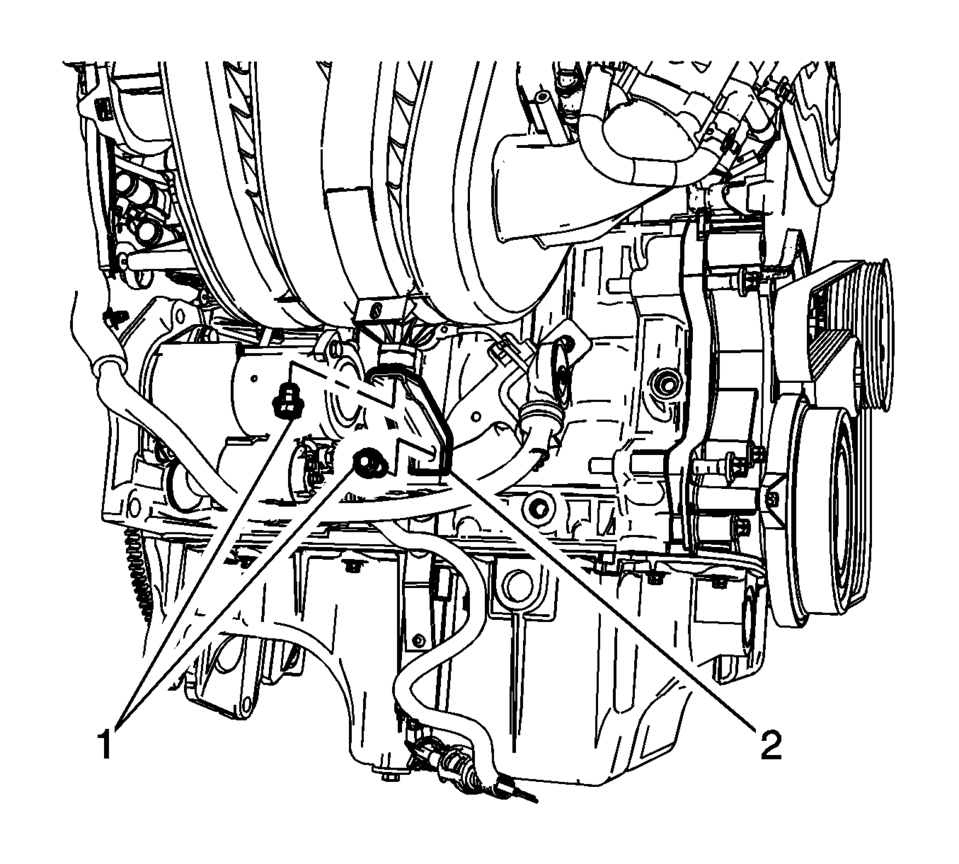
- Remove the intake manifold brace fasteners (1) and remove the intake manifold brace (2).
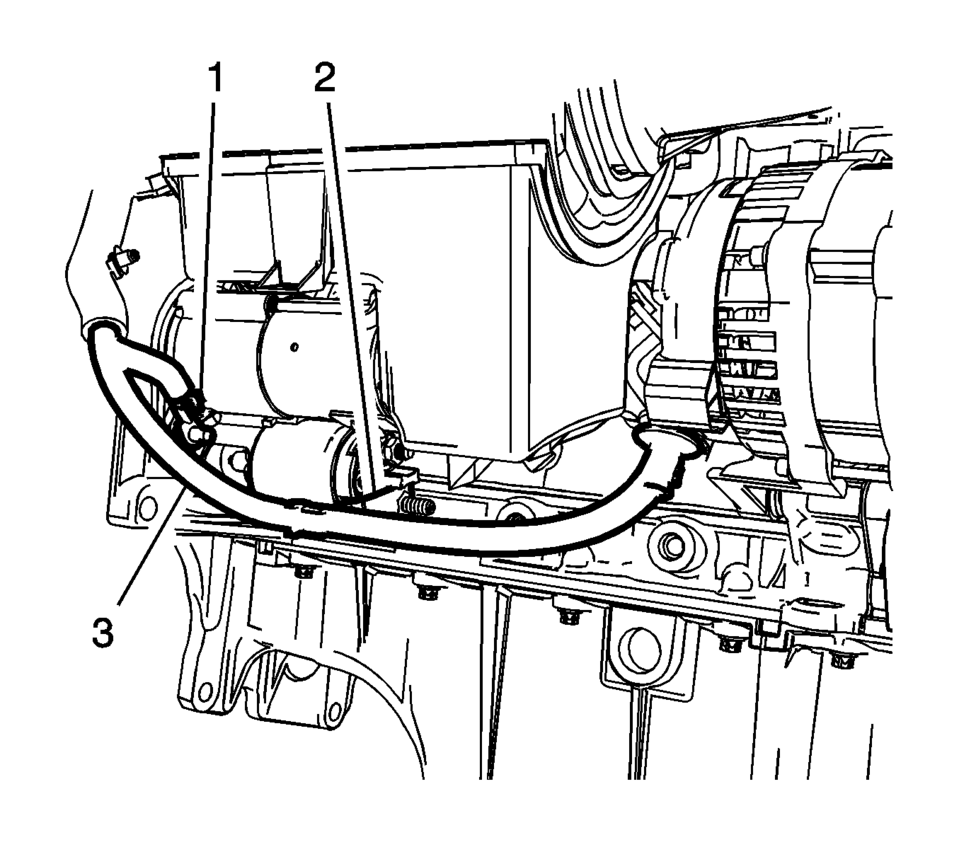
- Remove the starter solenoid battery positive fastener (2) and the starter mounting stud/fastener (1).
- Remove the battery positive and negative cable (3) from the starter.
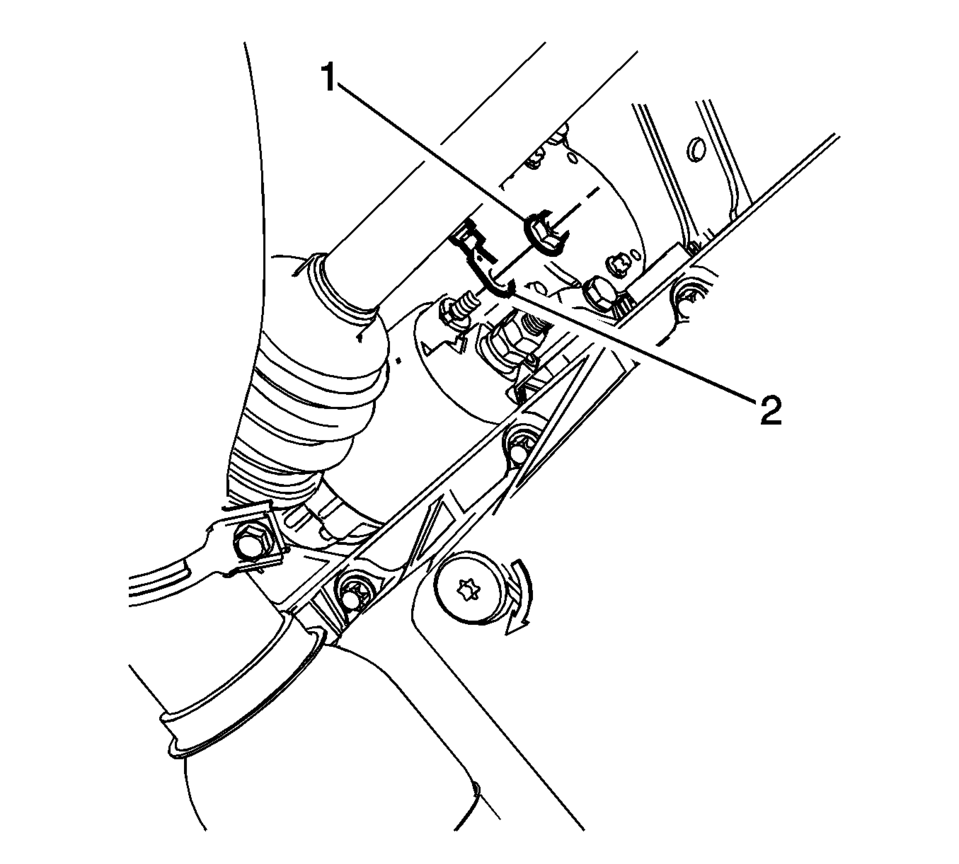
- Remove the starter solenoid fastener (1) and the engine harness terminal (2) from the starter solenoid.
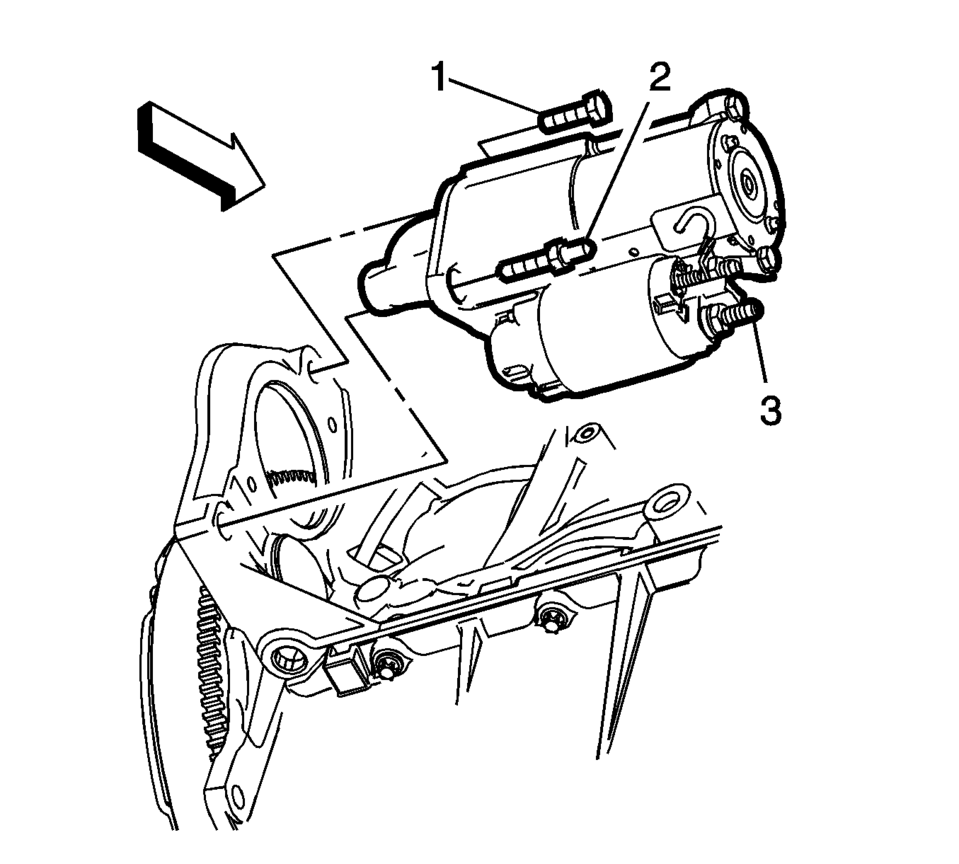
- Remove the starter mounting fastener (1) and the starter (3) from the vehicle.
Note:
The starter mounting fastener can be accessed from the top of the engine, with the battery tray removed.
- Installation Procedure
-
- Install the starter (3) into position and tighten the starter mounting
fastener (1) to 25 Y (18 lb ft)
.
- Install the engine harness terminal (2) to the starter solenoid and
tighten the solenoid fastener (1) to 9 Y (80 lb in)
.
- Install the battery negative cable terminal and the starter mounting
stud/fastener (1) to the starter. Tighten to 25 Y (18 lb ft)
.
- Install the positive battery cable terminal to the starter solenoid
and tighten the fastener (2) to 9 Y (80 lb in)
.
- Install the intake manifold brace (2) and mounting fasteners (1). Tighten
to 8 Y (71 lb in)
.
- Install the drivetrain and front suspension frame skid plate. Refer to Drivetrain and Front Suspension Frame Skid Plate Replacement.
- Connect the negative battery cable. Refer to Battery Negative Cable Disconnection and Connection.
Caution:
Refer to Fastener Caution.
- Install the starter (3) into position and tighten the starter mounting
fastener (1) to 25 Y (18 lb ft)
 Starter Replacement (LUV)
Removal Procedure
Disconnect the battery negative cable. Refer to Battery Negative Cable
Disconnection and Connection.
Raise and support the vehicle. Refer to Lifting and J ...
 Valvetrain
...
Other materials:
Compact Spare Tire
Warning
Driving with more than one compact spare tire at a time could result in loss
of braking and handling. This could lead to a crash and you or others could be injured.
Use only one compact spare tire at a time.
If this vehicle has a compact spare tire, it was fully inflated when new; howe ...
Liftgate Trim Finish Panel Replacement (Hatchback)
Liftgate Trim Finish Panel Replacement
Callout
Component Name
1
Liftgate Trim Finish Panel Fastener
Caution: Refer to Fastener Caution.
2
Liftgate Trim Finish Panel Retainer (Qty: ...
Gear Position Sensor Replacement
Gear Position Sensor Replacement
Callout
Component Name
Preliminary Procedure
Unclip the engine control module (ECM) and bracket from the battery tray.
1
Gear Position Sensor Magnet Bolt
...

0.0067