Chevrolet Sonic Repair Manual: Steering Column Upper Trim Cover Replacement
|
Callout |
Component Name |
|---|---|
|
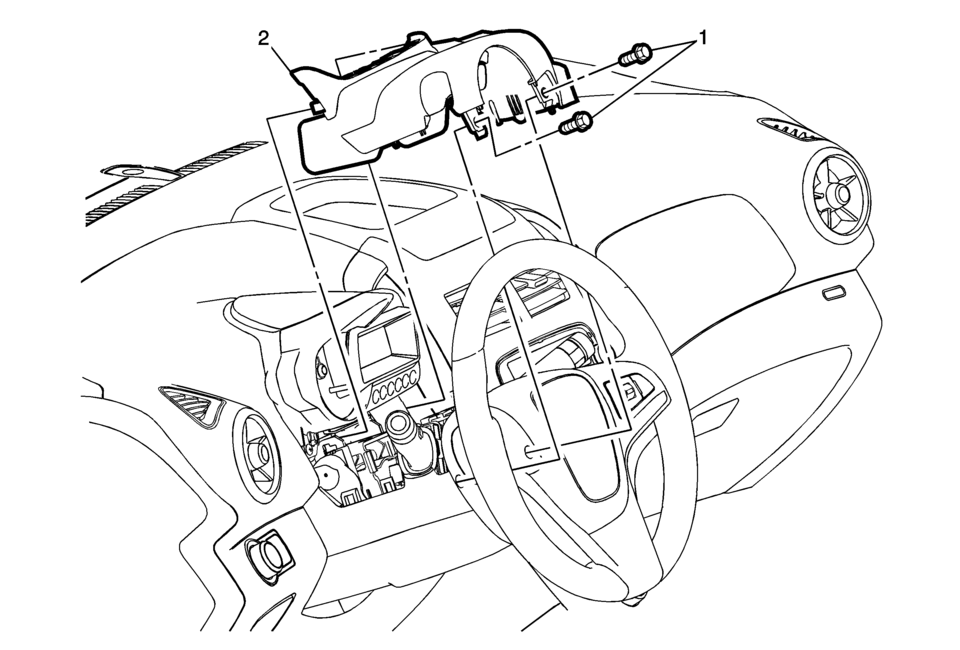
1 |
Instrument Panel Steering Column Upper Trim Cover Fasteners (Qty: 2) Caution: Refer to Fastener Caution. Procedure
Turn the steering wheel to the right and to the left in order to gain access to the fasteners. |
|
2 |
Instrument Panel Steering Column Upper Trim Cover Assembly Procedures
|
 Steering Column Replacement
Removal Procedure
Caution: With wheels of the vehicle facing straight ahead,
secure the steering wheel utilizing steering column anti-rotation pin,
steering column lock, or ...
 Steering Column in Lock Position Caution
Caution: With wheels of the vehicle facing straight ahead, secure
the steering wheel utilizing steering column anti-rotation pin, steering column
lock, or a strap to prevent rotation. Locking ...
Other materials:
Automatic Transmission
Move the shift lever to P (Park) or N (Neutral). The engine will not start in
any other position. To restart the engine when the vehicle is already moving, use
N (Neutral) only.
Caution
Do not try to shift to P (Park) if the vehicle is moving. If you do, you could
damage the transmission. Sh ...
Brake Rotor Assembled Lateral Runout Correction - On Vehicle Lathe
Special Tools
CH-45101-100 Conical Brake Rotor Washers
For equivalent regional tools, refer to Special Tools.
Warning: Refer to Brake Dust Warning.
Note:
Brake rotor thickness variation MUST be checked before checking
for assembled lateral runout (LRO). Thickness ...
Power Steering Pump Belt Installation
Special Tools
EN-50098 Belt Installer
For equivalent regional tools, refer to Special Tools.
Install EN-50098 installer (2) and a NEW power steering pump belt (1)
to water pump pulley and power steering pump pulley.
Turn the engine slowly clockwise at the crankshaft ...

0.0095