Chevrolet Sonic Repair Manual: Transmission Fluid Drain and Fill
- Draining Procedure
-
Note:
- The fluid check bolt at the front of the transmission may not be opened.
- The transmission fluid drained out during the pre-delivery inspection
may be re-used. New transmission fluid must be used during servicing
work.
The transmission fluid must be brought up to operating temperature before draining.
- Raise and support the vehicle. Refer to Lifting and Jacking the Vehicle.
- Remove the drivetrain and front suspension frame skid plate, if equipped. Refer to Drivetrain and Front Suspension Frame Skid Plate Replacement.
- Clean away all dirt and debris from the transmission fluid drain fastener area.
- Position an appropriate container under the transmission.
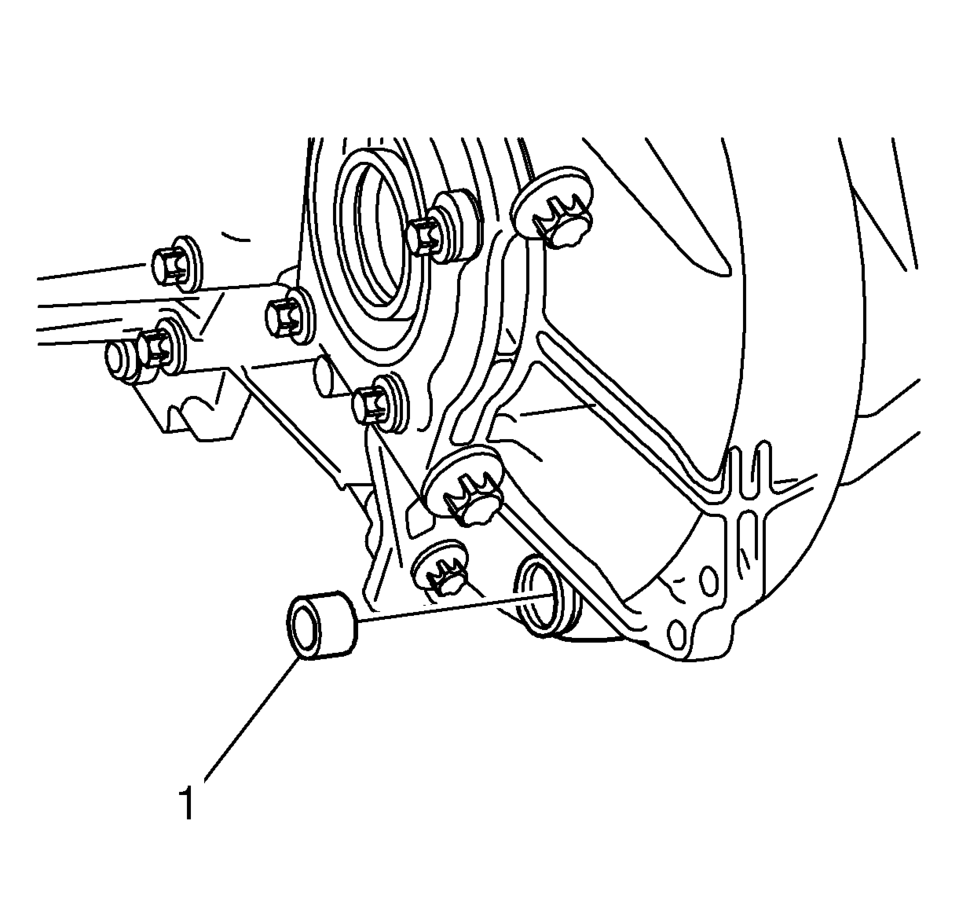
- Remove the transmission fluid drain fastener (1).
- Allow the transmission fluid to drain into the container.
- Install a new transmission fluid drain fastener and
tighten to 20 Y (15 lb ft)
.
- Remove the container used to catch the used transmission fluid from under the vehicle.
- Install the drivetrain and front suspension frame skid plate, if equipped. Refer to Drivetrain and Front Suspension Frame Skid Plate Replacement.
Caution:
Refer to Fastener Caution.
- Filling Procedure
-
- Lower the vehicle.
- Remove the engine control module with the bracket from the battery tray. Refer to Engine Control Module Replacement for the 1.2L or 1.4L engine, or Engine Control Module Replacement for the 1.6L or 1.8L engine.
- Clean away all dirt and debris from the transmission fluid fill fastener area.
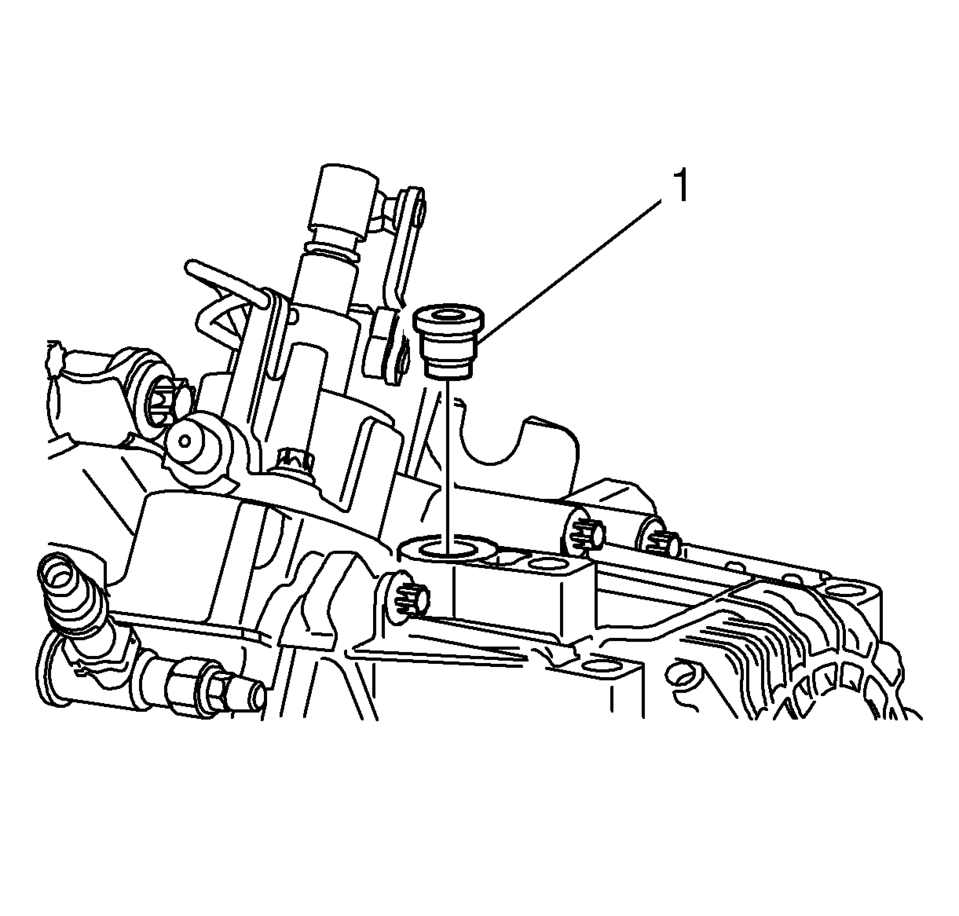
- Remove the transmission fluid fill fastener (1).
- Fill the transmission with the appropriate amount of fluid. Refer to Fluid and Lubricant Recommendations and Manual Transmission Specifications.
- Install a new transmission fluid fill fastener and
tighten to 30 Y (22 lb ft)
.
- Install the engine control module with the bracket to the battery tray. Refer to Engine Control Module Replacement for the 1.2L or 1.4L engine, or Engine Control Module Replacement for the 1.6L or 1.8L engine.
 Transmission Disassemble (Gen 2)
Special Tools
3-9506289 Universal Adapter
R-0007758 Holding Fixture
S-9407198 Differential Bearing Race Wrench
For equivalent regional tools, refer to Special Tools.
Attach R-0 ...
 Transmission Fluid Level and Condition Check
Removal Procedure
Raise and support the vehicle. Refer to
Lifting and Jacking the Vehicle
Remove the front suspension skid plate, if equipped.
Refer to Drivetrain and Front Sus ...
Other materials:
Tire Pressure Indicator Sensor Replacement
Removal Procedure
Raise the vehicle on a suitable support. Refer to
Lifting and Jacking the Vehicle.
Remove the tire/wheel assembly from the vehicle. Refer
to Tire and Wheel Removal and Installation.
Dismount the tire from the rim. Refer to
Tire Dismounting and Moun ...
Front Bumper Fascia Guide Replacement
Front Bumper Fascia Guide Replacement
Callout
Component Name
Warning: Refer to Eye Protection Warning.
Preliminary Procedure
Remove the front bumper fascia. Refer to Front Bumper Fascia Replacement.
...
Steering Linkage Outer Tie Rod Inspection
Special Tools
GE-8001 Dial Indicator Set
For equivalent regional tools, refer to Special Tools.
Note: This inspection procedure does not supersede local government
required inspections that have more stringent requirements.
Inspect the outer tie rod seal. If the outer tie rod ...

0.0078