
Chevrolet Sonic Repair Manual: Transmission Disassemble (Gen 2)
Special Tools
- 3-9506289 Universal Adapter
- R-0007758 Holding Fixture
- S-9407198 Differential Bearing Race Wrench
For equivalent regional tools, refer to Special Tools.
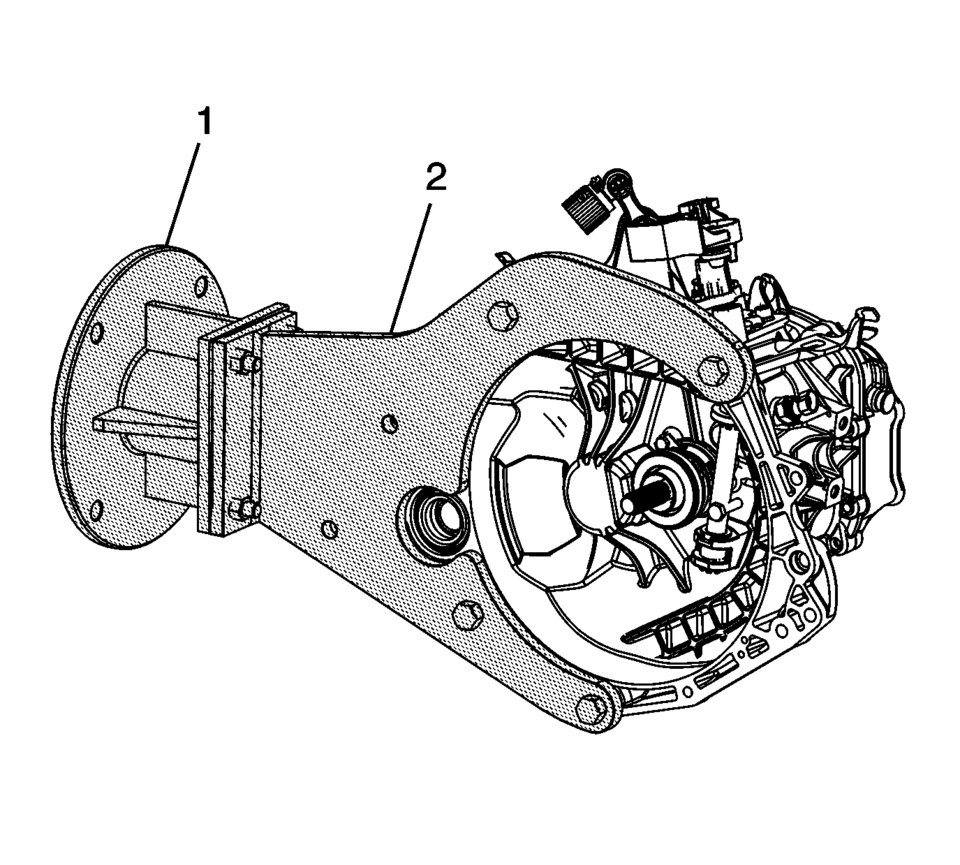
- Attach R-0007758 holding fixture (2) to the transmission.
- Attach R-0007758 holding fixture (2) with transmission to the 3-9506289 Universal Adapter (1).
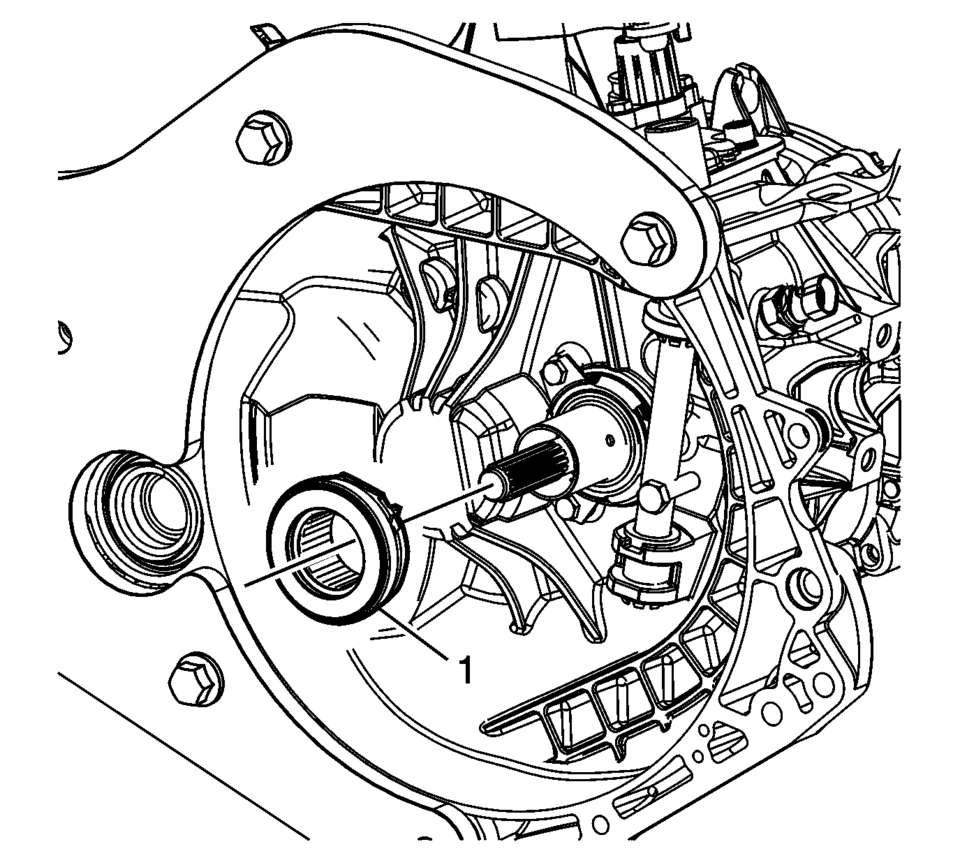
- Remove the clutch release bearing (1).
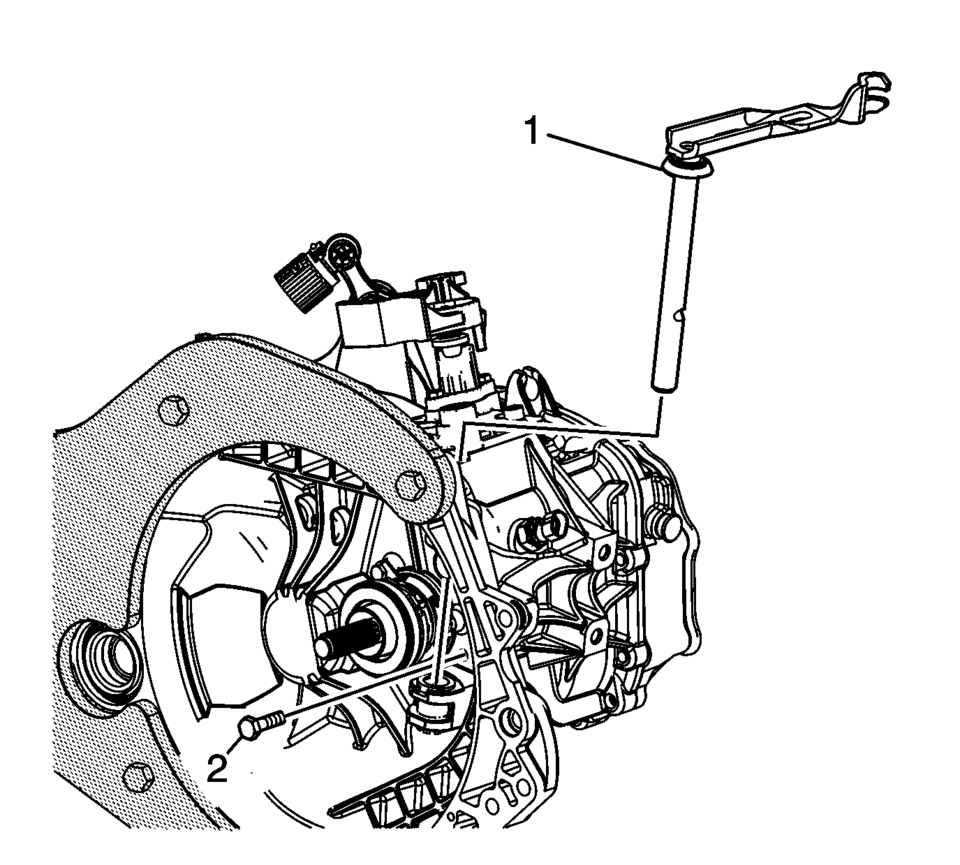
- Remove the clutch fork shaft retaining bolt (2).
- Remove the clutch fork shaft (1).
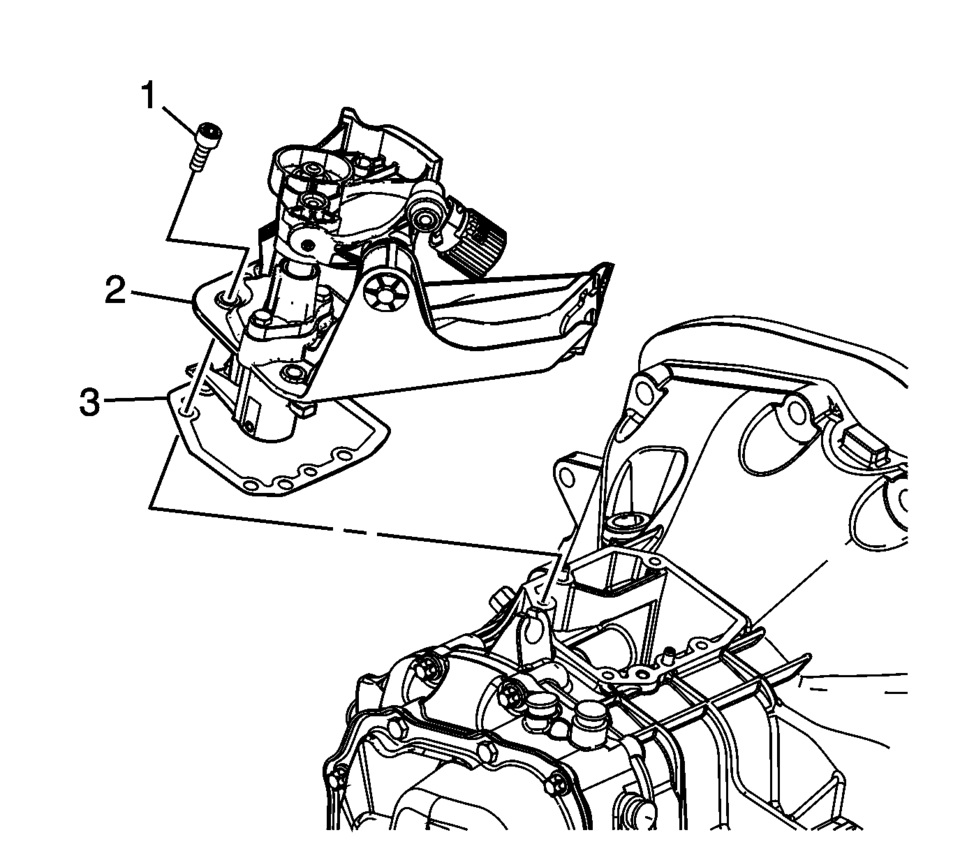
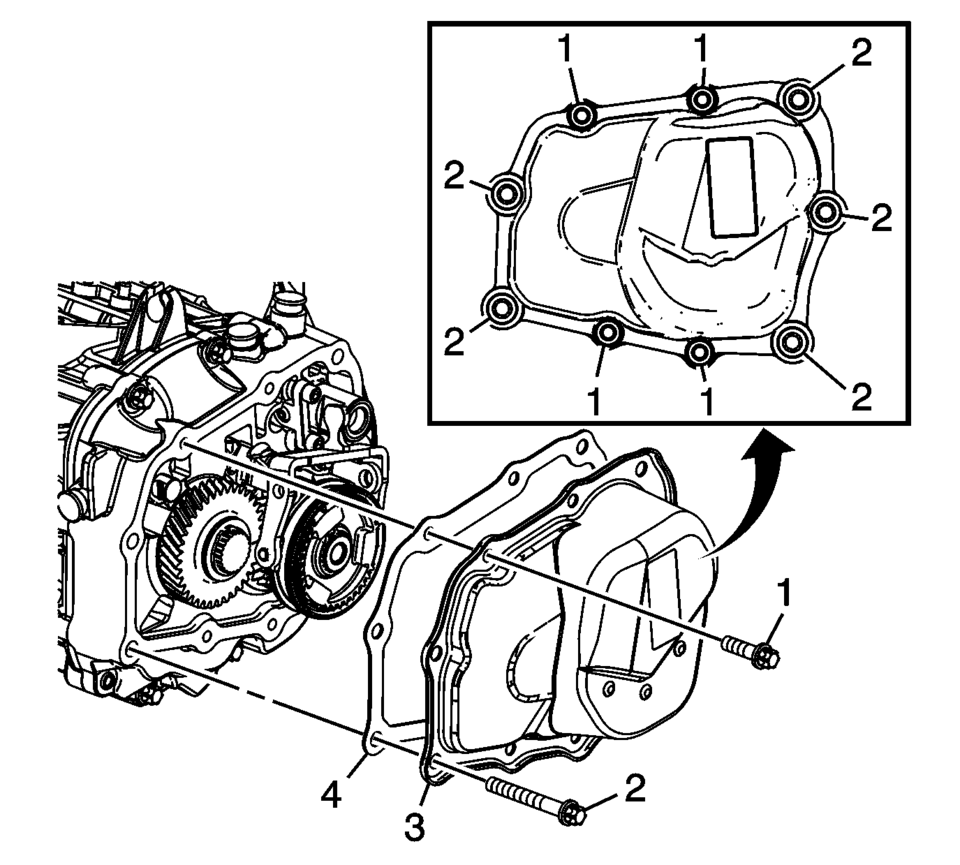
- Remove the transmission control lever housing bolts (1).
- Remove the control lever housing (2) and gasket (3).
- Remove the transmission cover bolts (3).
- Remove the transmission cover (2) and gasket (1).
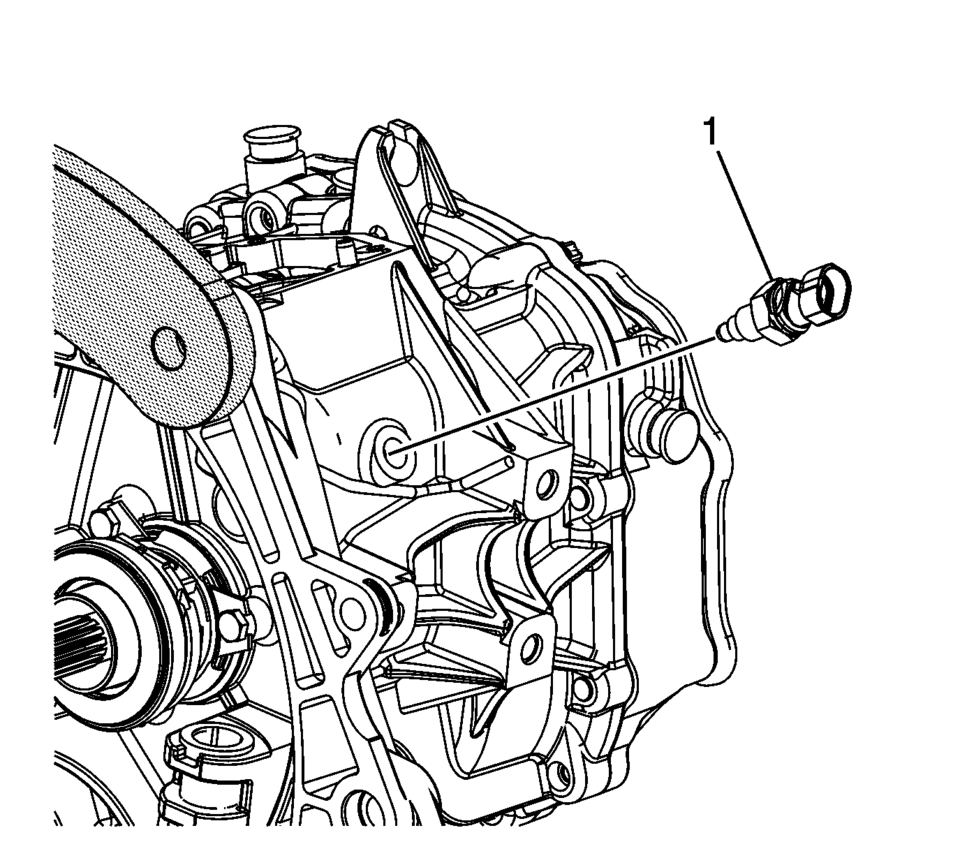
- Remove the back up lamp switch (1).
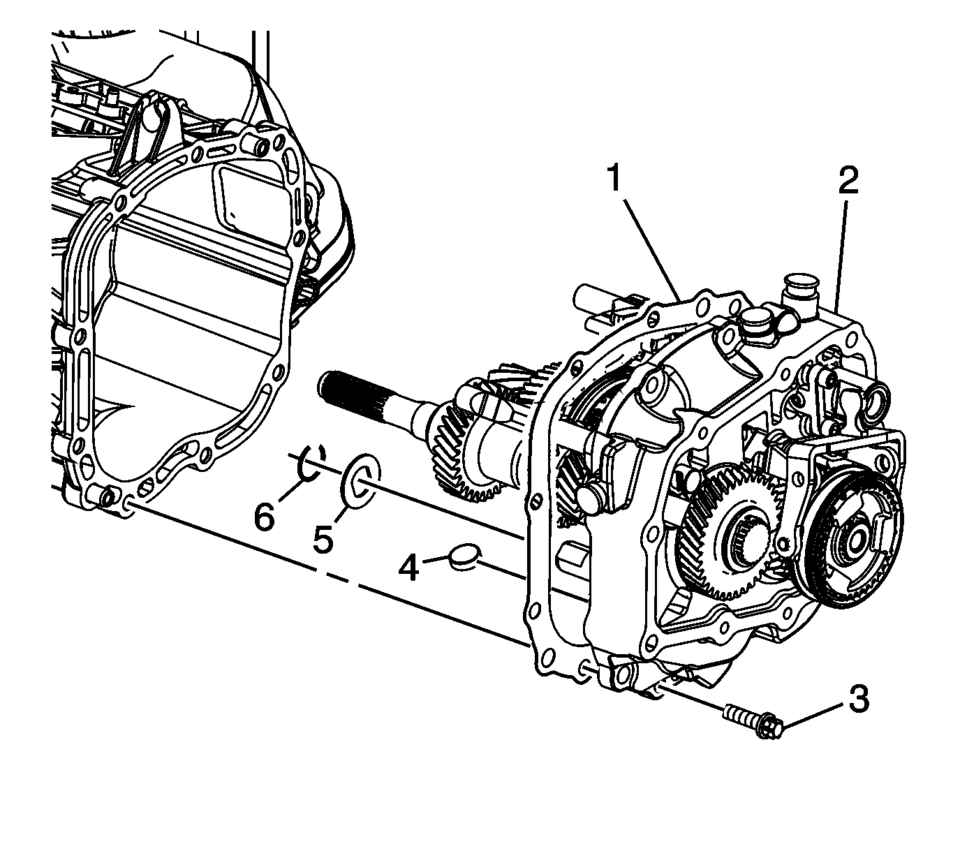
- Remove the transmission case bolts (3).
- Remove the transmission case (2) and gasket (1).
- Remove the case magnet (4), may stay with case.
- Remove the reverse gear shaft snap ring (6) if equipped.
- Remove the reverse idler gear washer (5), may stay on the reverse idler gear shaft.
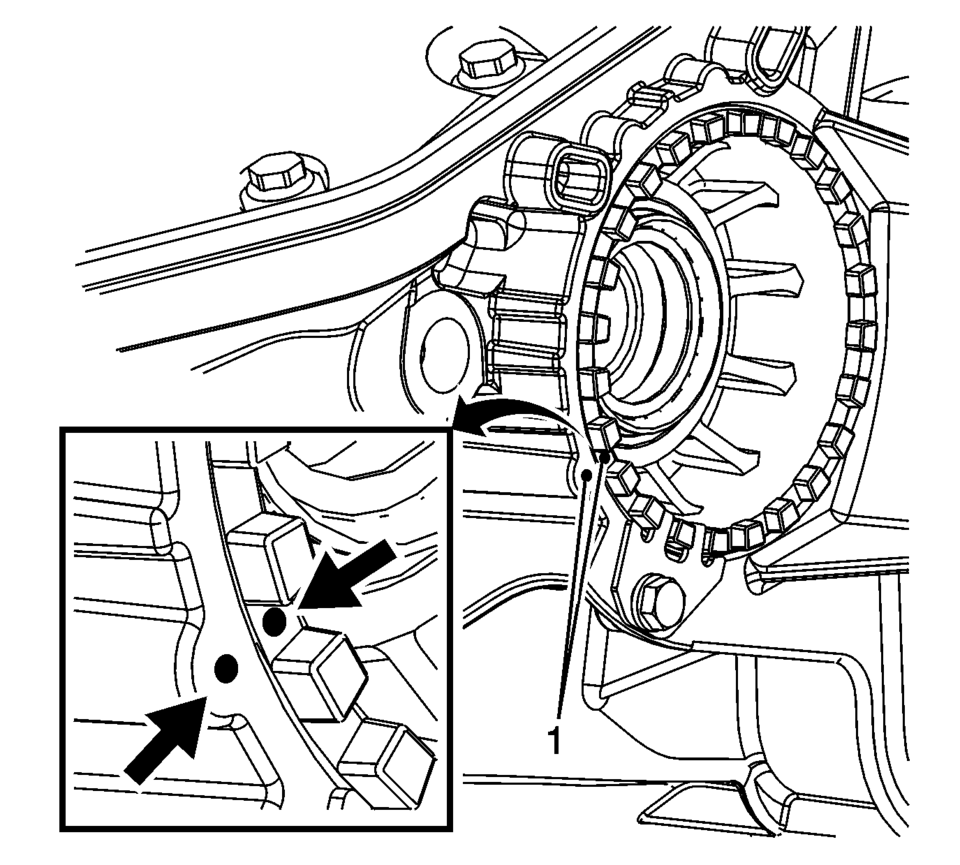
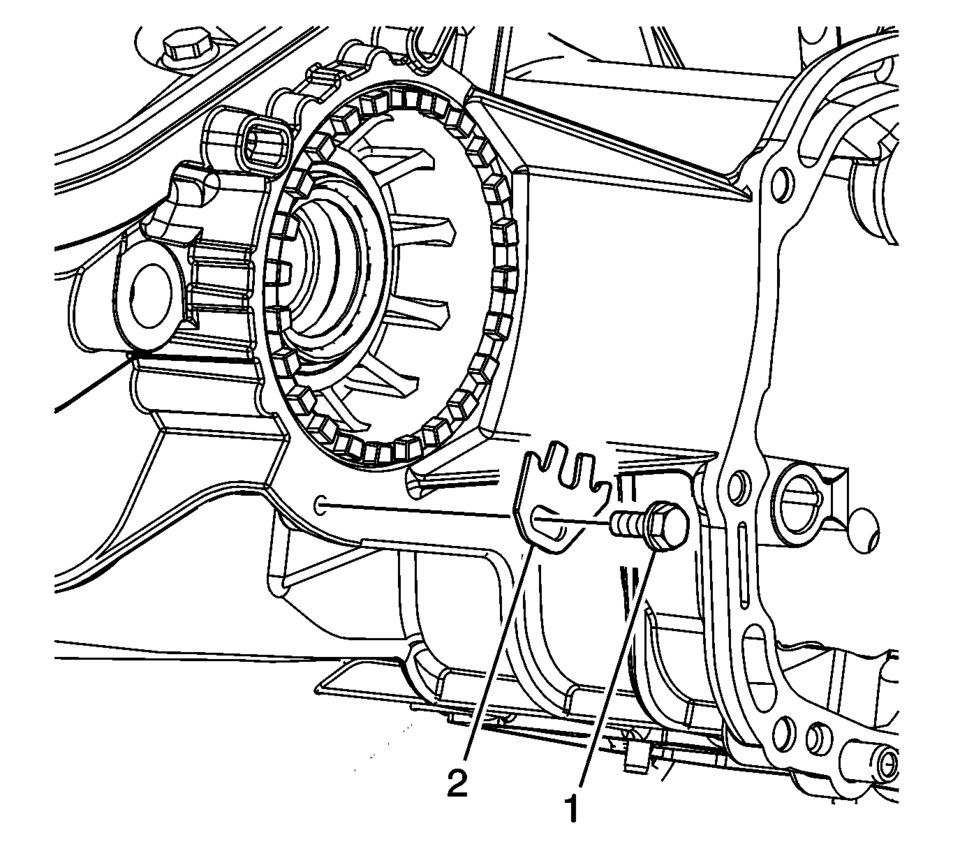
- Mark the differential bearing adjuster and case (1) before removal.
- Remove the differential bearing adjuster lock bolt (1).
- Remove the differential bearing adjuster lock (2).
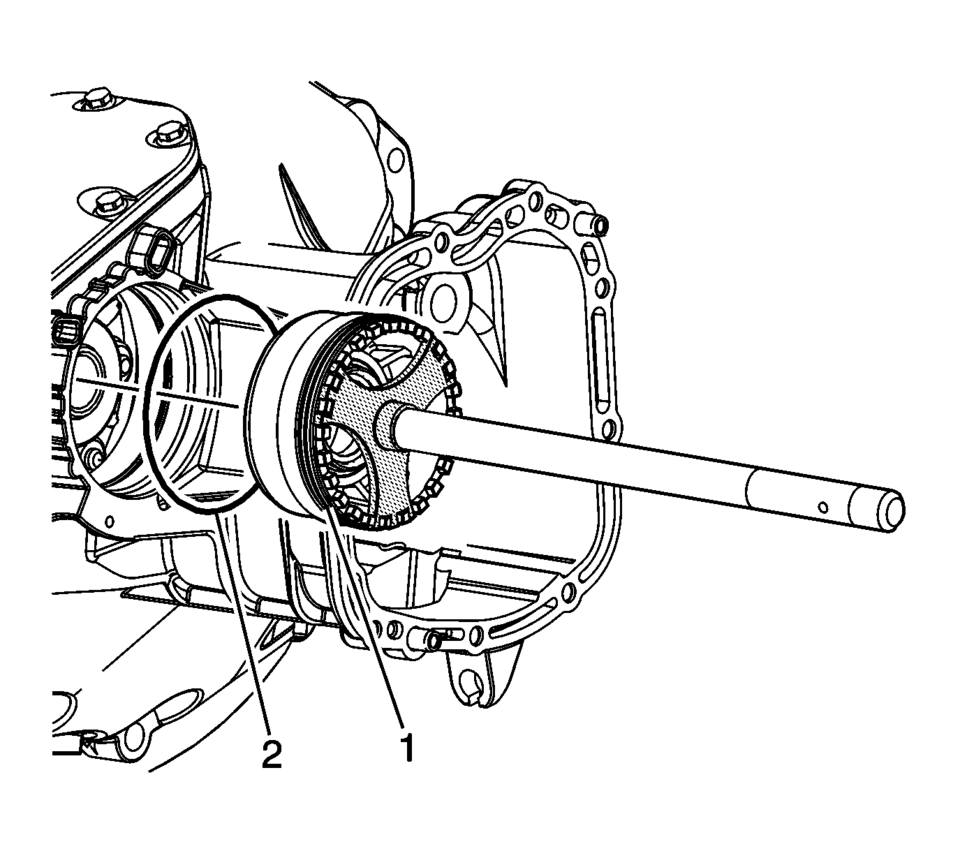
- Using S-9407198 differential bearing race wrench remove the front differential bearing adjuster (1).
- Remove the front differential bearing retainer O-ring seal (2).
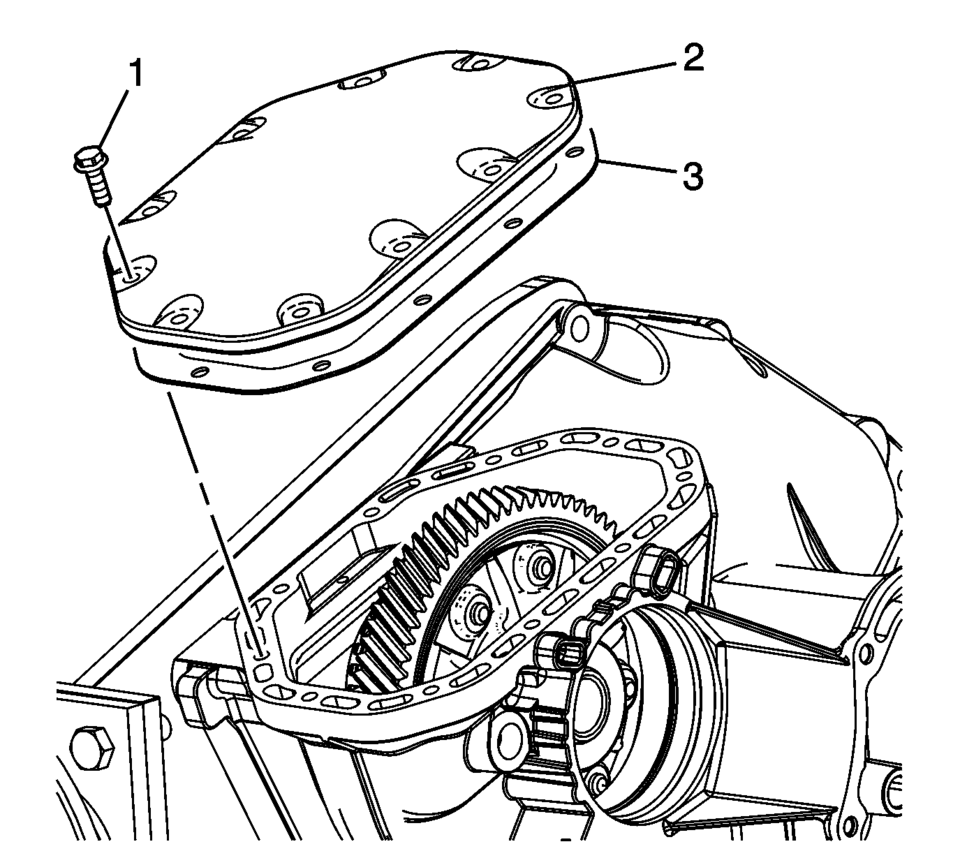
- Remove the front differential carrier cover bolts (1).
- Remove the differential carrier cover (2) and gasket (3).
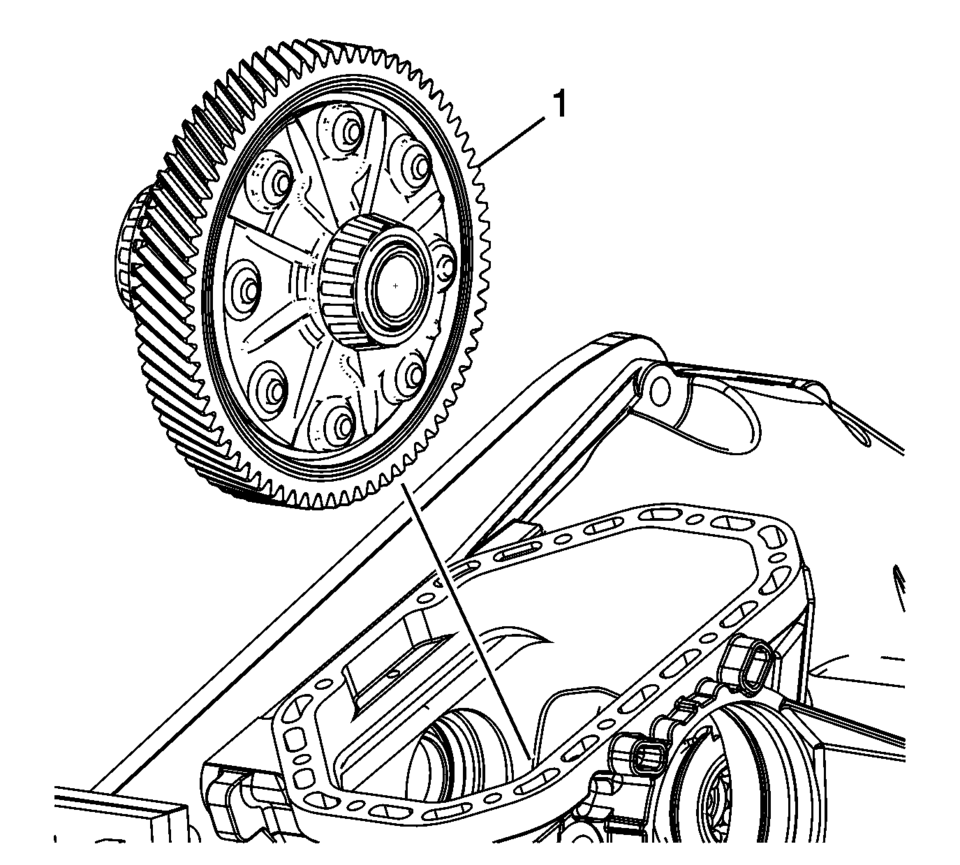
- Remove the front differential carrier (1).
Note:
The reverse gear shaft snap ring (6) MUST be installed even if not originally equipped to prevent shifting issues caused by incorrect assembly or parts not in position.
 Transmission Disassemble (Gen 1)
Special Tools
3-9506289 Universal Adapter
R-0007758 Holding Fixture
S-9407198 Differential Bearing Race Wrench
For equivalent regional tools, refer to Special Tools.
Attach R-0 ...
 Transmission Fluid Drain and Fill
Draining Procedure
Note:
The fluid check bolt at the front of the transmission may not be
opened.
The transmission fluid drained out during the pre-delivery inspection
...
Other materials:
Front Bumper Fascia Replacement
Front Bumper Fascia Replacement
Callout
Component Name
Preliminary Procedures
Remove the radiator opening upper cover. Refer to Front Opening
Upper Cover Replacement.
Remove the front bumper opening lower cover. Refer to ...
Seat Belt Latch Stop Installation
Seat Belt Latch Stop Installation
Callout
Component Name
Preliminary Procedure
Locate the hole in the seat belt webbing where the original seat
belt stop button was located.
If the original hole in the seat belt webbing i ...
Radiator Air Baffle Replacement (LUV, LUW)
Radiator Air Baffle Replacement
Callout
Component Name
Preliminary Procedure
Remove the front bumper fascia assembly. Refer to Front Bumper Fascia
Replacement.
1
Radiator Air Upper Baffle Push P ...

0.0086