Chevrolet Sonic Repair Manual: Turbocharger Disassemble
Special Tool
EN-49940 Remover Quick Connector
For equivalent regional tools, refer to Special Tools.
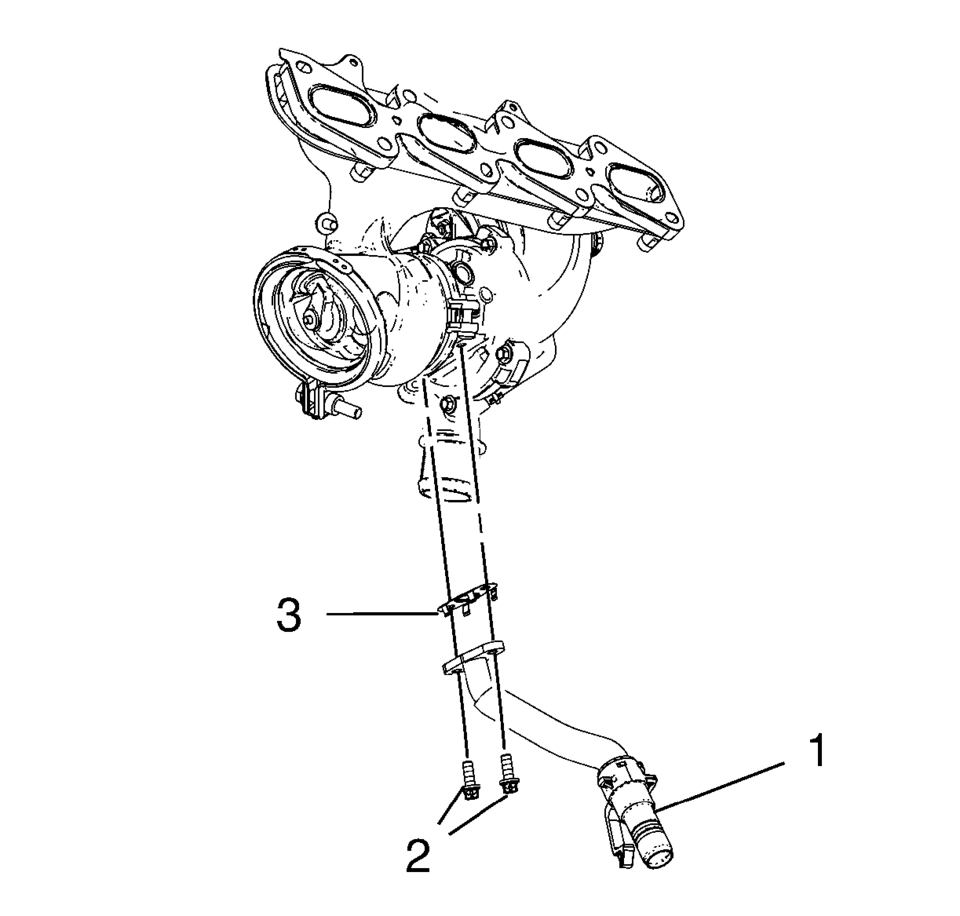
- Remove the 2 turbocharger oil return pipe bolts (2).
- Remove the turbocharger oil return pipe (1) and the sealing (3) from the turbocharger.
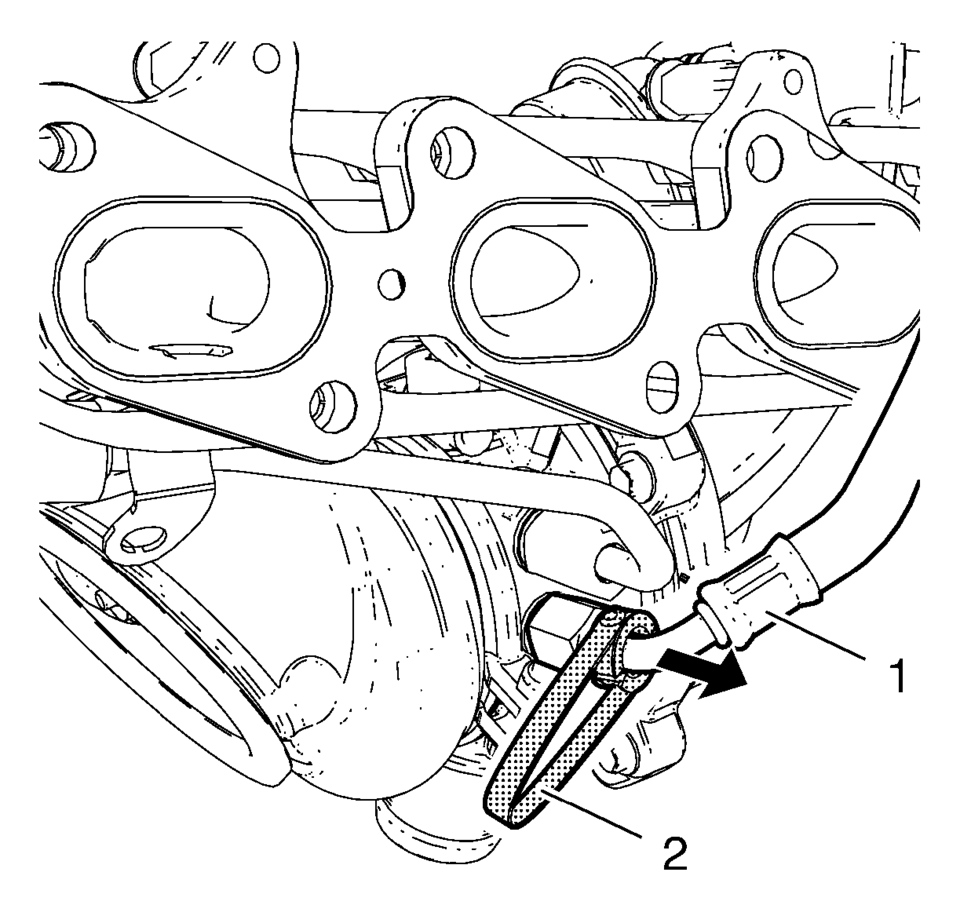
- Install the EN-49940 remover (2) to the turbocharger coolant feed pipe (1) and the quick fitting connector as shown.
- Compress the EN-49940 remover and remove the turbocharger coolant feed pipe direction of the arrow.
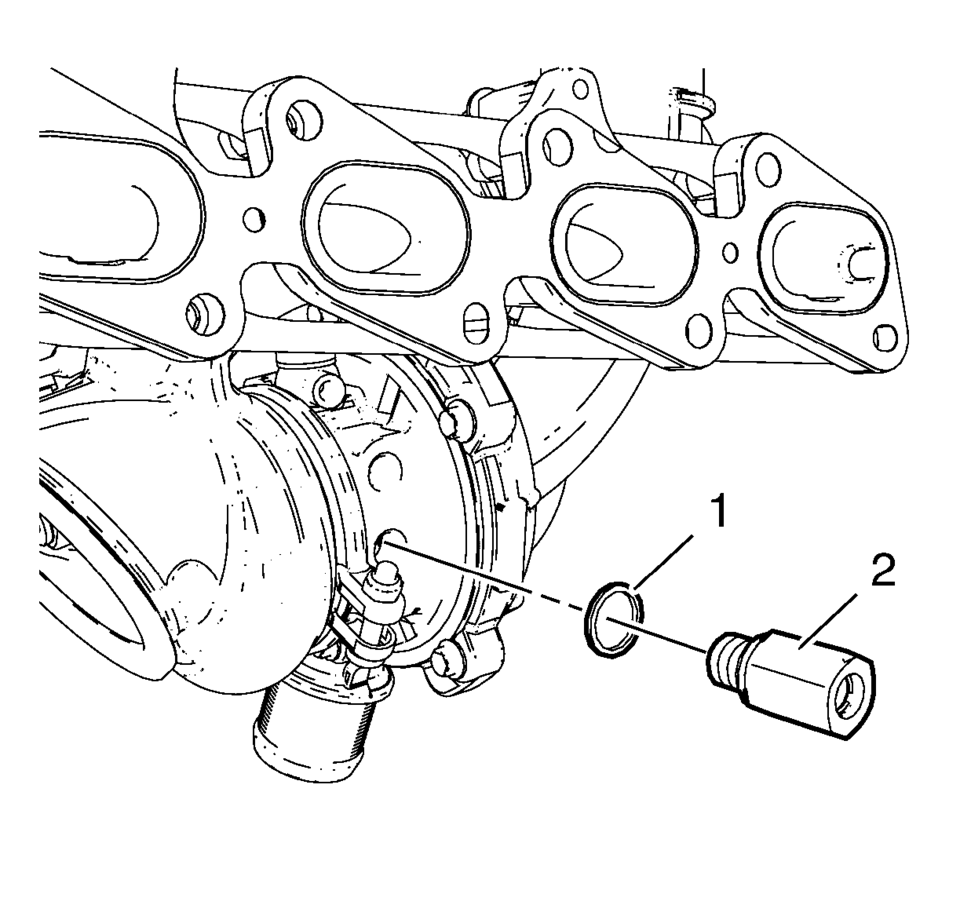
- Remove the quick fitting connector (2) and the seal ring (1).
- Use the same procedure for the turbocharger coolant return pipe and the turbocharger coolant return pipe quick fitting connector.
Note:
The quick fitting connectors should be always replaced when the turbocharger coolant pipes are removed
 Turbocharger Coolant Return Pipe Replacement (LUV)
Turbocharger Coolant Return Pipe Replacement
Callout
Component Name
Preliminary Procedure
Remove the turbocharger. Refer to Tur ...
 Turbocharger Installation
Special Tool
EN-49942 Holding Wrench
For equivalent regional tools, refer to Special Tools.
Clean the sealing surfaces.
Replace the connect fittings on the turbocharger coolant feed pipe an ...
Other materials:
OnStar Overview
If equipped, this vehicle has a comprehensive, in-vehicle system that can connect
to a live Advisor for Emergency, Security, Navigation, Connection, and Diagnostic
Services.
The OnStar system status light is next to the OnStar buttons. If the status light
is:
Solid Green: System is read ...
Taillamps, Turn Signal, Stoplamps, and Back-Up Lamps
Sedan Taillamp Shown, Hatchback Taillamp Similar
Back-up Lamp
Turn Signal Lamp
Stop Lamp/Taillamp
Sidemarker Lamp
To replace one of these bulbs:
Open the trunk.
Remove the two screws, which secure the taillamp assembly.
Remove the taillamp assembly by pulling it straight ...
Front Side Door Upper Front Trim Panel Replacement
Front Side Door Upper Front Trim Panel Replacement
Callout
Component Name
1
Front Side Door Upper Front Trim Panel Assembly
Procedure
Use the appropriate plastic trim tool to aid in the removal of the door
tri ...

0.0077