
Chevrolet Sonic Repair Manual: Water Pump Pulley Replacement (LUW)
- Removal Procedure
-
- Remove the air cleaner housing. Refer to Air Cleaner Assembly Replacement.
- Support the engine with a suitable jack.
- Remove the engine mount. Refer to Engine Mount Replacement.
- Raise engine to access the bolts.
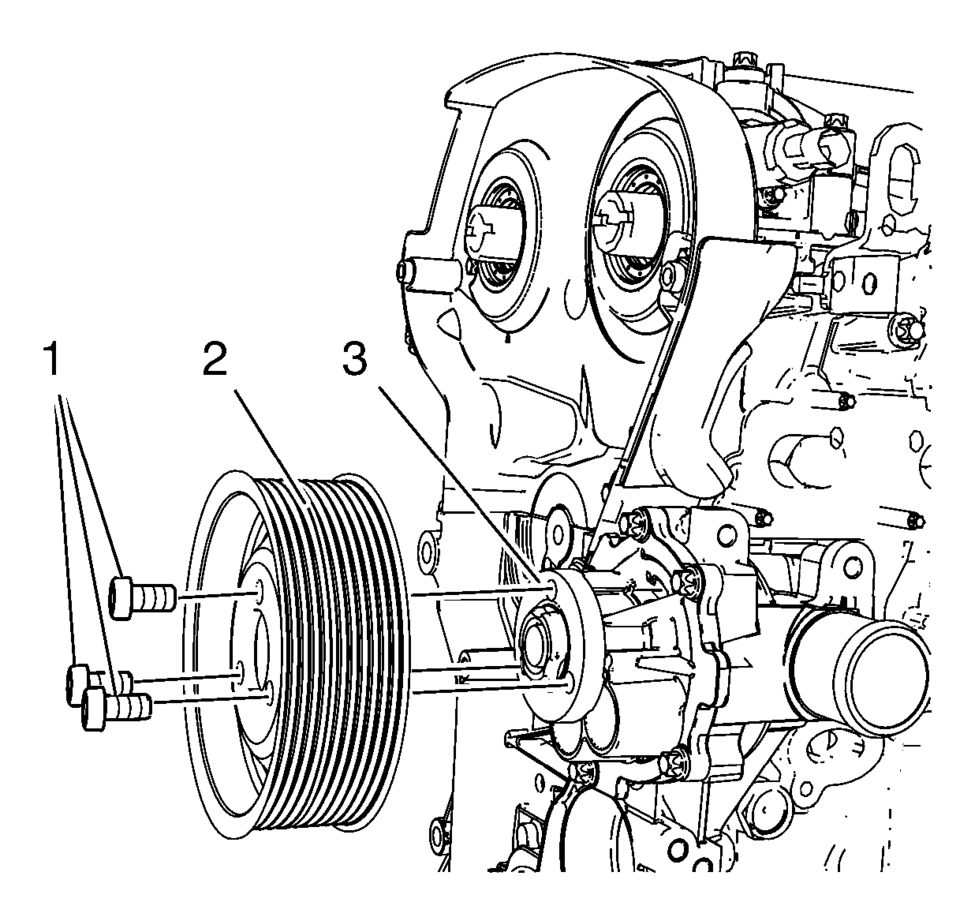
- Loosen the 3 water pump pulley bolts (1).
Note:
Counterhold against crankshaft balancer bolt.
- Remove the drive belt. Refer to Drive Belt Replacement.
- Remove the 3 water pump pulley bolts (1).
- Remove the water pump pulley (2) from the water pump (3).
- Installation Procedure
-
- Install the water pump pulley (2) to the water pump (3).
- Install the 3 water pump pulley bolts (1).
- Install the drive belt. Refer to Drive Belt Replacement.
- Tighten the 3 water pump pulley bolts (1) to 20 Y (15 lb ft)
.
Note:
Counterhold against crankshaft balancer bolt.
- Install the engine mount. Refer to Engine Mount Replacement.
- Install the air cleaner housing. Refer to Air Cleaner Assembly Replacement.
Caution:
Refer to Fastener Caution.
 Water Pump Pulley Replacement (LUV)
Removal Procedure
Remove the air cleaner assembly. Refer to Air Cleaner Assembly Replacement.
Remove the engine mount bracket. Refer to Engine Mount Bracket Replacement
- Right ...
 Water Pump Removal
Remove the 5 short water pump bolts (4) and the 5 long water pump bolts (3).
Remove the water pump (2).
Remove the water pump gasket (1).
...
Other materials:
Clutch and Differential Housing Cleaning and Inspection
Warning: Wear safety glasses to avoid injury when using compressed
air or any cleaning solvent. Bodily injury may occur if fumes are inhaled
or if skin is exposed to chemicals.
Clean the clutch housing (1) with a suitable solvent. Air dry all the parts.
Inspect ...
Timing Belt Upper Front Cover Installation
Install the timing belt upper front cover (1).
Caution: Refer to Fastener Caution.
Install the 2 timing belt upper front cover bolts (2) and tighten to
6 Y(53 lb in).
...
Ignition Transmission Lock Check
While parked, and with the parking brake set, try to turn the ignition to LOCK/OFF
in each shift lever position.
For automatic transmission vehicles, the ignition should turn to LOCK/OFF
only when the shift lever is in P (Park).
For manual transmission vehicles, the ignition should turn ...

0.0099