Chevrolet Sonic Repair Manual: Camshaft Replacement
Special Tools
EN-422 Installer
For equivalent regional tools, refer to Special Tools.
- Removal Procedure
-
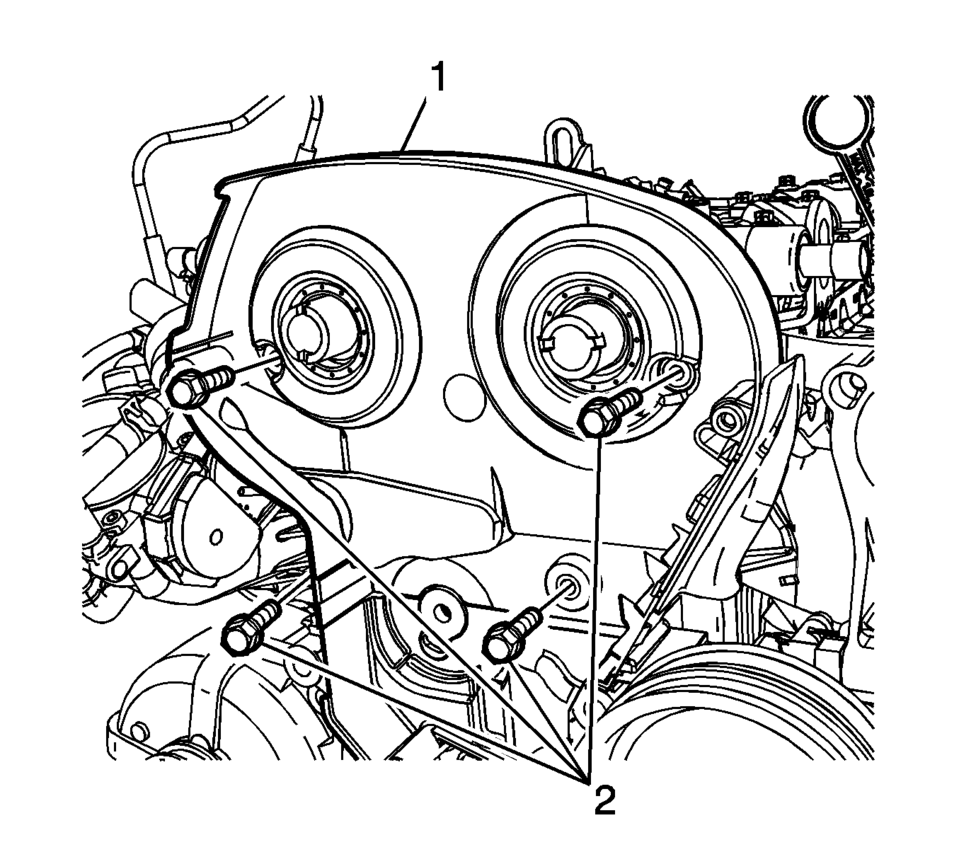
- Remove the timing belt rear cover (1). Refer to Timing Belt Rear Cover Replacement.
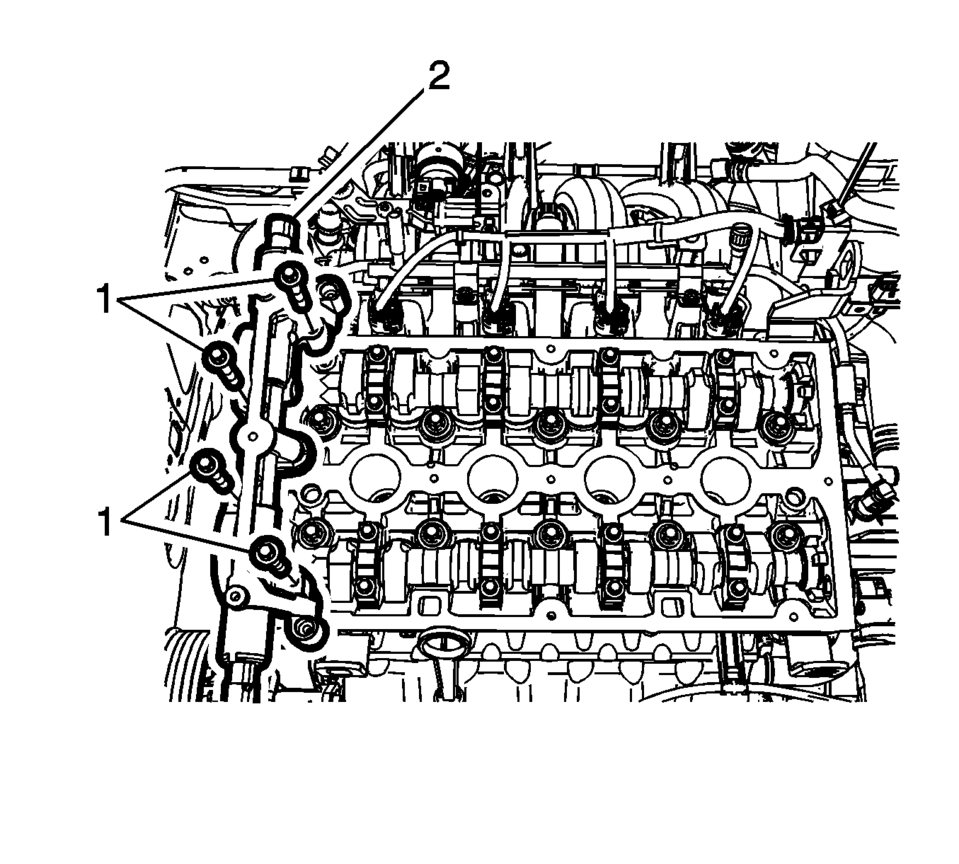
- Remove the camshaft position solenoid valve housing bolts (1) and housing (2).
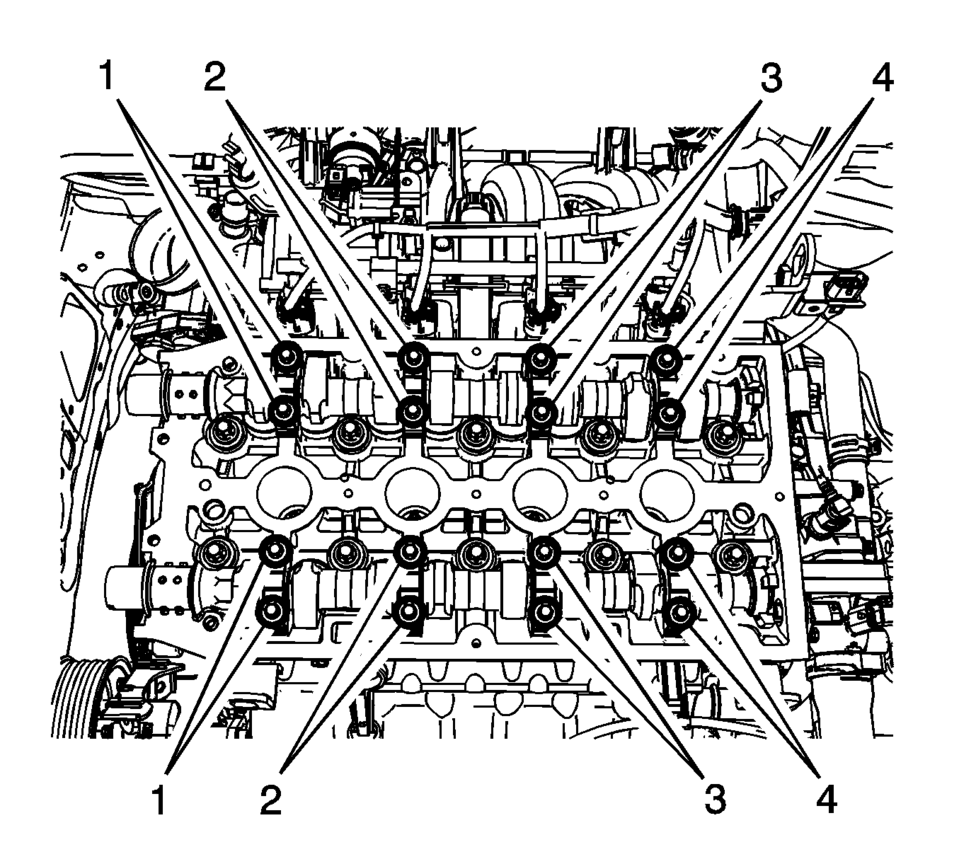
- Remove the camshaft cap bolts in sequence (1, 4, 2, 3).
- Remove the camshaft caps.
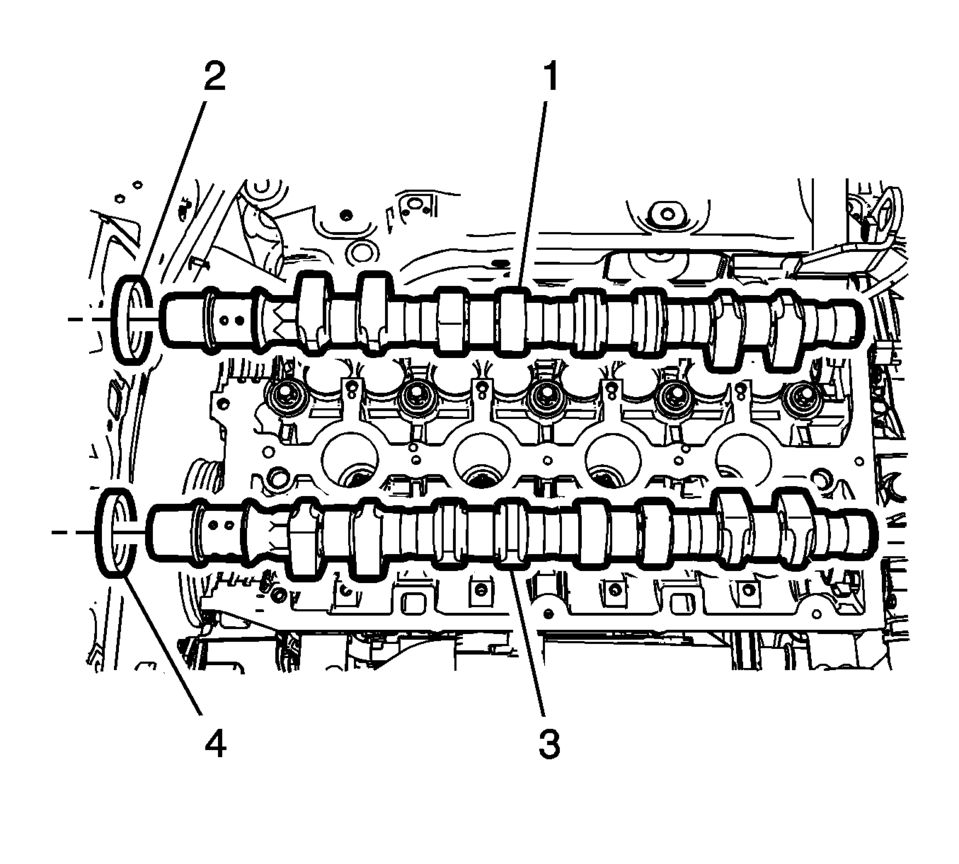
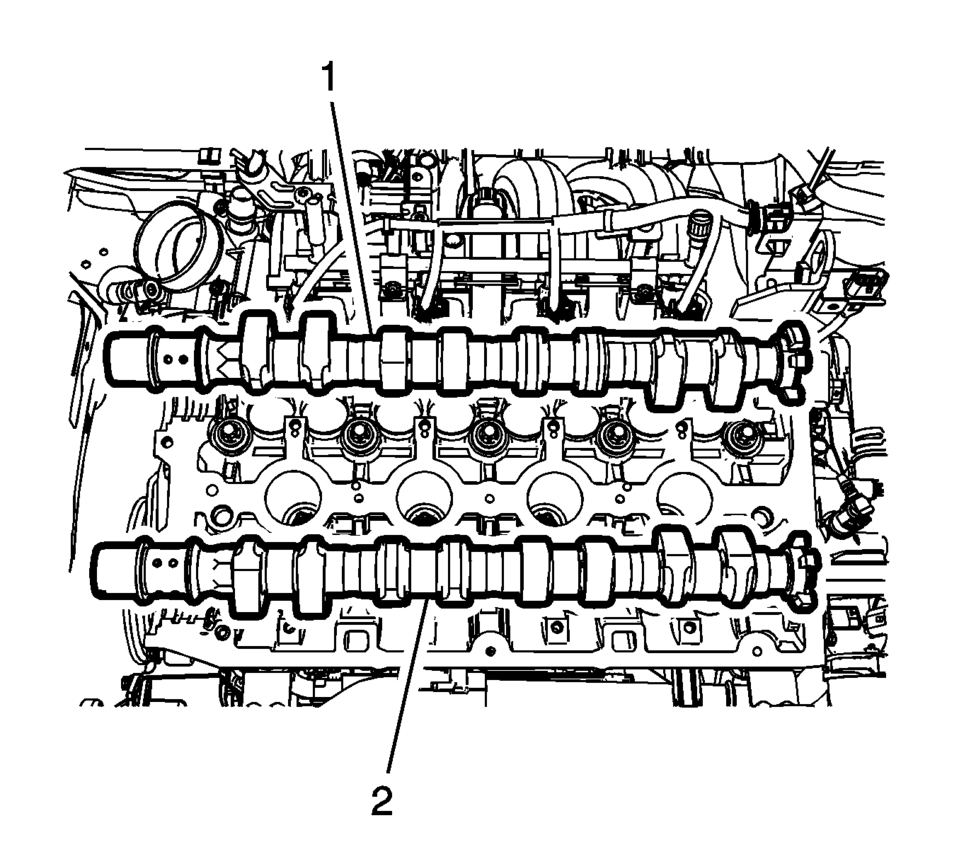
- Remove the exhaust camshaft (1) and intake camshaft (3) as necessary.
- Remove exhaust camshaft seal (2) and intake camshaft seal (4) as necessary.
Note:
Take extreme care to prevent any scratches, nicks or damage to the camshafts and caps bearing surfaces.
Note:
Mark the camshafts upon removal to ensure installation is in the correct position.
Note:
The camshaft seal MUST be replaced whenever the camshaft is removed.
- Installation Procedure
-
- Coat and lubricate the camshaft bearing and cam surfaces with clean engine oil.
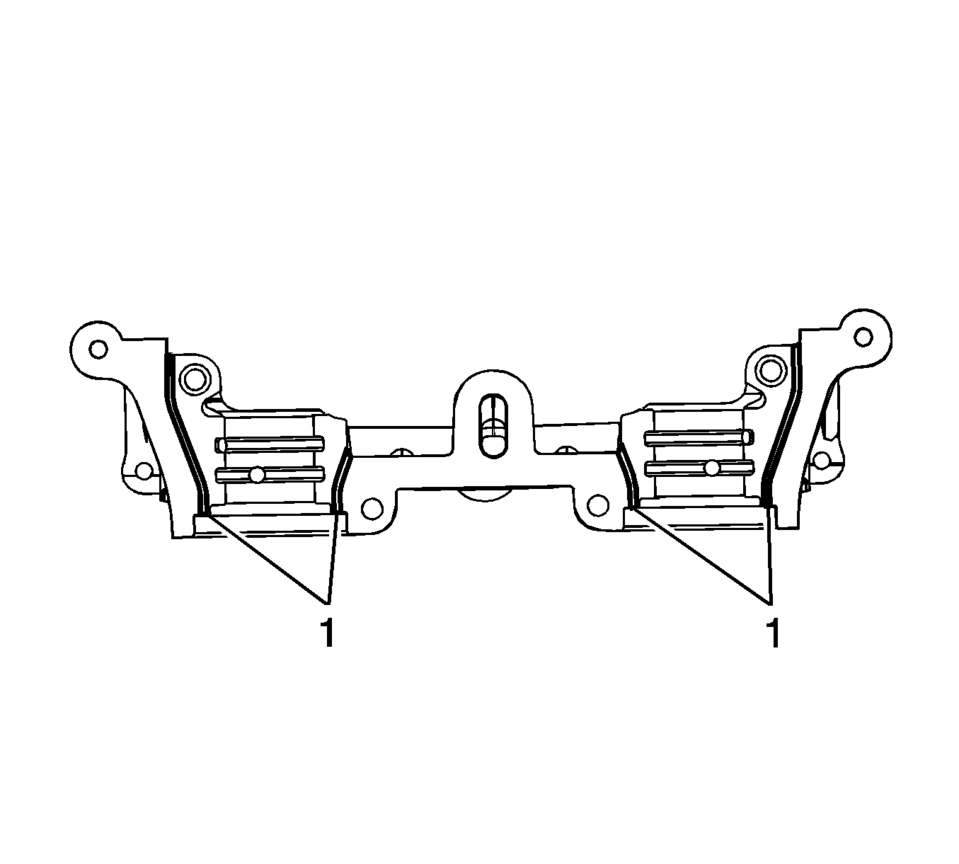
- Apply sealant to the surface (1) of the 1st camshaft bearing cap.
- Install the exhaust camshaft (1) and intake camshaft (2) on the cylinder head.
- Install the camshaft bearing caps in sequence (2, 3, 1, 4) Tighten the
camshaft bearing cap bolts to 8 Y (71 lb in)
.
- Install the camshaft position solenoid valve housing (2) and camshaft
position solenoid valve housing bolts (1). Tighten the bolts to 8 Y (71 lb in)
.
- Install the new camshaft oil seal rings using EN-422 installer .
- Install the timing belt rear cover (1) and tighten the bolts (2) to
6 Y (53 lb in)
. Refer to Timing Belt Rear Cover Replacement.
Note:
It is essential to ensure that no sealant is applied outside the marked sealing areas.
Caution:
Refer to Fastener Caution.
 Camshaft Removal
Note: Note removal sequence 1?E.
Remove the 4 camshaft bearing cap bolts.
Note: Release the bearing support by striking it gently with a
plastic hammer.
...
 Exhaust Camshaft Installation
Note: Mind the markings on the camshaft bearing caps. Camshaft
bearing caps should be installed in their original position.
Lubricate camshaft and camshaft bearing caps with eng ...
Other materials:
Servicing the Airbag-Equipped Vehicle
Airbags affect how the vehicle should be serviced. There are parts of the airbag
system in several places around the vehicle. Your dealer and the service manual
have information about servicing the vehicle and the airbag system. To purchase
a service manual, see Service Publications Ordering I ...
Seat Adjustment
Manual Seats
Warning: You can lose control of the vehicle if you try to adjust
a driver seat while the vehicle is moving. Adjust the driver seat only when
the vehicle is not moving.
To adjust a manual seat:
Pull the handle at the front of the seat.
Slide the ...
Low and Reverse and 1-2-3-4 Clutch Housing Assemble (6T40/45/50)
Table 1:
1??? Clutch Piston Installation
Table 2:
Low and Reverse Clutch Piston Installation
1??? Clutch Piston Installation
1??? Clutch Piston Installation
Callout
Component Name
...

0.0066