Chevrolet Sonic Repair Manual: Clutch Master Cylinder Replacement
- Removal Procedure
-
- Remove the battery tray. Refer to Battery Tray Replacement.
- Remove as much brake fluid out of brake fluid reservoir as possible.
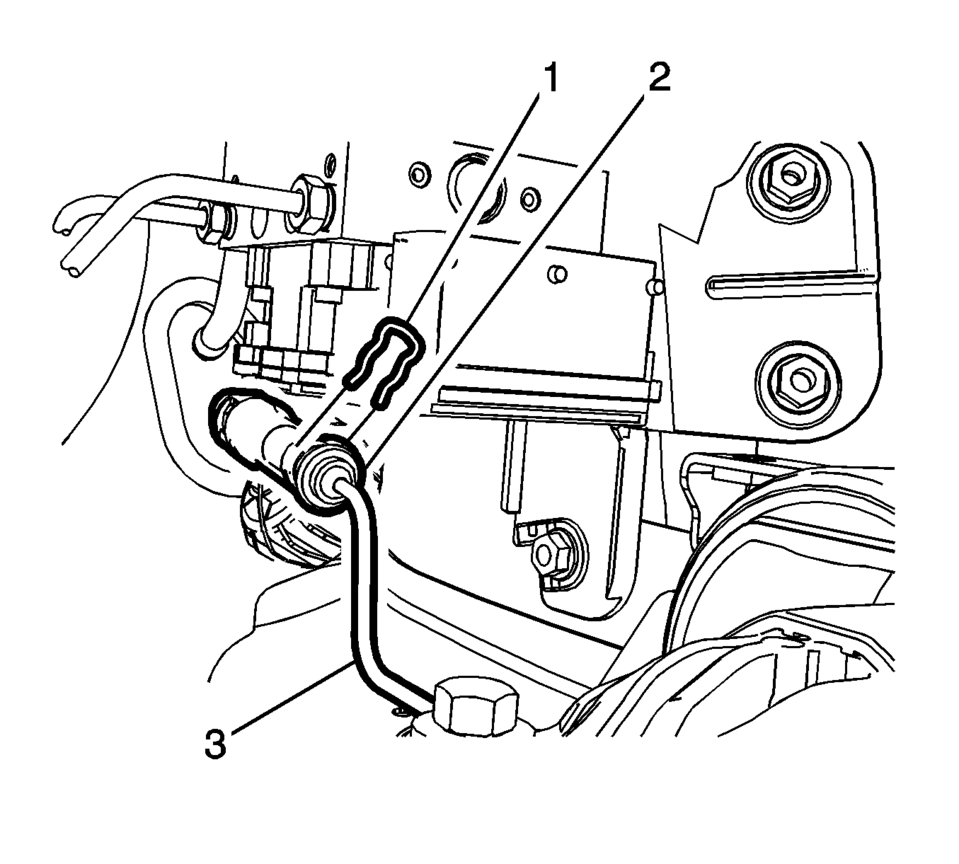
- Remove the clutch master cylinder reservoir hose (1) from the clutch master cylinder.
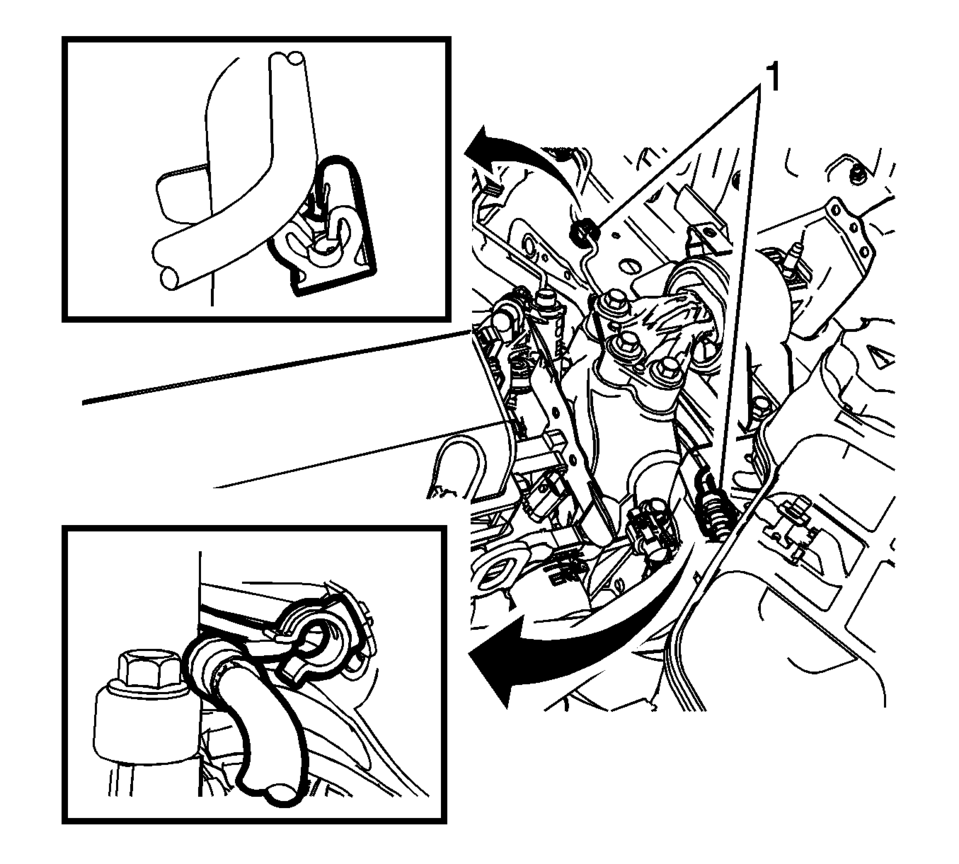
- Unclip the clutch actuator cylinder front pipe from the 2 retainers (1).
- Remove the retaining clip (1).
- Disconnect the clutch actuator cylinder front pipe (3) from the clutch master cylinder (2).
- Remove the brake pedal assembly. Refer to Brake Pedal Assembly Replacement.
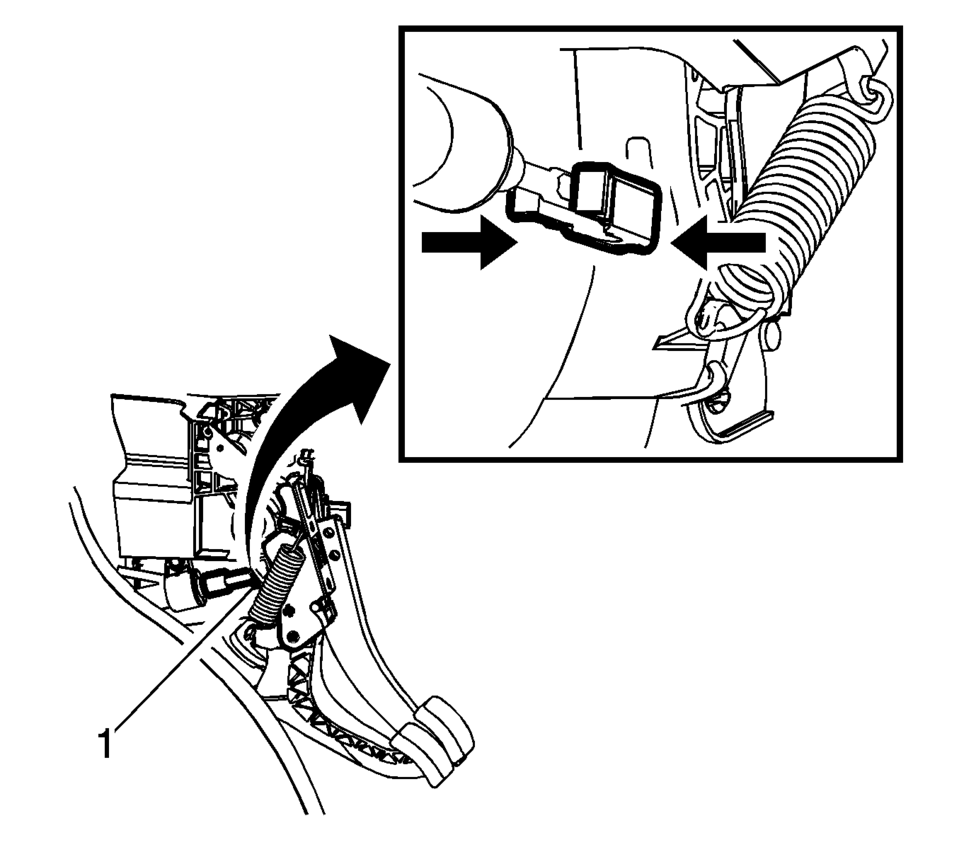
- Disconnect the push rod retainer (1) from the clutch pedal.
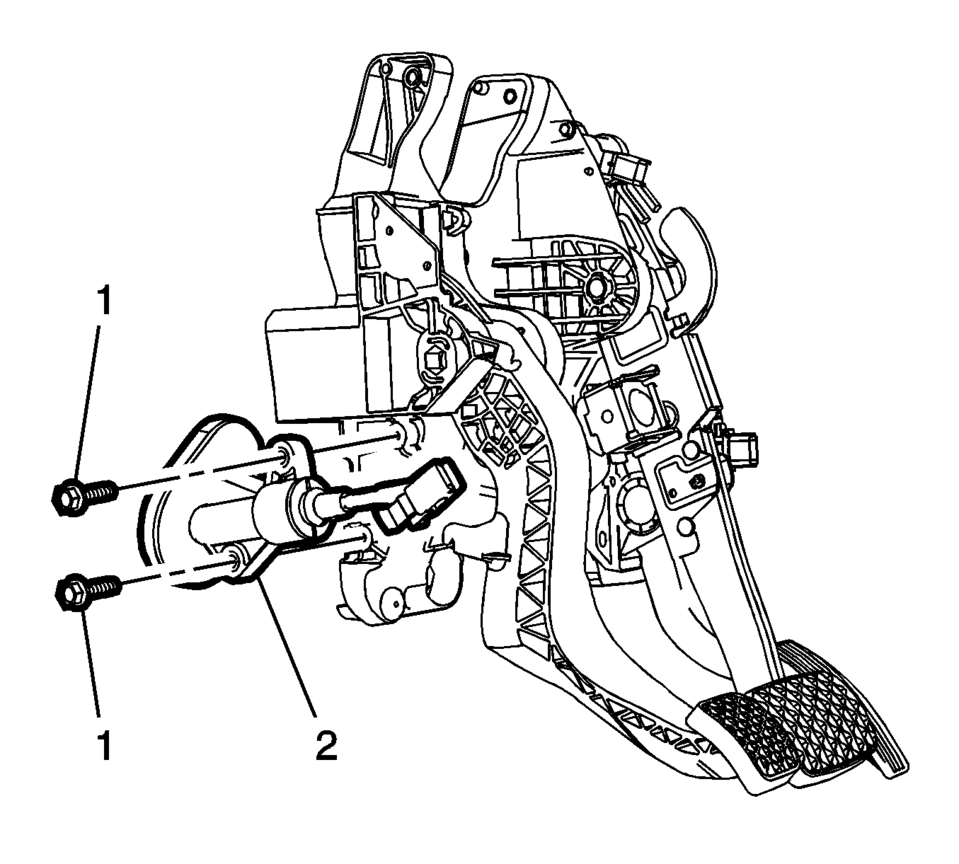
- Remove the 2 clutch master cylinder fasteners (1).
- Remove the clutch master cylinder from the brake pedal assembly.

Note:
Press the 2 latches (arrows) together.
- Installation Procedure
-
- Install the clutch master cylinder into the brake pedal assembly.
- Install the 2 clutch master cylinder fasteners (1)
and tighten to 4.5 Y (40 lb in)
.
- Connect the push rod retainer (1) to the clutch pedal.
- Install the brake pedal assembly. Refer to Brake Pedal Assembly Replacement.
- Connect the clutch actuator cylinder front pipe (3) to the clutch master cylinder (2).
- Install the retaining clip (1).
- Clip the clutch actuator cylinder front pipe into the 2 retainers (1).
- Install the clutch master cylinder reservoir hose (1) to the clutch master cylinder.
- Install the battery tray. Refer to Battery Tray Replacement.
- Bleed the hydraulic clutch system. Refer to Hydraulic Clutch System Bleeding.
- Fill the reservoir with GM approved brake fluid from a clean, sealed brake fluid container up to the MAX level.
Caution:
Refer to Fastener Caution.
Note:
An audible click will be heard when the clip is correctly seated.
 Hydraulic Clutch System Bleeding
Warning: Refer to Brake Fluid Irritant Warning.
Caution: Brake fluid must not come in contact with mineral oils and
greases. The smallest amount of such could lead to malfunction or bre ...
 Clutch Pedal Position Sensor Replacement
Removal Procedure
Remove the instrument panel lower trim pad cover.
Refer to Instrument Panel Lower Trim Pad Cover Replacement.
Remove the clutch pedal position sen ...
Other materials:
Storing a Flat or Spare Tire and Tools
Warning
Storing a jack, a tire, or other equipment in the passenger compartment of
the vehicle could cause injury. In a sudden stop or collision, loose equipment could
strike someone. Store all these in the proper place.
Storing the Flat Tire and Tools
1. Return the jack and tools to their or ...
Rear Wheel Bearing and Hub Replacement (Disc Brake)
Special Tools
EN–45059 Angle Meter
For equivalent regional tools, refer to Special Tools.
Removal Procedure
Raise and suitably support the vehicle. Refer to Lifting and Jacking
the Vehicle.
Remove the tire and wheel assembly. Refer to Tire and Wheel Removal
and Insta ...
Special Tools
Illustration
Tool Number/Description
EN-471
KM-471
J-42070
J-36649
Adapter
iiiiiiiiiiiii[iii]!!!iiiiiiiiillllliiiiii1/iiii
EN-6327-A
KM-6327-A
J-24460
J-42401
Cooling System ...

0.0098