Chevrolet Sonic Repair Manual: Instrument Panel Accessory Upper Trim Plate Replacement
|
Callout |
Component Name |
|---|---|
|
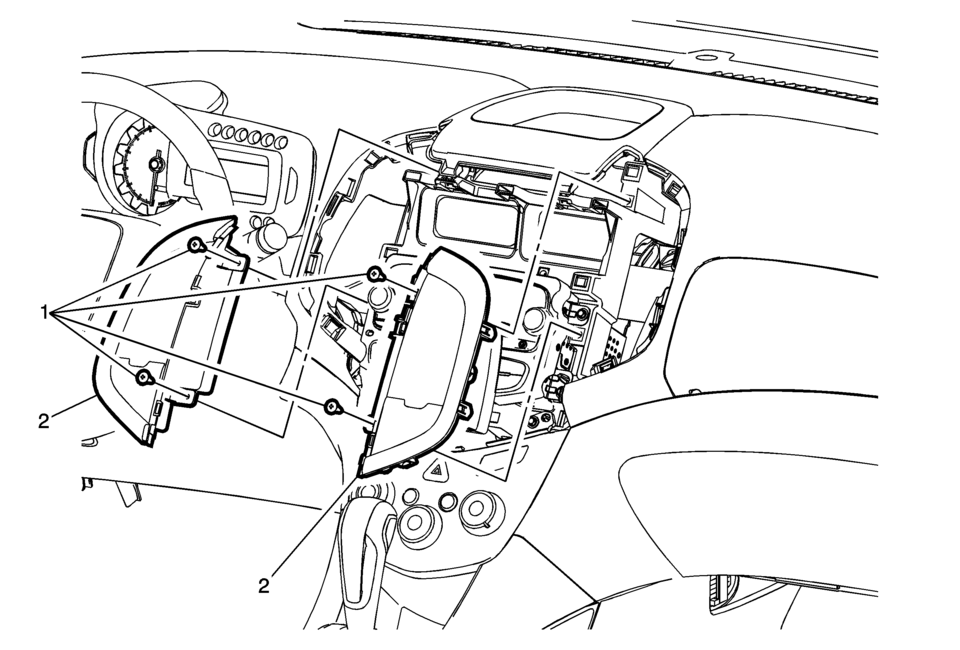
Preliminary Procedure
Remove the instrument panel center molding. Refer to Instrument Panel Center Molding Replacement. |
|
|
1 |
Instrument Panel Accessory Upper Trim Plate Fastener (Qty:?€‰4) Caution: Refer to Fastener Caution. |
|
2 |
Instrument Panel Accessory Upper Trim Plate (Qty:?€‰2) Procedures
|
 Instrument Panel Accessory Bezel Package Installation
Installation Instructions Part Number
95205543
Kit Contents
Qty
Description
1
Molding Assembly - I/P Center Upper
...
 Instrument Panel Airbag Arming Status Display Replacement
Instrument Panel Airbag Arming Status Display Replacement
Callout
Component Name
Preliminary Procedure
Remove the heater and ai ...
Other materials:
Intelligent Around View Monitor system operation
The Nissan Armada Intelligent Around View Monitor utilizes multiple strategically
positioned cameras 1, including units mounted in the front grille, beneath the outside
mirrors, and above the rear license plate, to create a comprehensive multi-angle
view of the vehicle surroundings.
Basic ...
System operation
The Nissan Armada sonar system provides both visual and audible alerts under
the following conditions:
Detection of front obstacles when the transmission is in D (Drive)
Detection of both front and rear obstacles when the transmission is in R
(Reverse)
How the system alerts of obstacle ...
Air fresheners
Many air fresheners contain chemical solvents that may negatively affect the
interior materials of your Nissan Armada if not used properly.
When using an air freshener inside the Nissan Armada, follow these precautions
to prevent damage and maintain the premium interior finish:
Hanging-type ...

0.0052