
Chevrolet Sonic Owner's Manual: Lower Anchor and Top Tether Anchor Locations
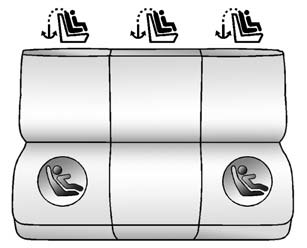
 (Top Tether Anchor): Seating positions
with top tether anchors.
 (Lower Anchor): Seating positions
with two lower anchors.
To assist in locating the lower anchors, each seating position with lower anchors has two labels, near the crease between the seatback and the seat cushion.
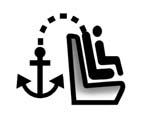
To assist in locating the top tether anchors, the top tether anchor symbol is on the cover for sedan models or near the anchors on hatchback models.
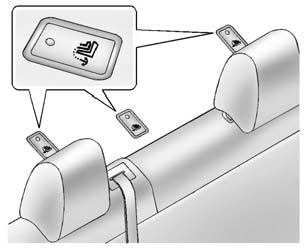
Sedan
For sedan models, the top tether anchors are under the covers behind the rear seat on the filler panel. Pull open the cover to access the top tether anchors. Be sure to use an anchor on the same side of the vehicle as the seating position where the child restraint will be placed.
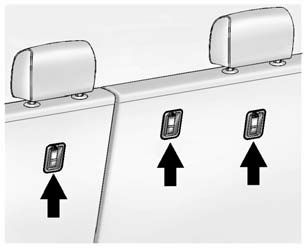
Hatchback
For hatchback models, the top tether anchors are on the back of the rear seatbacks. Remove the cargo cover before installing the top tether. The cargo cover should remain off while the top tether is in use. Be sure to use an anchor on the same side of the vehicle as the seating position where the child restraint will be placed.
Do not secure a child restraint in a position without a top tether anchor if a national or local law requires that the top tether be attached, or if the instructions that come with the child restraint say that the top tether must be attached.
According to accident statistics, children and infants are safer when properly restrained in a child restraint system or infant restraint system secured in a rear seating position. See Where to Put the Restraint for additional information.
 Top Tether Anchor
A top tether (3, 4) anchors the top of the child restraint to the vehicle. A
top tether anchor is built into the vehicle. The top tether attachment (2) on the
child restraint connects to the top ...
 Securing a Child Restraint Designed for the LATCH System
Warning
If a LATCH-type child restraint is not attached to anchors, the child restraint
will not be able to protect the child correctly. In a crash, the child could be
seriously injured or killed ...
Other materials:
Window Motor Programming - Express Function
Window Motor Normalized Procedure
A window motor that has not been normalized will no longer perform the express
up and express down functions, this may occur during the following conditions:
When a window motor has been disconnected
When a door harness has been disconnected
...
Engine Mount Replacement - Right Side
..
Engine Mount Replacement - Right Side
Callout
Component Name
Preliminary Procedures
Remove the air cleaner assembly. Refer to Air Cleaner Assembly Replacement.
Install the engine support fixture. Refer to Engine Support ...
Drive Range - Fourth Gear (Gen 2)
As vehicle speed increases, the transmission control module (TCM) processes input
signals from the automatic transmission input and output speed sensors, the throttle
position sensor and other vehicle sensors to determine the precise moment to command
OFF the normally-low 35R pressure control ...

0.0057