Chevrolet Sonic Repair Manual: Rear Seat Outboard Seat Back Airbag Replacement
|
Callout |
Component Name |
|---|---|
|
Warning: Following the deployment of a rear seat side air bag, inspect the following parts for damage. Replace these parts if necessary:
Failure to do so may cause future personal injury.
|
|
|
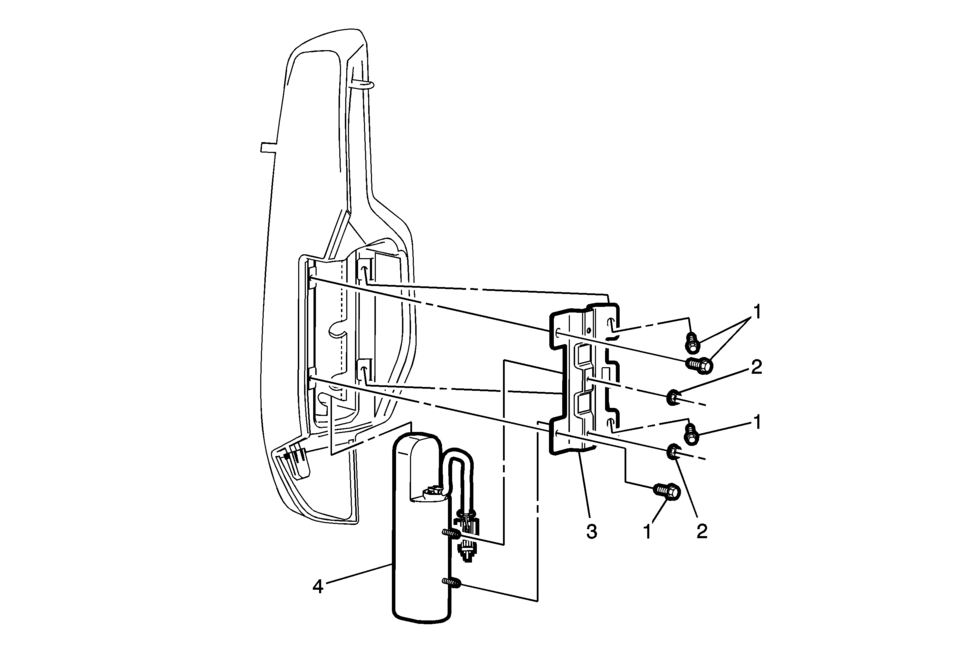
1 |
Rear Seat Side Inflatable Restraint Module Bracket Bolt (Qty:?€‰4) Caution: Refer to Fastener Caution.
3.5?€‰Y (31?€‰lb?€‰in) |
|
2 |
Rear Seat Side Inflatable Restraint Module Nut (Qty:?€‰2) Caution: Refer to Fastener Caution.
3.5?€‰Y (31?€‰lb?€‰in) |
|
3 |
Rear Seat Side Inflatable Restraint Module Bracket |
|
4 |
Rear Seat Side Inflatable Restraint Module Procedure
|
 Rear Seat Latch Replacement
Rear Seat Latch Replacement
Callout
Component Name
Preliminary Procedures
Remove the rear seat back cushion. Refer to Rear Seat Bac ...
 Wipers, Washers
...
Other materials:
Steering Knuckle Replacement
Removal Procedure
Raise and support the vehicle. Refer to Lifting and Jacking the Vehicle.
Remove the tire and wheel assembly. Refer to Tire and Wheel Removal
and Installation.
Remove the wheel speed sensor from the steering knuckle. Refer to Front
Wheel Speed Sensor ...
Radiator Inlet Hose Replacement (LUV)
Radiator Inlet Hose Replacement
Callout
Component Name
Preliminary Procedures
Drain the engine coolant. Refer to Cooling System Draining and Filling.
Remove the fasteners securing the radiator surge tank to the vehicle
...
Timing Chain Tensioner Replacement
Timing Chain Tensioner Replacement
Callout
Component Name
Preliminary Procedure
Remove the camshaft timing chain . Refer to Camshaft Timing Chain Replacement.
1
Timing Chain Tensioner Fastener (Q ...

0.006