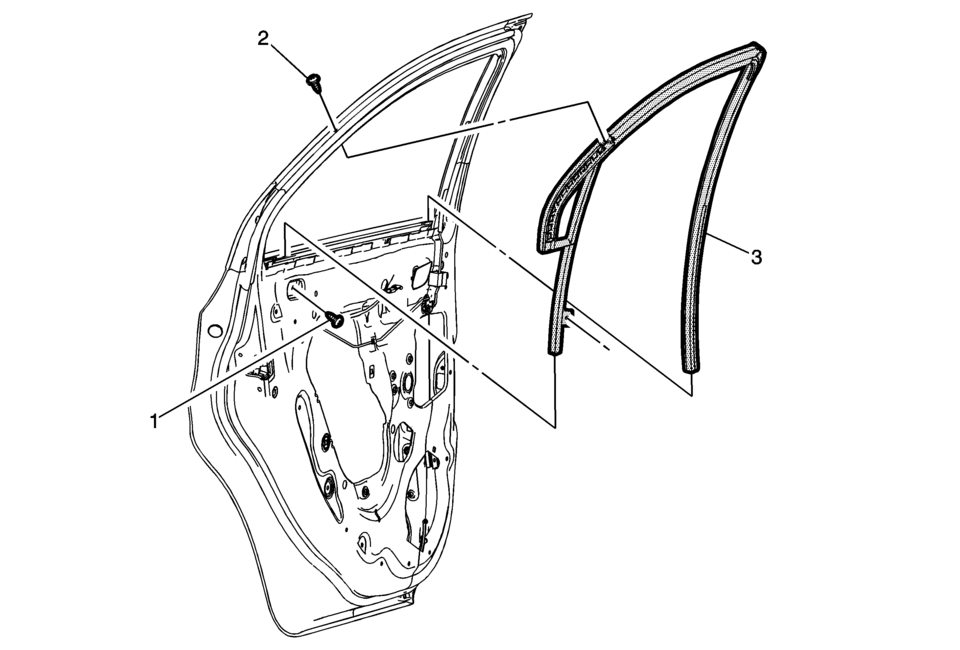
Chevrolet Sonic Repair Manual: Rear Side Door Window Weatherstrip Replacement (Sedan)

|
Callout |
Component Name |
|---|---|
Preliminary Procedures
|
|
|
1 |
Rear Side Door Window Weatherstrip Lower Bolt Caution: Refer to Fastener Caution. Procedure
Remove the rear side door water deflector. Tighten
9?€‰Y (80?€‰lb?€‰in) |
|
2 |
Rear Side Door Window Weatherstrip Upper Screw Procedure
3?€‰Y (27?€‰lb?€‰in) |
|
3 |
Rear Side Door Window Weatherstrip Procedure
|
 Rear Side Door Window Weatherstrip Replacement (Hatchback)
Rear Side Door Window Weatherstrip Replacement
Callout
Component Name
Preliminary Procedure
Remove the rear side door window . ...
Other materials:
Door Lock Switch Replacement
Door Lock Switch Replacement
Callout
Component Name
Preliminary Procedure
Remove the heater and air conditioning control. Refer to Heater and Air
Conditioning Control Replacement.
1
Door Lock Sw ...
Cylinder Head Removal
Loosen the 12 cylinder head bolts in the sequence as shown. Use the following
procedure:
Loosen the cylinder head bolts 90 degrees.
Loosen the cylinder head bolts 180 degrees.
Note: Do not damage the guide sleeves (4) and (5).
R ...
Control Valve Body Assembly Assemble (Gen 1)
Control Valve Body Assembly Assemble
Callout
Component Name
1
Valve Body Ball Check Valve (Qty: 6)
2
Control Valve Channel Plate Spacer Plate Assembly
3
...
0.0069

