Chevrolet Sonic Repair Manual: Water Pump Pulley Replacement (LUV)
- Removal Procedure
-
- Remove the air cleaner assembly. Refer to Air Cleaner Assembly Replacement.
- Remove the engine mount bracket. Refer to Engine Mount Bracket Replacement - Right Side.
- Remove the drive belt. Refer to Drive Belt Replacement.
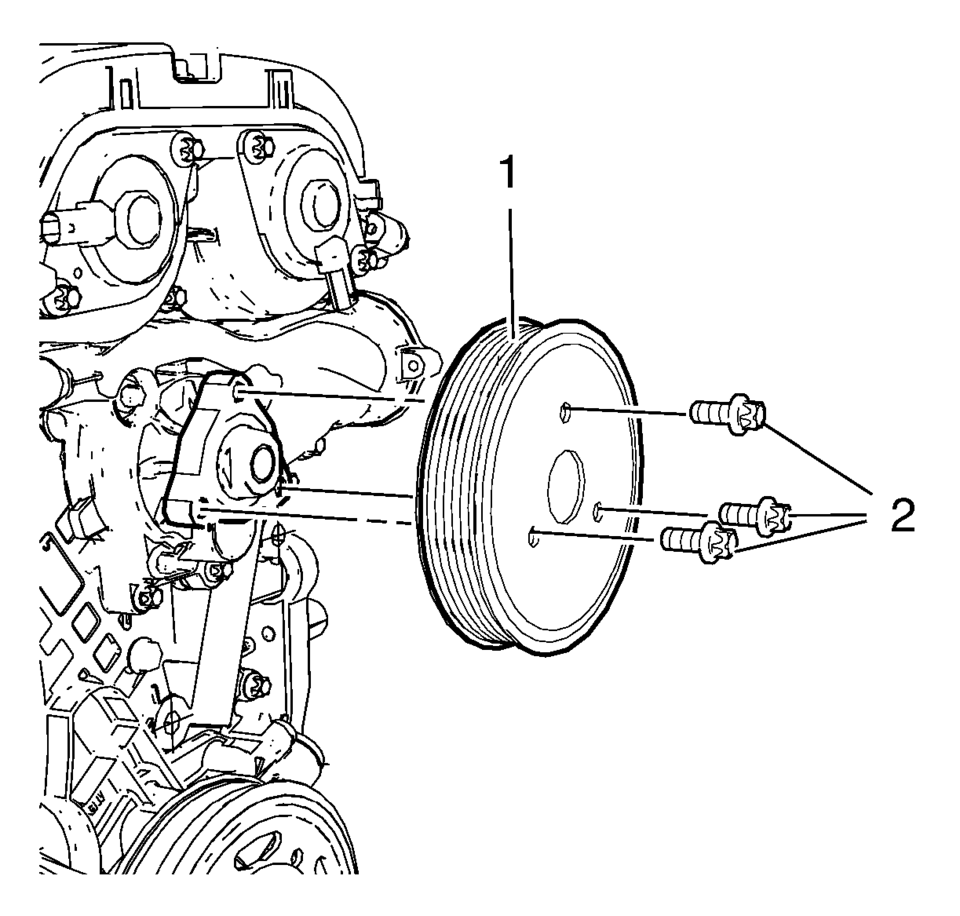
- Loosen the 3 water pump pulley bolts (2) while holding the water pump pulley hub with a wrench.
- Remove the 3 water pump pulley bolts (2).
- Remove the water pump pulley (1).
- Installation Procedure
-
- Install the water pump pulley (1).
- Install the 3 water pump pulley bolts (2).
- Tighten the 3 water pump pulley bolts to 22 Y (16 lb ft)
while holding the water pump pulley hub with a wrench.
- Install the drive belt. Refer to Drive Belt Replacement.
- Install the engine mount bracket. Refer to Engine Mount Bracket Replacement - Right Side.
- Install the air cleaner assembly. Refer to Air Cleaner Assembly Replacement.
Caution:
Refer to Fastener Caution.
 Water Pump Pulley Removal
Loosen the 3 water pump pulley bolts (2) while holding up the water pump
pulley hub with a wrench.
Remove the 3 water pump pulley bolts (2).
Remove the water ...
 Water Pump Pulley Replacement (LUW)
Removal Procedure
Remove the air cleaner housing. Refer to Air Cleaner Assembly Replacement.
Support the engine with a suitable jack.
Remove the engine mount. Refer to En ...
Other materials:
Timing Belt Inspection
Special Tools
EN-6340 Locking Tool
EN-6628-A Locking Tool
For equivalent regional tools, refer to Special Tools.
Removal Procedure
Remove the timing belt upper front cover. Refer to Timing Belt Upper
Front Cover Removal.
Set the crankshaft balancer in the ...
Transmission Disassemble (Gen 1)
Special Tools
3-9506289 Universal Adapter
R-0007758 Holding Fixture
S-9407198 Differential Bearing Race Wrench
For equivalent regional tools, refer to Special Tools.
Attach R-0007758 holding fixture (2) to the transmission.
Attach R-0007758 holding fixture (2 ...
Transmission Mount Replacement - Left Side
Removal Procedure
Remove the battery tray. Refer to
Battery Tray Replacement.
Install the engine support fixture. Refer to
Engine Support Fixture.
Remove and DISCARD the left transmission mount to
bracket bolts (1).
Remove the left transmission mo ...

0.0075