Chevrolet Sonic Repair Manual: 2-6 Clutch Piston Installation (6T40/45/50)
|
Callout |
Component Name |
|---|---|
|
1 |
2?E Clutch Piston Assembly Note:
Special Tool
DT-47796 Seal Protector For equivalent regional tools, refer to Special Tools. |
|
2 |
2?E Clutch Spring |
|
3 |
2?E Clutch Spring Retainer Caution: Regulate the air pressure to 276 kPa (40 psi) maximum. High pressure could cause the piston to over travel and damage the piston seals. Note:
For equivalent regional tools, refer to Special Tools. |
 2-6 Clutch Piston Installation (6T30)
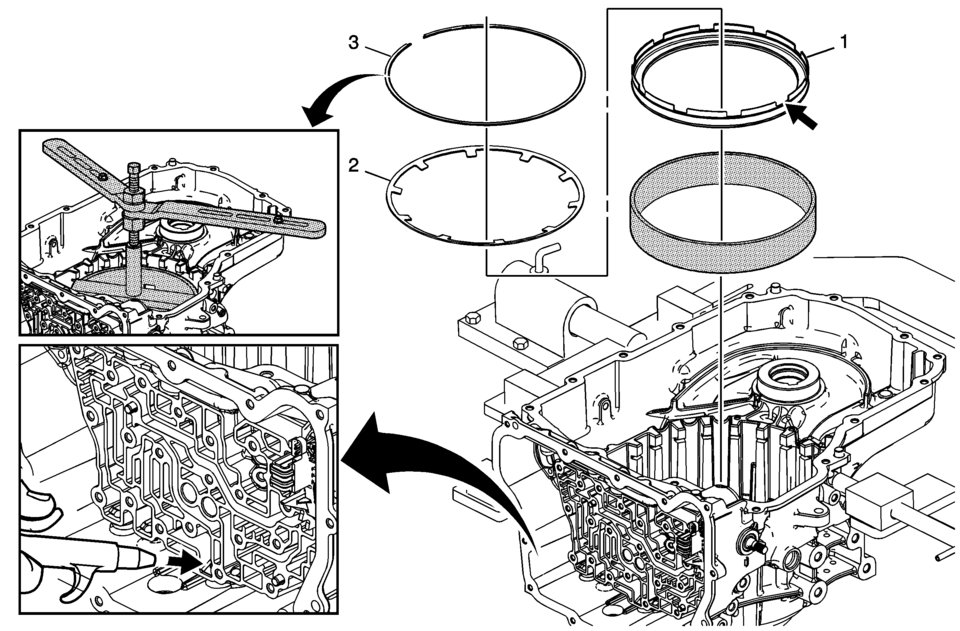
2-6 Clutch Piston Installation
Callout
Component Name
1
2?E Clutch Piston Assembly
Note:
Position the ...
 Cylinder Head
...
Other materials:
Liftgate Emblem/Nameplate Replacement (Hatchback)
Liftgate Emblem/Nameplate Replacement
Callout
Component Name
1
Liftgate Emblem/Nameplate Assembly
Caution: Refer to Exterior Trim Emblem Removal Caution.
Procedure
The part and surface should be 2 ...
Heater and Air Conditioning Control Replacement
Heater and Air Conditioning Control Replacement
Callout
Component Name
Preliminary Procedures
Remove I/P center bezel. Refer to Instrument Panel Center Molding
Replacement.
Remove front floor shifter bezel. Refer to Front ...
Low and Reverse and 1-2-3-4 Clutch Housing Disassemble
Table 1:
Low and Reverse Clutch Piston Removal
Table 2:
1??? Clutch Piston Removal
Low and Reverse Clutch Piston Removal
Low and Reverse Clutch Piston Removal
Callout
Component Name
...

0.0058