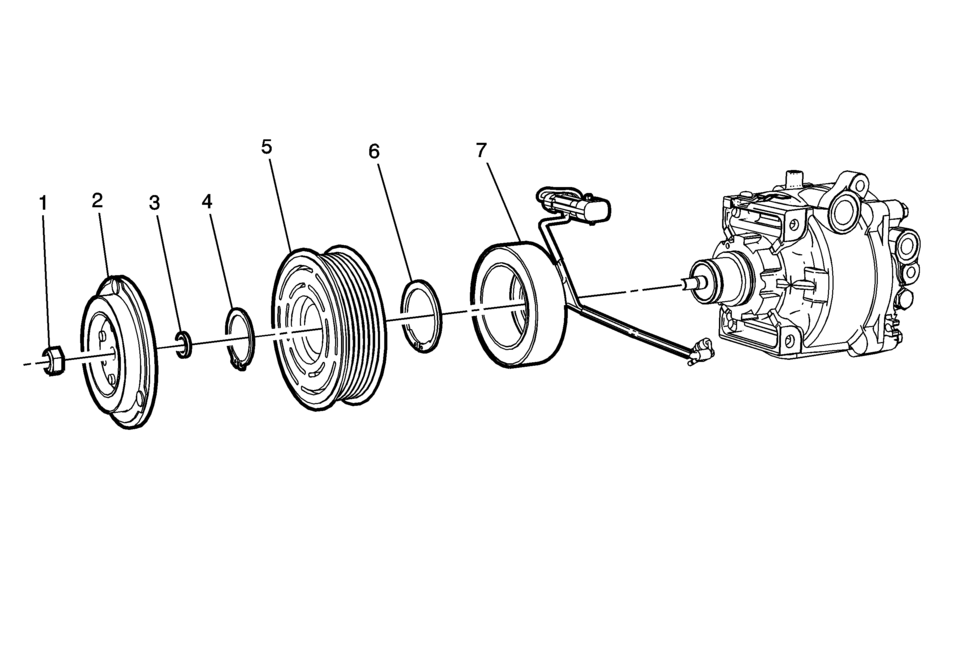
Chevrolet Sonic Repair Manual: Air Conditioning Clutch Assembly Replacement (LUV)
|
Callout |
Component Name |
|---|---|
|
Preliminary Procedure
Remove the air conditioning compressor. Refer to Air Conditioning Compressor Replacement. |
|
|
1 |
Air Conditioning Compressor Clutch Nut Caution: Refer to Fastener Caution. Procedure
Use the CH-37872 holder to hold the compressor clutch plate from turning when removing the nut. Special Tools
CH-37872 Clutch Plate Holder For equivalent regional tools, refer to Special Tools. |
|
2 |
Air Conditioning Compressor Clutch |
|
3 |
Air Conditioning Compressor Clutch Shim (Qty: 5) |
|
4 |
Retaining Ring |
|
5 |
Air Conditioning Compressor Pulley |
|
6 |
Retaining Ring |
|
7 |
Air Conditioning Compressor Coil |
 Air Conditioning Clutch Assembly Replacement (LDE/LUW/LWE)
Air Conditioning Clutch Assembly Replacement
Callout
Component Name
Preliminary Procedure
Remove the air conditioning compresso ...
 Clutch System Description and Operation
Clutch Spin Down Time
Inspect the clutch spin down time as follows:
Apply the parking brake and block the vehicle wheels.
Shift the manual transmission into NEUTRAL.
Start the eng ...
Other materials:
Engine Oil Pressure Light
Caution
Lack of proper engine oil maintenance can damage the engine. Driving with
the engine oil low can also damage the engine. The repairs would not be covered
by the vehicle warranty. Check the oil level as soon as possible. Add oil if required,
but if the oil level is within the operating ...
Air Intake System Description
Circuit/System Description
The primary function of the air intake system is to provide filtered air
to the engine. The system uses a filter element mounted in a housing. The filter
housing is remotely mounted and uses intake ducts to route the incoming air
into the throttle body. T ...
Input, Reaction, and Output Carrier Disassemble
Input, Reaction, and Output Carrier Disassemble
Callout
Component Name
1
Output Carrier Assembly
Note:
The 6T30 and 6T40 have 4 pinions.
The 6T45 and 6T50 have 5 pinions.
...

0.0098