Chevrolet Sonic Repair Manual: Air Conditioning Compressor and Condenser Hose Replacement (LUW)
- Removal Procedure
-
- Recover the refrigerant. Refer to Refrigerant Recovery and Recharging.
- Disconnect the A/C refrigerant pressure sensor electrical connector.
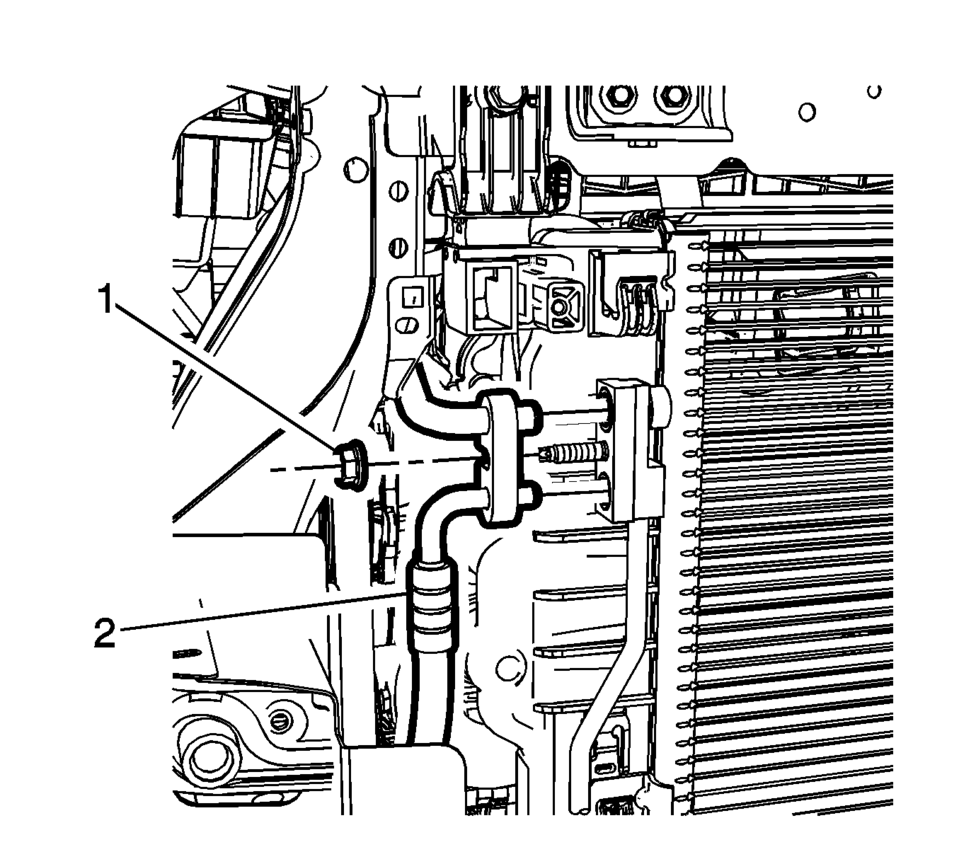
- Remove air conditioning compressor and condenser hose nut (1).
- Remove air conditioning compressor and condenser hose (2) from A/C condenser.
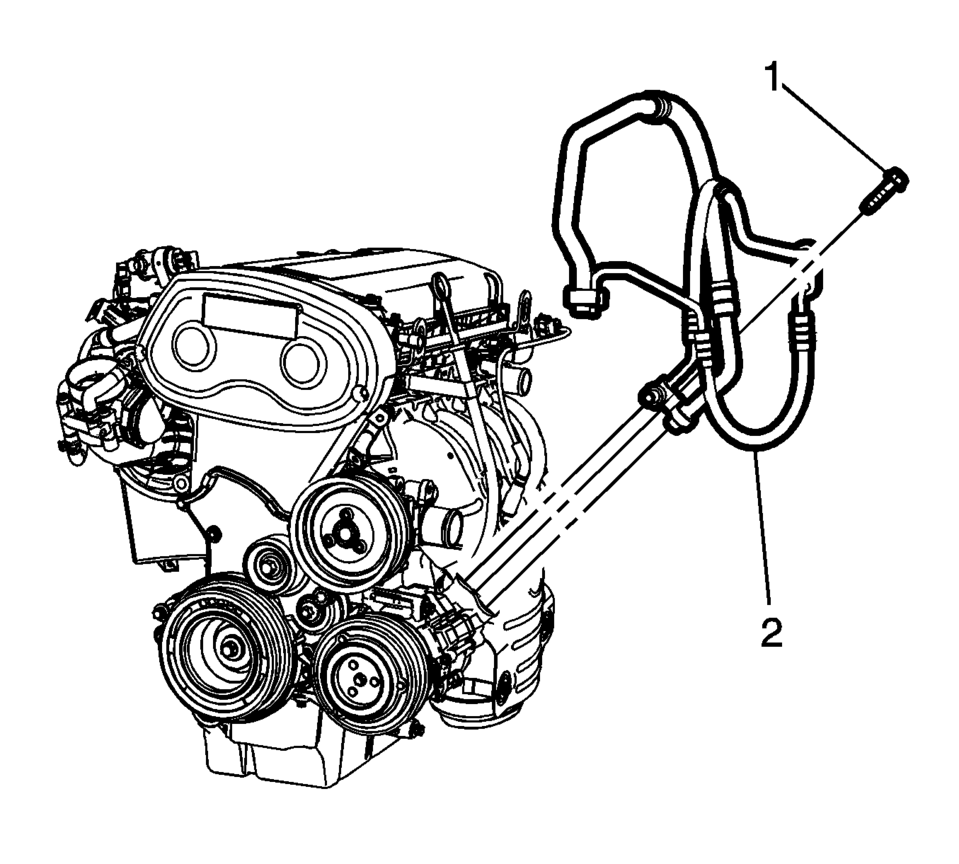
- Remove A/C compressor and condenser hose bolt (1).
- Remove A/C compressor and condenser hose (2) from A/C compressor.
- Remove air conditioning compressor and condenser hose nut (1).
- Remove air conditioning compressor and condenser hose (2) from refrigerant hose.
- Remove air conditioning compressor and condenser hose from the vehicle.

- Installation Procedure
-
- Install air conditioning compressor and condenser hose.
- Install air conditioning compressor and condenser hose (2) to the refrigerant hose.
- Install air conditioning compressor and condenser hose nut (1). Tighten
nut to 22 Y (16 lb ft)
.
- Install air conditioning compressor and condenser hose (2) to the A/C compressor.
- Install air conditioning compressor and condenser hose bolt (1). Tighten
bolt to 22 Y (16 lb ft)
.
- Install air conditioning compressor and condenser hose (2) to the A/C condenser.
- Install air conditioning compressor and condenser hose nut (1). Tighten
nut to 22 Y (16 lb ft)
.
- Connect the A/C refrigerant pressure sensor electrical connector.
- Evacuate and charge the refrigerant system. Refer to Refrigerant Recovery and Recharging.
Note:
Use NEW system seals. Refer to Air Conditioning System Seal Replacement.
Caution:
Refer to Fastener Caution.
 Air Conditioning Compressor and Condenser Hose Replacement (LUV)
Removal Procedure
Recover the refrigerant. Refer to Refrigerant Recovery and Recharging.
Remove the drivetrain and front suspension frame skid plate if equipped.
Refer to Drive ...
 Air Conditioning Compressor and Condenser Hose Replacement (LDE/LWE)
Removal Procedure
Recover the refrigerant. Refer to Refrigerant Recovery and Recharging.
Disconnect the A/C refrigerant pressure sensor electrical connector.
Remove air ...
Other materials:
Selecting an Auxiliary Device
Connect the auxiliary device to the AUX input terminal. Play will begin when
the system has finished reading the information on the device.
If the storage device is already connected, press
, audio, Source
, select AUX from the drop down menu.
...
Protecting Exterior Bright Metal Moldings
Caution
Failure to clean and protect the bright metal moldings can result in a hazy
white finish or pitting. This damage would not be covered by the vehicle warranty.
The bright metal moldings on the vehicle are aluminum. To prevent damage always
follow these cleaning instructions:
Be sure ...
Positive Crankcase Ventilation Hose/Pipe/Tube Replacement
Removal Procedure
Remove the air cleaner outlet duct. Refer to Air Cleaner Outlet Duct
Replacement.
Open the 2 positive crankcase ventilation pipe retainer clips (2) and (3).
Note: Move retainer clamp (1) in direction of the arrow. ...

0.0076