Chevrolet Sonic Repair Manual: Low and Reverse and 1-2-3-4 Clutch Housing, and 1-2-3-4 Clutch Plate Installation (6T30)
|
Callout |
Component Name |
|---|---|
|
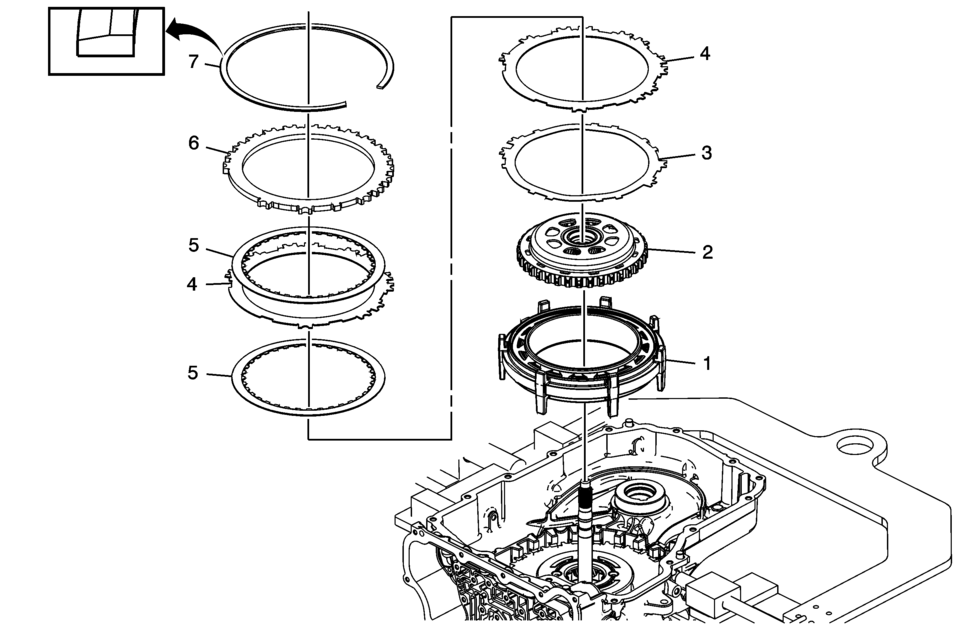
1 |
Low and Reverse and 1??? Clutch Housing Note: The longer legs face the bottom of the case and the oil passages face the valve body end of the case. |
|
2 |
Output Sun Gear Assembly |
|
3 |
1??? Clutch Waved Plate Note: Align the single pair of tabs with the bottom valve body end of the case. |
|
4 |
1??? Clutch Plate (Qty: 2) |
|
5 |
1??? Clutch Plate Assembly (Qty: 2) |
|
6 |
1??? Clutch Backing Plate Note: Align the single tab with the case spline facing the bottom of the case. |
|
7 |
1??? Clutch Backing Plate Retainer Ring Warning: The retainer is under tension. Use care when removing or installing the retainer. Personal injury could result. Caution: Use caution during removal or installation of the retainer ring to avoid damage to the case machined surface in the park pawl area. Burrs or raised edges on the case machined surface can cause the park pawl to bind and prohibit it from engaging the park gear. Note:
Special Tool
DT-28585 Snap Ring Remover or equivalent For equivalent regional tools, refer to Special Tools. |
 Low and Reverse and 1-2-3-4 Clutch Housing Disassemble
Table 1:
Low and Reverse Clutch Piston Removal
Table 2:
1??? Clutch Piston Removal
Low and Reverse Clutch Piston Removal
Low and Reverse Clutch Piston R ...
 Low and Reverse and 1-2-3-4 Clutch Housing, and 1-2-3-4 Clutch Plate Installation
(6T40/45/50)
Low and Reverse and 1-2-3-4 Clutch Housing, and 1-2-3-4 Clutch Plate Installation
(6T40/45/50)
Low and Reverse and 1-2-3-4 Clutch Housing, and 1-2-3-4 Clutch Plate
Installation
Callout
Component Name
1
Low and Re ...
Other materials:
OnStar Additional Information
Transferring Service
Press to request account transfer
eligibility information. The Advisor can assist in canceling or removing account
information. If OnStar receives information that vehicle ownership has changed,
OnStar may send a voice message to the vehicle, requesting updated account i ...
Driver or Passenger Seat Back Cushion Frame Replacement
Driver or Passenger Seat Back Cushion Frame Replacement
Callout
Component Name
Preliminary Procedures
Remove the driver or passenger seat. Refer to Driver or Passenger
Seat Removal and Installation
Remove the front seat c ...
Rear Seat Cushion Removal and Installation
Rear Seat Cushion Removal and Installation
Callout
Component Name
1
Rear Seat Cushion Replacement
Procedure
Release the rear seat center seat belts.
Lift up on the front of the seat cushion at the latch locati ...

0.0056