Chevrolet Sonic Repair Manual: Low and Reverse and 1-2-3-4 Clutch Housing Disassemble
| Table 1: | Low and Reverse Clutch Piston Removal |
| Table 2: | 1??? Clutch Piston Removal |
- Low and Reverse Clutch Piston Removal
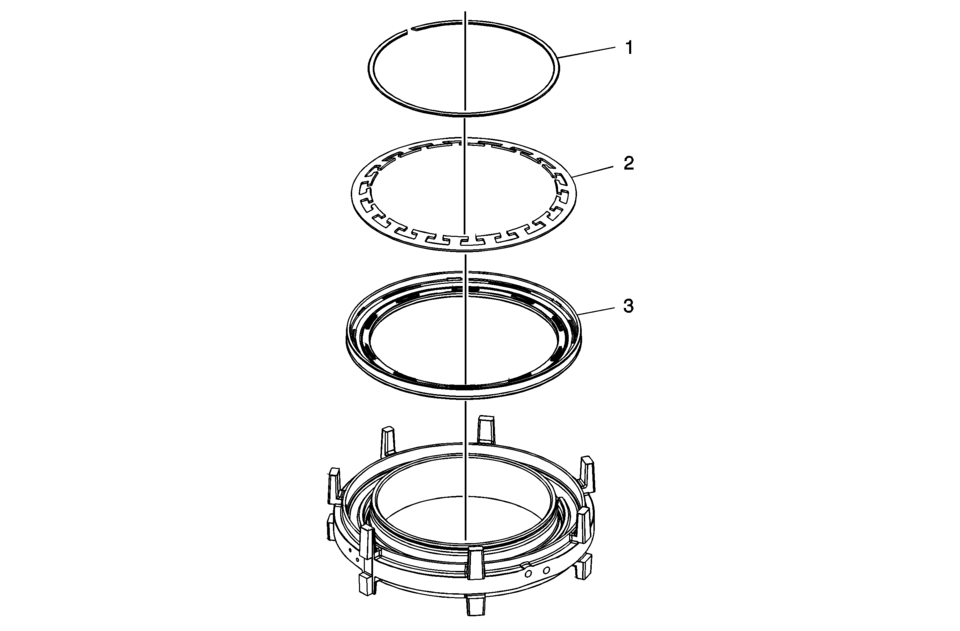
Low and Reverse Clutch Piston Removal Callout
Component Name
1
Low and Reverse Clutch Spring Retainer
Special Tool
GE-8059 Snap Ring Pliers ?#8201;Parallel Jaw
For equivalent regional tools, refer to Special Tools.
2
Low and Reverse Clutch Spring
3
Low and Reverse Clutch Piston
- 1??? Clutch Piston Removal
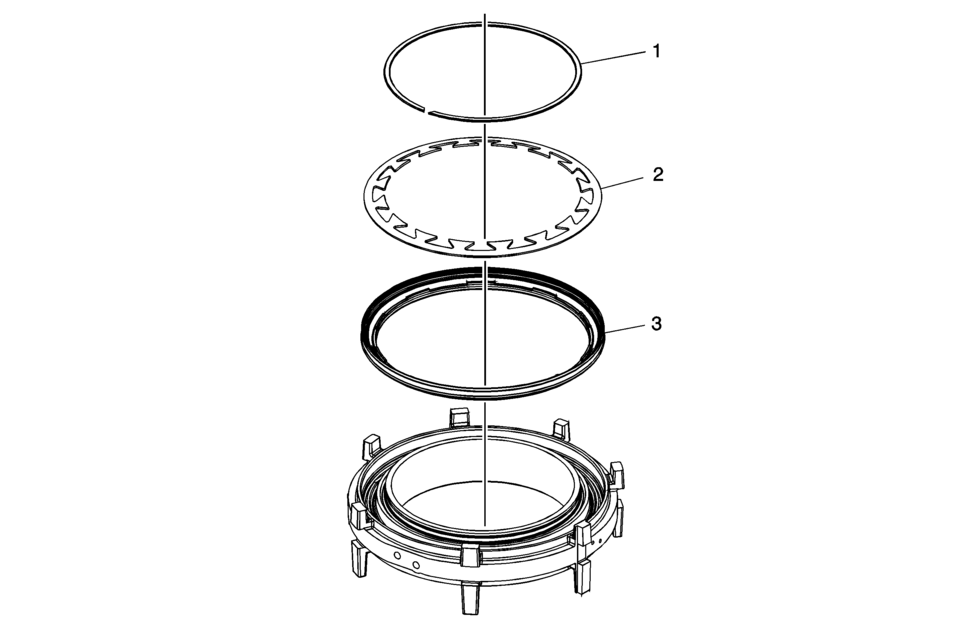
1??? Clutch Piston Removal Callout
Component Name
1
1??? Clutch Spring Retainer
Special Tool
GE-8059 Snap Ring Pliers ?#8201;Parallel Jaw
For equivalent regional tools, refer to Special Tools.
2
1??? Clutch Spring
3
1??? Clutch Piston
 Low and Reverse and 1-2-3-4 Clutch Housing Cleaning and Inspection
Low and Reverse and 1-2-3-4 Clutch Housing Cleaning and Inspection
Callout
Component Name
Caution: After cleaning the transmis ...
 Low and Reverse and 1-2-3-4 Clutch Housing, and 1-2-3-4 Clutch Plate Installation
(6T30)
Low and Reverse and 1-2-3-4 Clutch Housing, and 1-2-3-4 Clutch Plate Installation
(6T30)
Low and Reverse and 1-2-3-4 Clutch Housing, and 1-2-3-4 Clutch Plate
Installation
Callout
Component Name
1
Low and Re ...
Other materials:
Headlamp Replacement
Headlamp Replacement
Callout
Component Name
Preliminary Procedure
Remove the front bumper fascia. Refer to Front Bumper Fascia Replacement.
1
Headlamp Assembly Screw (Qty:?€‰4)
Cautio ...
Air Conditioning Clutch Assembly Replacement (LUV)
Air Conditioning Clutch Assembly Replacement
Callout
Component Name
Preliminary Procedure
Remove the air conditioning compressor. Refer to Air Conditioning Compressor
Replacement.
1
Air Conditio ...
Clutch Master Cylinder Reservoir Hose Replacement
Removal Procedure
Note: Before disconnecting the reservoir tank hose, remove
the clutch/brake fluid from the reservoir tank.
Remove the clutch master cylinder reservoir hose (1)
from the reservoir tank.
Remove the clutch master cylinder reservoir ...

0.0054