Chevrolet Sonic Repair Manual: Low and Reverse and 1-2-3-4 Clutch Housing Cleaning and Inspection
|
Callout |
Component Name |
|---|---|
|
Caution: After cleaning the transmission components, allow to air dry. Do not use cloth or paper towels in order to dry any transmission components. Lint from the towels can cause component failure. Caution: Do not reuse cleaning solvents. Previously used solvents may deposit sediment which may damage the component.
|
|
|
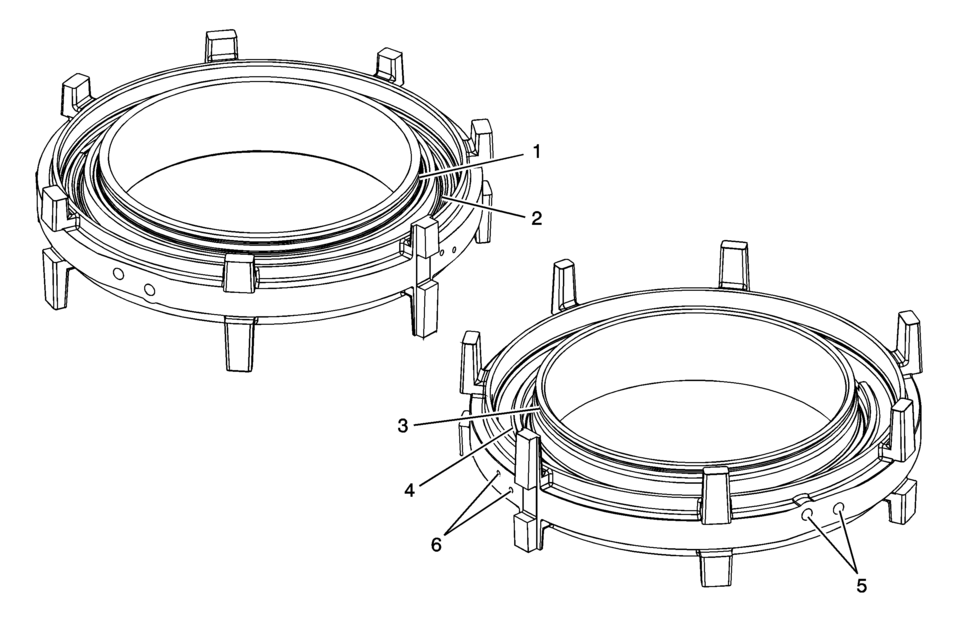
1 |
1??? Clutch Spring Retainer Groove |
|
2 |
1??? Clutch Piston Bore |
|
3 |
Low and Reverse Clutch Spring Retainer Groove |
|
4 |
Low and Reverse Clutch Piston Bore |
|
5 |
Clutch Oil Passages |
|
6 |
Air Bleed Passages |
 Low and Reverse and 1-2-3-4 Clutch Housing Assemble (6T40/45/50)
Table 1:
1??? Clutch Piston Installation
Table 2:
Low and Reverse Clutch Piston Installation
1??? Clutch Piston Installation
1??? Clutch Piston Installa ...
 Low and Reverse and 1-2-3-4 Clutch Housing Disassemble
Table 1:
Low and Reverse Clutch Piston Removal
Table 2:
1??? Clutch Piston Removal
Low and Reverse Clutch Piston Removal
Low and Reverse Clutch Piston R ...
Other materials:
Event Data Recorders
This vehicle is equipped with an event data recorder (EDR). The main purpose
of an EDR is to record, in certain crash or near crash-like situations, such as
an air bag deployment or hitting a road obstacle, data that will assist in understanding
how a vehicle’s systems performed. The EDR is ...
Front Side Door Check Link Replacement
iii!
Front Side Door Check Link Replacement
Callout
Component Name
Preliminary Procedure
Remove the front side door trim panel. Refer to Front Side Door Trim
Replacement.
1
Front Side Door Check ...
Battery Negative Cable Replacement
Battery Negative Cable Replacement
Callout
Component Name
Preliminary Procedures
Disconnect the battery current sensor connector.
Remove the battery tray. Refer to Battery Tray Replacement.
1
Bo ...

0.0052