Chevrolet Sonic Repair Manual: Air Conditioning Compressor and Condenser Hose Replacement (LUV)
- Removal Procedure
-
- Recover the refrigerant. Refer to Refrigerant Recovery and Recharging.
- Remove the drivetrain and front suspension frame skid plate if equipped. Refer to Drivetrain and Front Suspension Frame Skid Plate Replacement.
- Remove the front fascia assembly. Refer to Front Bumper Fascia Replacement.
- Disconnect the A/C refrigerant pressure sensor electrical connector.
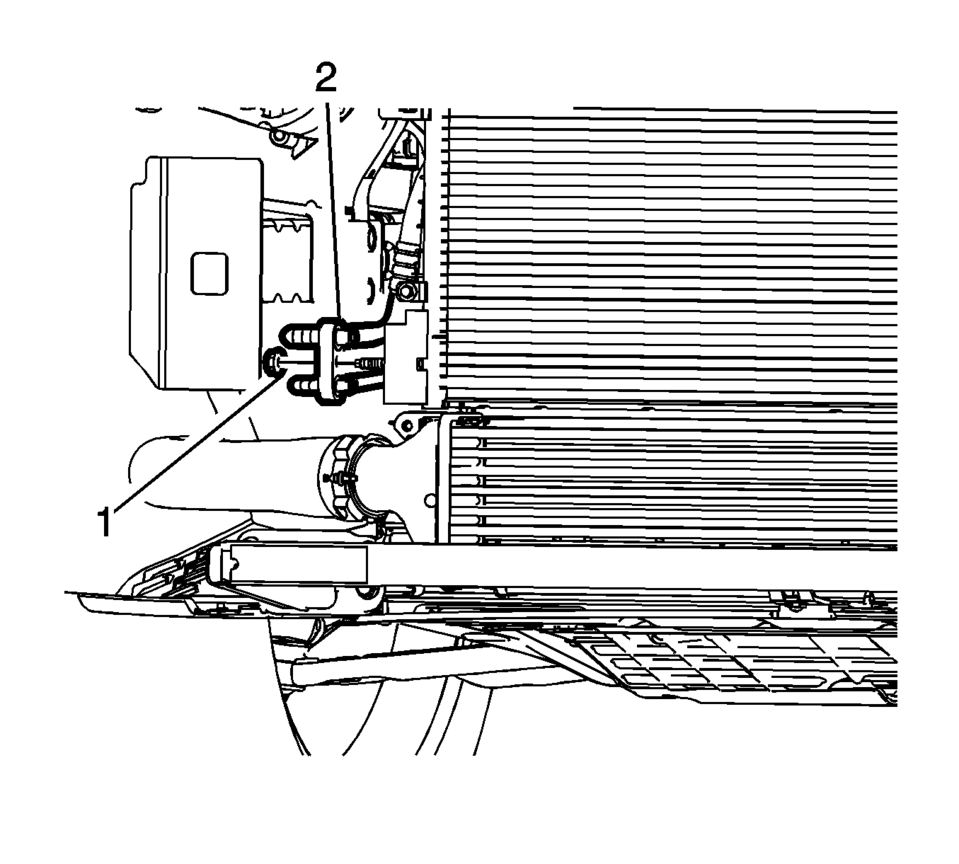
- Remove air conditioning compressor and condenser hose nut (1).
- Remove air conditioning compressor and condenser hose (2) from A/C condenser.
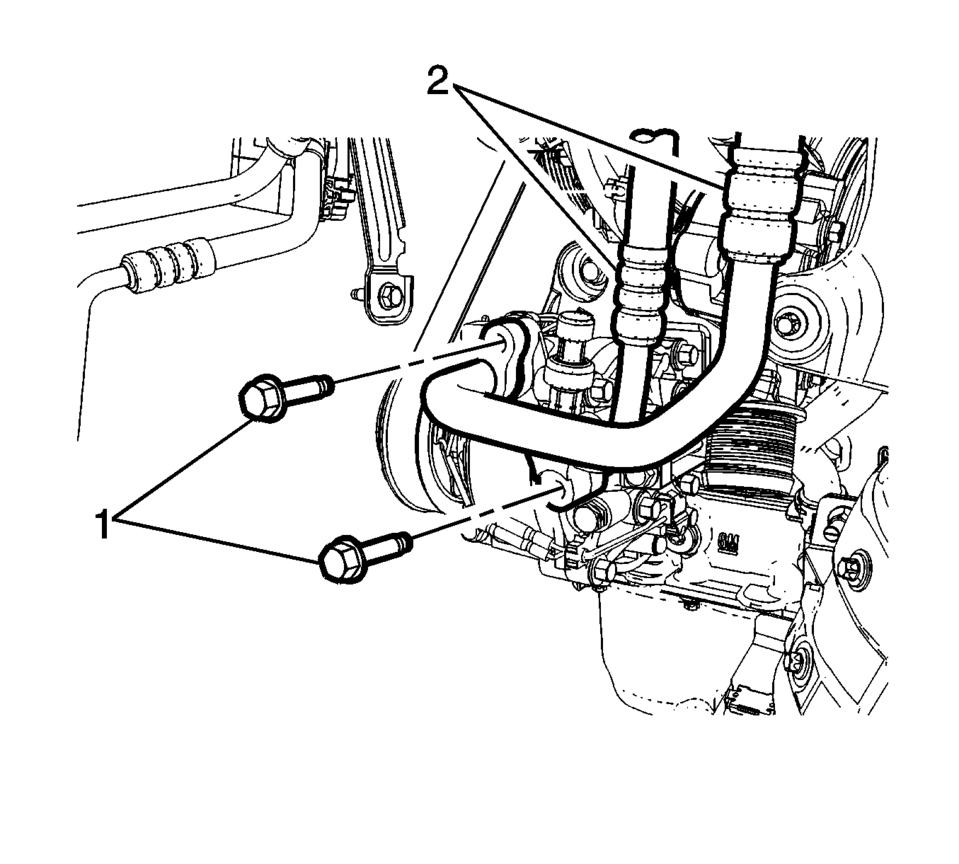
- Remove A/C compressor and condenser hose bolts (1).
- Remove A/C compressor and condenser hose (2) from A/C compressor.
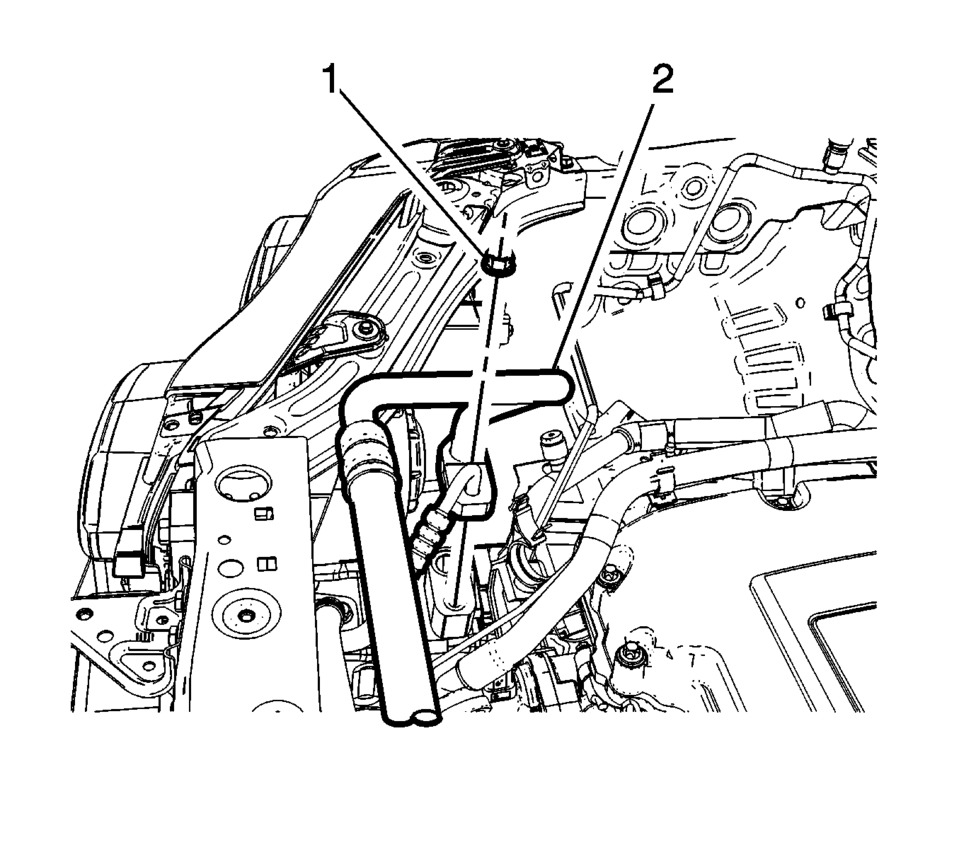
- Remove air conditioning compressor and condenser hose nut (1).
- Remove air conditioning compressor and condenser hose (2) from refrigerant hose.
- Remove air conditioning compressor and condenser hose from the vehicle.
- Discard all the old air conditioning seals.
- Transfer the air conditioning pressure sensor to the new line assembly.
_. i/v
- Installation Procedure
-
- Install NEW air conditioning system seals. Refer to Air Conditioning System Seal Replacement.
- Install air conditioning compressor and condenser hose assembly into the vehicle.
- Install air conditioning compressor and condenser hose (2) to the refrigerant hose.
- Install air conditioning compressor and condenser hose nut (1) and tighten
the nut to 22 Y (16 lb ft)
.
- Install air conditioning compressor and condenser hose (2) to the A/C compressor.
- Install air conditioning compressor and condenser hose bolts (1) and
tighten the bolt to 22 Y (16 lb ft)
.
- Install air conditioning compressor and condenser hose (2) to the A/C condenser.
- Install air conditioning compressor and condenser hose nut (1) and tighten
the nut to 22 Y (16 lb ft)
.
- Connect the A/C refrigerant pressure sensor electrical connector.
- Install the front fascia assembly. Refer to Front Bumper Fascia Replacement.
- Install the drivetrain and front suspension frame skid plate if equipped. Refer to Drivetrain and Front Suspension Frame Skid Plate Replacement.
- Charge the refrigerant system. Refer to Refrigerant Recovery and Recharging.
_. i/v
Caution:
Refer to Fastener Caution.
 Air Conditioning Compressor and Condenser Hose Replacement (LDE/LWE)
Removal Procedure
Recover the refrigerant. Refer to Refrigerant Recovery and Recharging.
Disconnect the A/C refrigerant pressure sensor electrical connector.
Remove air ...
 Air Conditioning Compressor and Condenser Hose Replacement (LUW)
Removal Procedure
Recover the refrigerant. Refer to Refrigerant Recovery and Recharging.
Disconnect the A/C refrigerant pressure sensor electrical connector.
Remove ...
Other materials:
Special Tools
Illustration
Tool Number/Description
3-0207944
Main Shaft Tapered Bearing Insert Tool
39506289
Universal Adapter, 2.5L HST Engine
69604356
Gear Pullers
...
Seat adjustment using touch screen display
Example
The Nissan Armada offers an advanced and intuitive way to control seat adjustments
through its integrated touch screen display. This system enhances convenience by
allowing the driver to manage multiple seating functions quickly and efficiently
without relying solely on physical c ...
Lower Anchors and Tethers for CHildren System (LATCH)
LATCH system lower anchor locations - models with 2nd row captain's seats
LATCH system lower anchor locations - models with 2nd row bench seat
Lower Anchors and Tethers for CHildren System (LATCH)
Basic information
The Nissan Armada is equipped with a dedicated child safety anchoring ...

0.0066