Chevrolet Sonic Repair Manual: Engine Coolant Fan Replacement (LDE/LUW)
- Removal Procedure
-
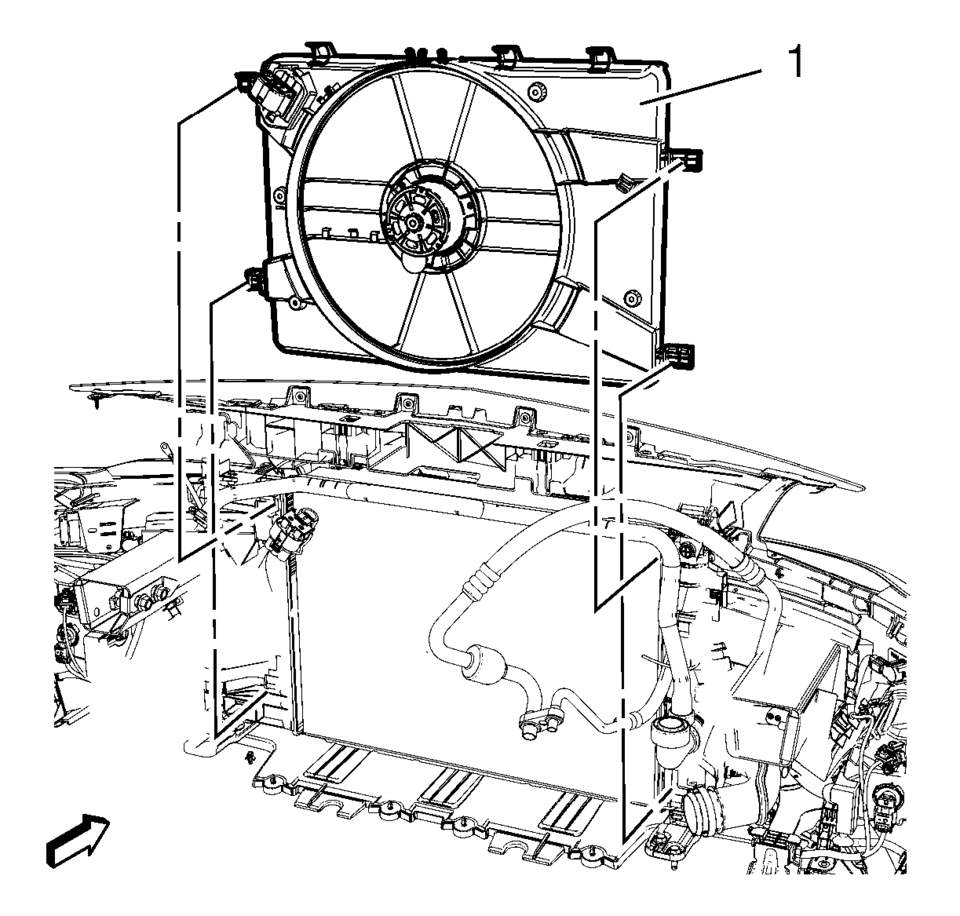
- Unclip transmission cooler lines from shroud if equipped.
- Unclip radiator surge tank outlet hose from fan shroud.
- Disconnect the engine coolant fan wiring harness.
- Unclip the engine coolant fan shroud (1) at the shown four mounting points.
- Remove the engine coolant fan shroud (1).
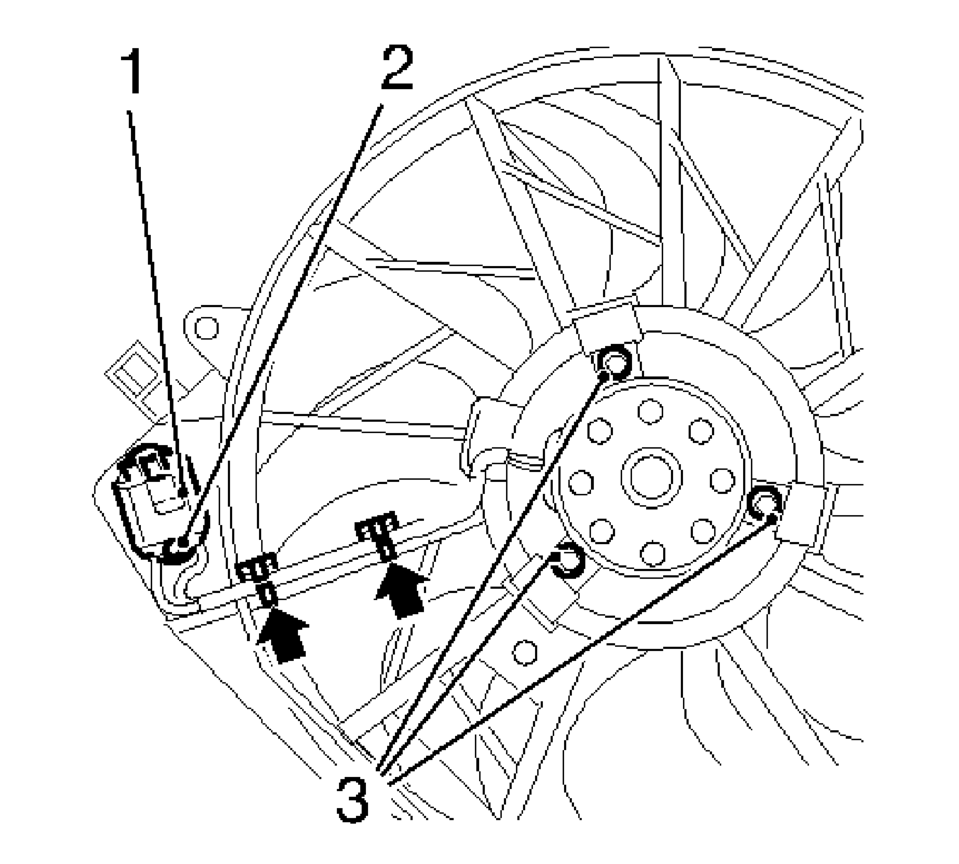
- Remove the engine coolant fan resistor (1) by unclipping the retainer clip (2).
- Unclip the engine coolant fan to engine coolant fan resistor wiring harness (arrows).
- Remove the 3 engine coolant fan engine bolts (3) from the engine coolant fan.
- Remove the engine coolant fan.
Note:
You stand against driving direction.
- Installation Procedure
-
- Install the engine coolant fan.
- Install the 3 engine coolant fan engine bolts (3) to the engine coolant
fan and tighten to 4 Y (35 lb in)
.
- Clip in the engine coolant fan to the engine coolant fan resistor wiring harness (arrows).
- Install the engine coolant fan resistor (1) by clipping the retainer clip (2).
- Install the engine coolant fan shroud (1).
- Clip in the engine coolant fan shroud (1) at the shown four mounting points.
- Connect the engine coolant fan wiring harness.
- Clip the radiator surge tank outlet hose to the fan shroud.
- Clip the transmission cooler lines to the fan shroud if equipped.
Caution:
Refer to Fastener Caution
 Engine Coolant Air Bleed Hose Replacement (LUV)
Engine Coolant Air Bleed Hose Replacement
Callout
Component Name
1
Engine Coolant Air Bleed Hose Clamp (Qty: 2)
...
 Engine Coolant Fan Replacement (LUV)
Engine Coolant Fan Replacement
Callout
Component Name
Preliminary Procedure
Remove the engine coolant fan shroud. Refer to Engi ...
Other materials:
Starting the Vehicle
1. Aim the RKE transmitter at the vehicle.
2. Press and release .
3. Immediately after completing Step 2, press and hold
for at least four seconds or until
the turn signal lamps flash.
When the engine starts, the parking lamps will turn on and remain on as long
as the engine is running. The ...
Repairing Damaged Wire Insulation
If the wire insulation has been chafed, or broken, enough to show the conductive
portion of the wire, and the wire is not damaged, determine the length of insulation
that needs to be repaired. If the repair is less than 280?€‰mm (11?€‰in), cut the
wire within the damaged area. Then sli ...
Intake Air Pressure and Temperature Sensor Replacement
Intake Air Pressure and Temperature Sensor Replacement
Callout
Component Name
Preliminary Procedure
Remove the left front wheelhouse liner. Refer to
Front Wheelhouse Liner Replacement.
1
Intake A ...

0.0061