Chevrolet Sonic Repair Manual: Crankshaft Front Oil Seal Replacement
Special Tools
- EN-960 Installer
- EN-45000 Remover Oil seal
For equivalent regional tools, refer to Special Tools.
- Removal Procedure
-
- Remove the crankshaft balancer. Refer to Crankshaft Balancer Replacement.
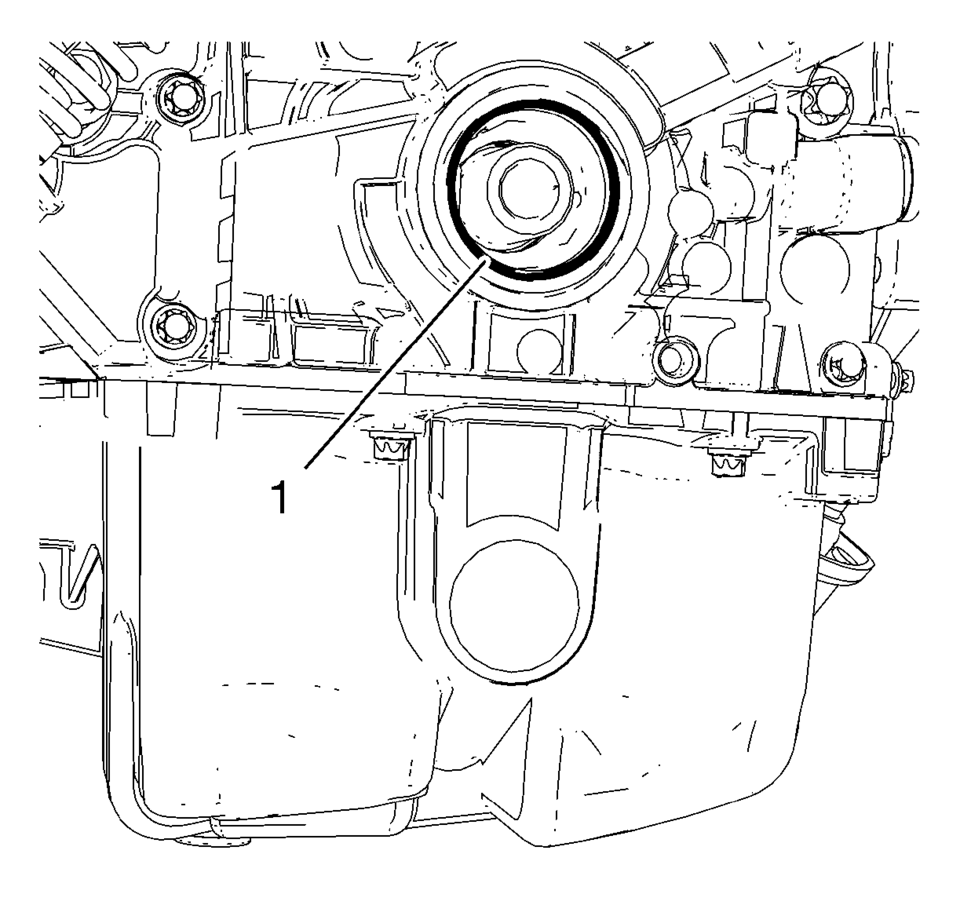
- Place a drain pan underneath the front crankshaft seal area.
- Remove crankshaft front oil seal (2) from engine front cover. Use EN-45000 remover (1).
- Installation Procedure
-
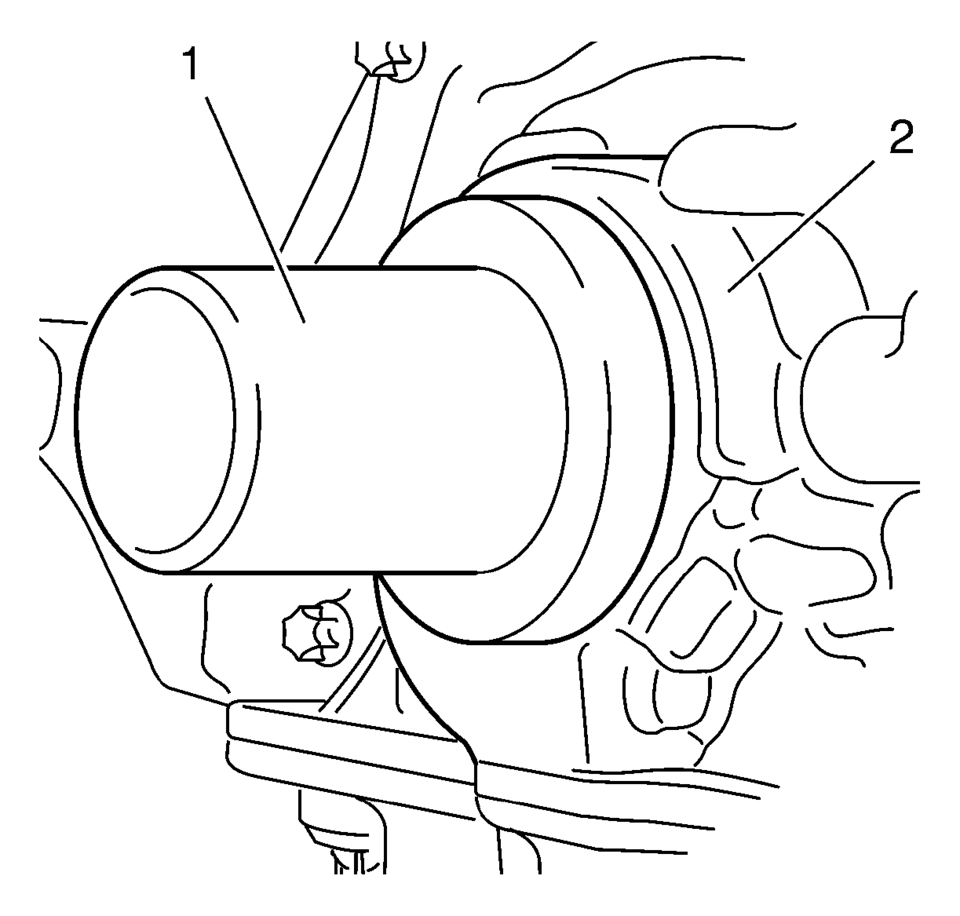
- Install NEW crankshaft front oil seal (1) to EN-960 installer (2).
- Install crankshaft front oil seal by means of EN-960 installer (1) to engine front cover (2).
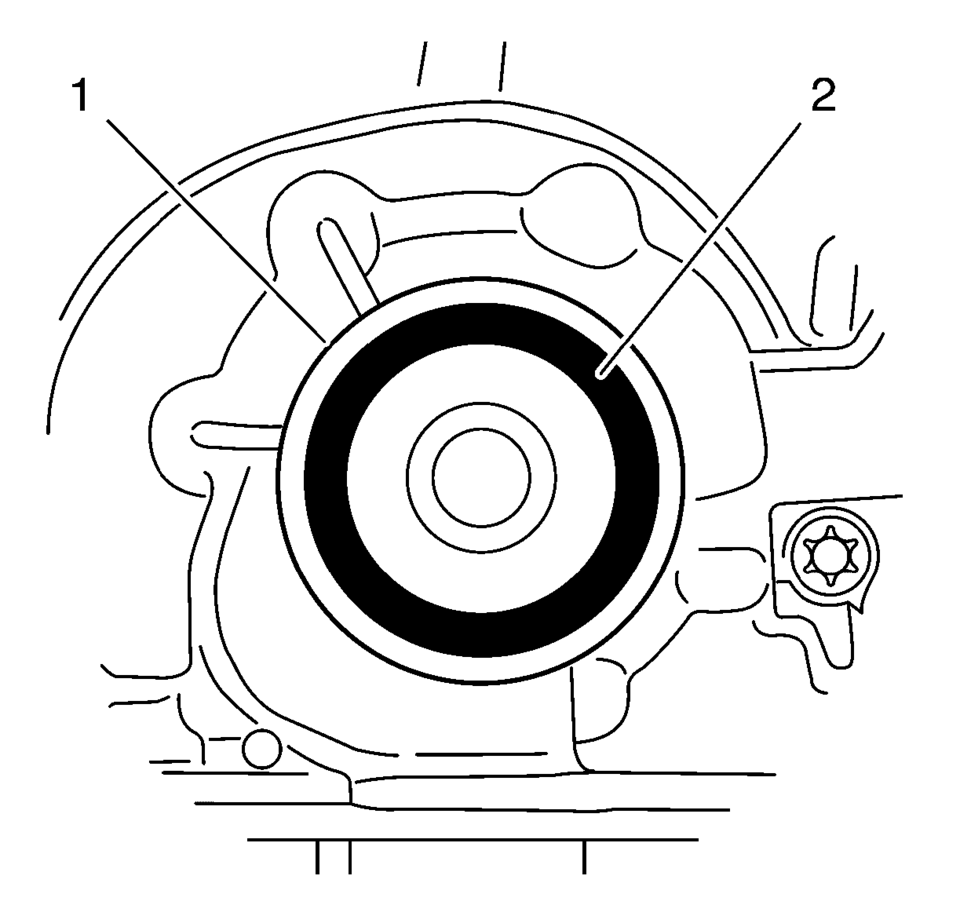
- Ensure that crankshaft front oil seal (2) is flush with engine front cover (1).
- Install crankshaft balancer. Refer to Crankshaft Balancer Replacement.
- Remove the drain pan.
- Check and correct engine oil level.

 Crankshaft Front Oil Seal Installation
Special Tools
EN-6351 Mounting Sleeves
For equivalent regional tools, refer to Special Tools.
Clean the sealing surfaces.
Slide the EN-6351 sleeves (2) protective sleeve onto t ...
 Crankshaft Rear Oil Seal Installation
Special Tools
EN-658-1 Installer
EN-235-6 Installer
For equivalent regional tools, refer to Special Tools.
Slide the crankshaft rear oil seal (2) across the EN-235-6 installe ...
Other materials:
Overview (AM-FM Radio)
45tune<=backtoneseekl>klseekpushmenu101112131415
FAV 1-2-3 (Favorites)
Radio: Opens the favorites list.
O /VOL (Power/Volume)
Turns the system on or off and adjusts the volume.
Buttons 1−6
Radio: Saves and selects favorite stations.
SEEK ¨
Radio ...
Water Outlet Installation
Clean the sealing surfaces.
Install the water outlet (2) and a NEW water outlet seal ring (1).
Caution: Refer to Fastener Caution.
Install the 3 water outlet bolts (3) and tighten to 8 Y (71 lb in).
...
Basic information
WARNING
Failure to strictly follow all safety warnings and operating instructions
related to the Intelligent Driver Alertness system in the Nissan Armada may result
in serious injury or fatal accidents.
The Nissan Armada I-DA system is designed –∏—Å–∫–ª—é—á–∏—Ç–µ–ª—å–Ω–æ as a driver assista ...

0.0075