Chevrolet Sonic Repair Manual: Differential Case Disassemble
Special Tools
- 6-9607346 Sensor Ring Gear Puller
- J-810704 Steering Column Center Bar Puller
- J-810721 Axle Shaft Seal Remover Support Base
- R-0006749 Support Base
- R-0407011 Bearing Race Remover
- R-0007761 Universal Handle for Pullers and Installers
- S-9407195 Pinion Gear Case Bearing Installer
- T-9804678 Speed Sensor Reluctor Wheel Remover
For equivalent regional tools, refer to Special Tools.
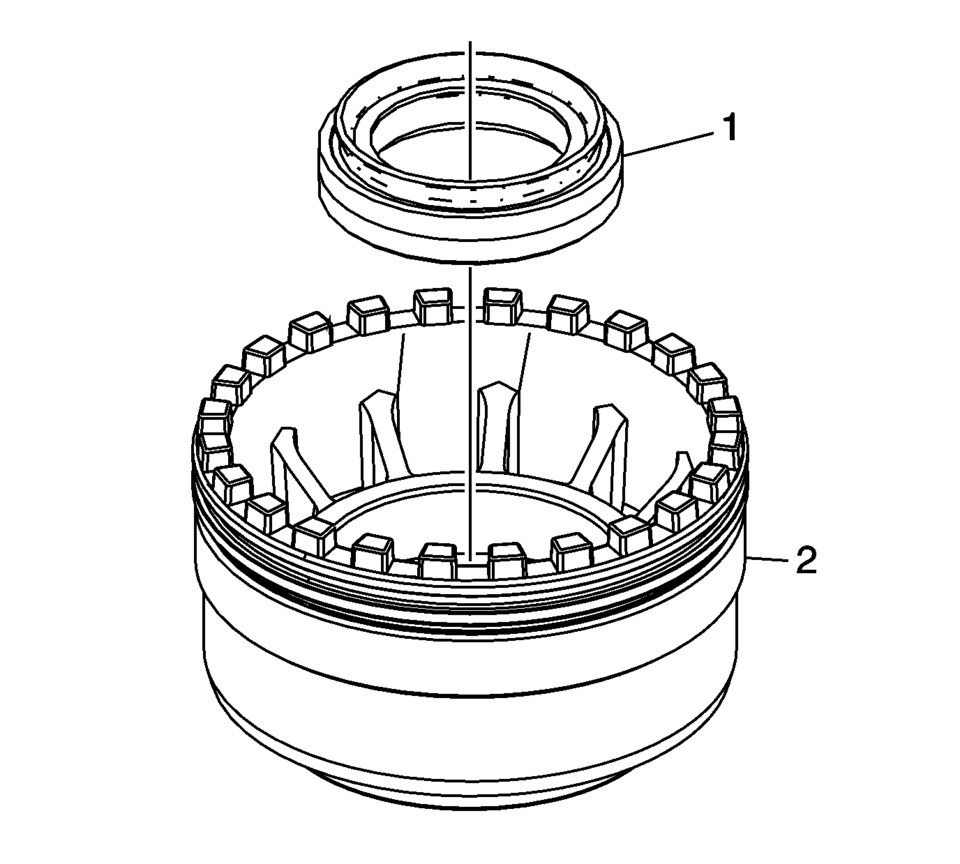
- Remove the front wheel drive shaft oil seal (1) from the front differential bearing adjuster (2).
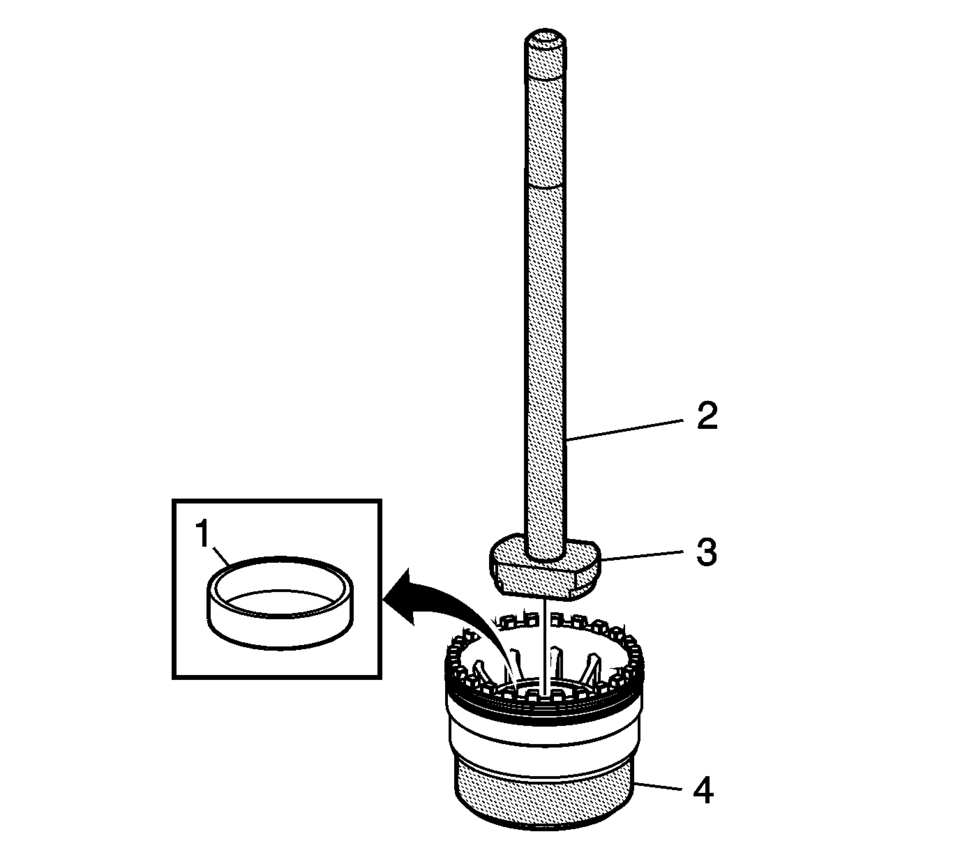
- Remove the front differential bearing race (1) from the front differential bearing adjuster using the R-0007761 handle (2), R-0407011 remover (3), and the J-810721 support base (4).
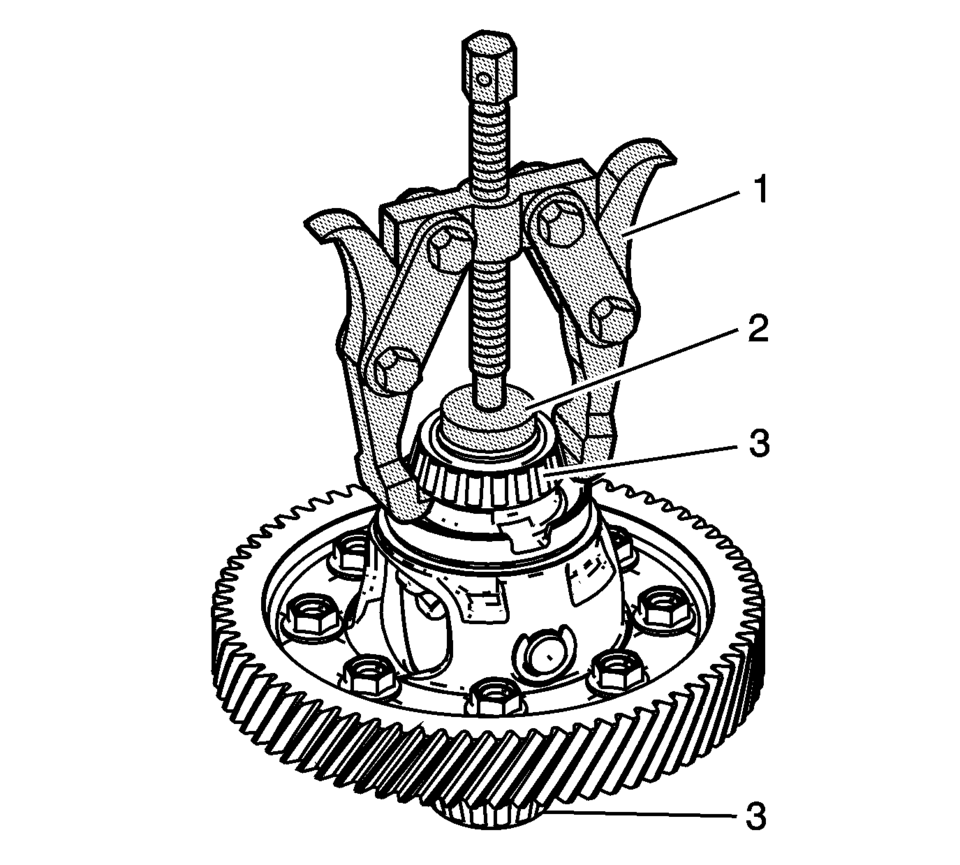
- Remove the ring front wheel speed sensor reluctor wheel (1) using the 6-9607346 puller (2), S-9407195 installer (3), and the T-9804678 remover (4).
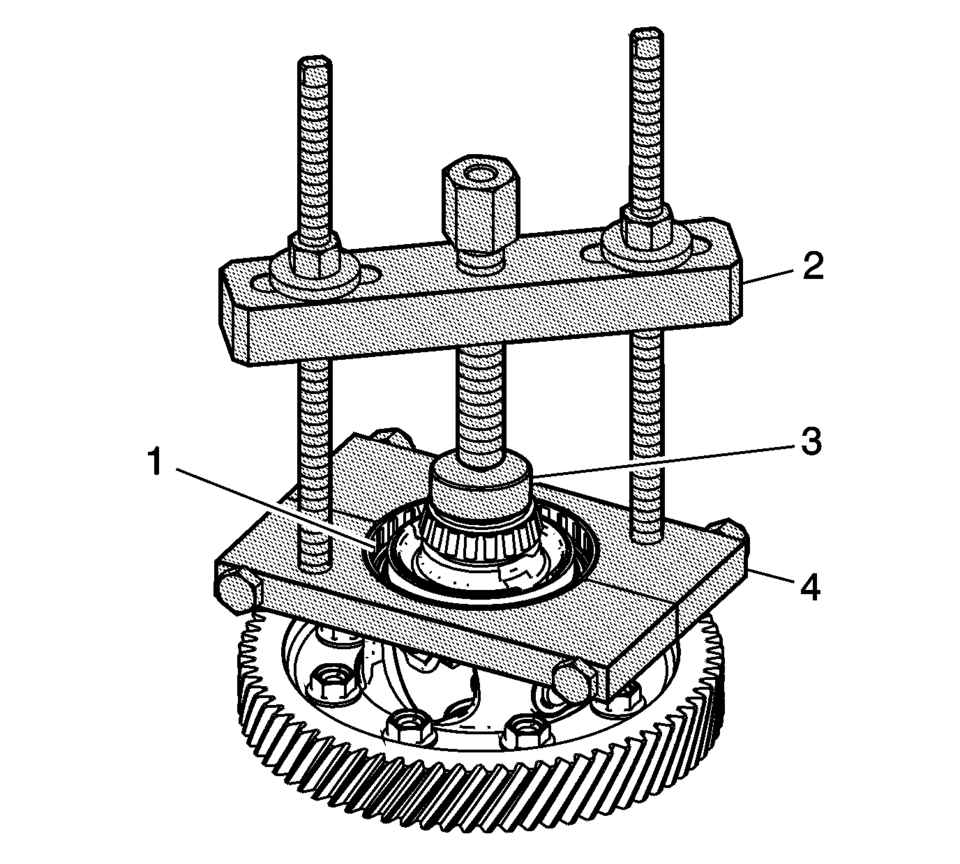
- Remove the front differential bearing assemblies (3) using the J-810704 puller (1) and R-0006749 support base (2) .
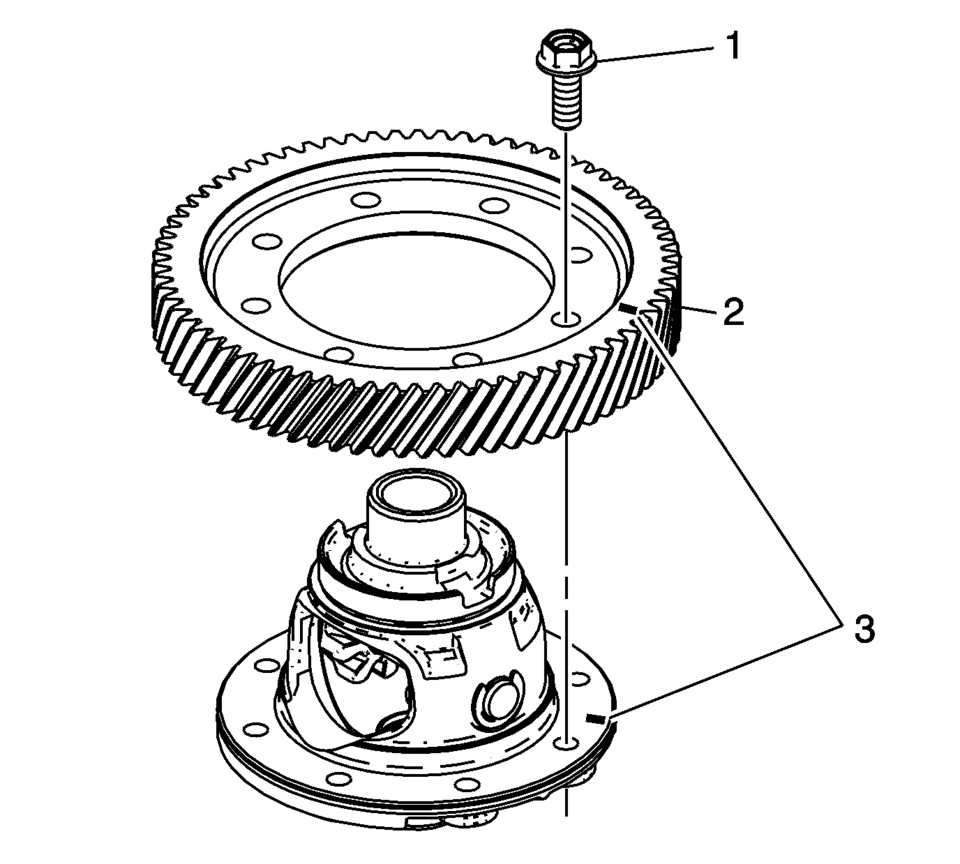
- Place a mark (3) on the differential and the differential ring gear for realigning parts during assembly in case both components are reused.
- Remove the front differential ring gear bolts (1) and the front differential ring gear (2).
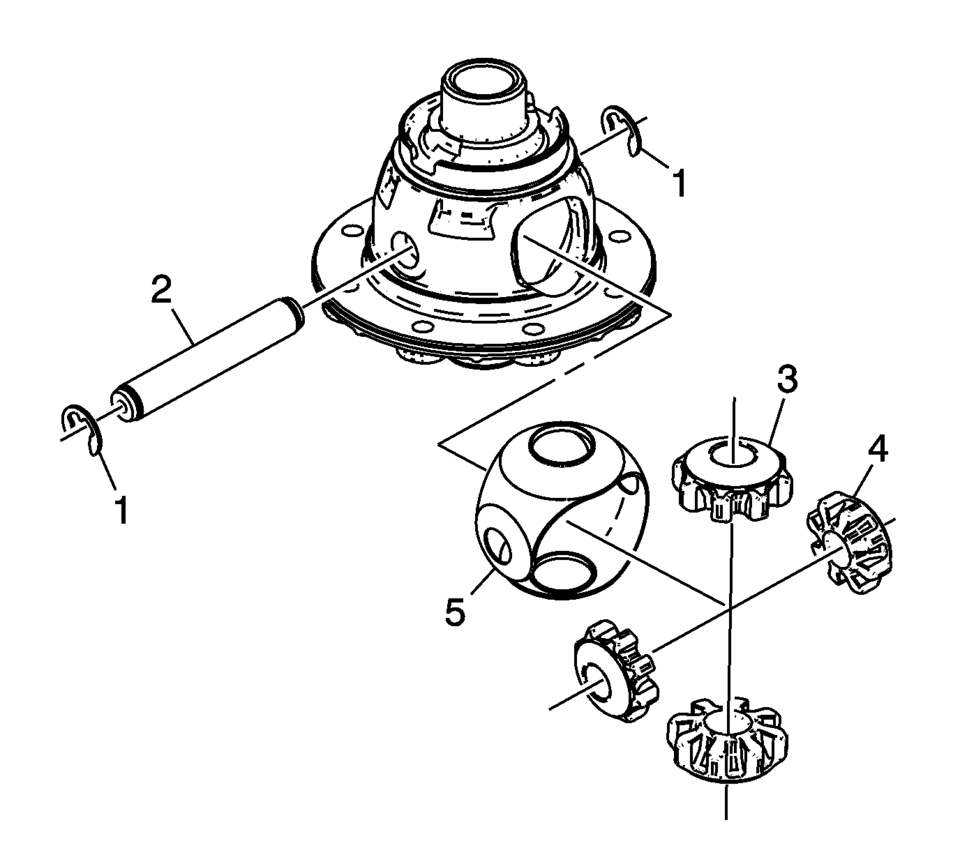
- Remove the pinion gear shaft retaining washers (1) and the front differential pinion gear shaft (2).
- Remove the front differential pinion gears (3) and side gears (4).
- Remove the front differential pinion and side gear thrust washer (5).
Note:
Do not interchange outer and inner races respectively when re-using tapered roller bearings.
 Differential Case Assemble
Special Tools
J-810721 Axle Shaft Seal Remover Support Base
R-0407011 Bearing Race Remover
R-0407012 Differential Carrier Cone Bearing Cap Driver
R-0007761 Universal Handle for Pullers and ...
 Clutch and Differential Housing Assemble
Special Tools
R-0007761 Universal Handle for Pullers and Installers
R-0407009 Countershaft Front Bearing Driver
R-0407010 Input Shaft Needle Bearing Puller and Driver
R-0407014 Gearshift De ...
Other materials:
Radio Front Side Door Speaker Replacement
Radio Front Side Door Speaker Replacement
Callout
Component Name
Preliminary Procedure
Remove the front side door trim. Refer to Front
Side Door Trim Replacement.
1
Radio Front Side Door Speaker ...
Front Disc Brake Pads Replacement
Removal Procedure
Warning: Refer to Brake Dust Warning.
Note: Always replace disc brake pads in axle sets.
Inspect the fluid level in the brake master cylinder reservoir.
If the brake fluid level is midway between the maximum-full point and
the minimum allowab ...
P-Metric Sized Tires Description
245/50r16953typeloadindep-passengerttemporarylt-lighttruckspeedsymbolsectionwidth(millimeters)235245275construction(sectionwidth)ddagonal(bas)40sectionwidthsectionheight
Replacement tires should be of the same tire performance criteria (TPC) specification
number. This will ensure the same size, ...

0.0059