Chevrolet Sonic Repair Manual: Driver or Passenger Seat Cushion Frame Replacement
|
Callout |
Component Name |
|---|---|
Preliminary Procedures
|
|
|
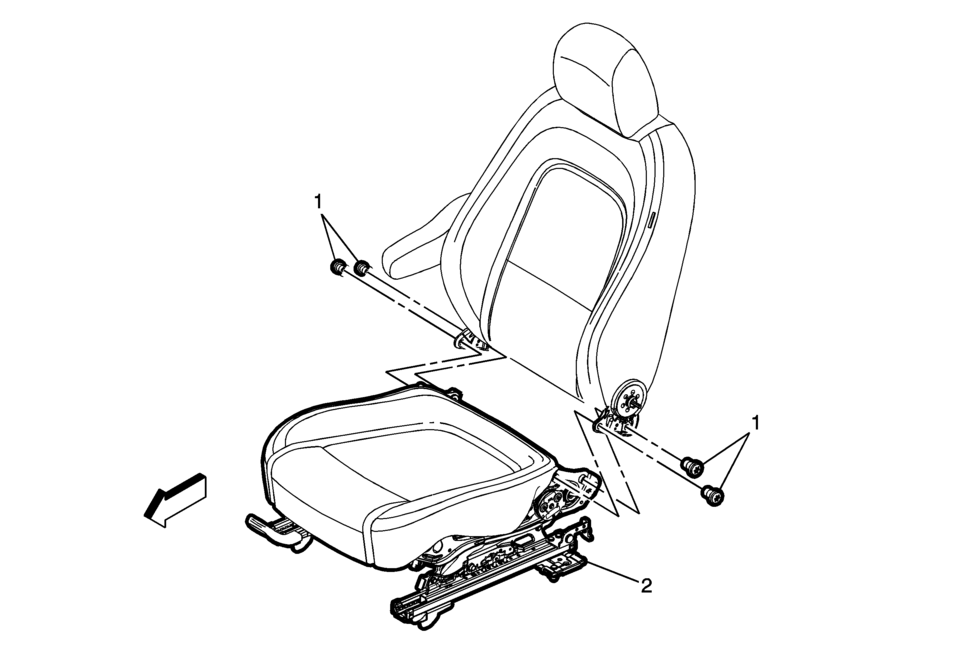
1 |
Front Seat Cushion Frame Bolt (Qty:?€‰4) Caution: Refer to Fastener Caution.
22?€‰Y (16?€‰lb?€‰ft) |
|
2 |
Driver or Passenger Seat Cushion Frame Procedure
|
 Driver or Passenger Seat Back Cushion Frame Replacement
Driver or Passenger Seat Back Cushion Frame Replacement
Callout
Component Name
Preliminary Procedures
Remove the driver or passenge ...
 Drivetrain and Front Suspension Frame Replacement
Special Tools
EN-45059 Angle Meter
For equivalent regional tools, refer to Special Tools.
Removal Procedure
Support the radiator and condenser from above using the upper brackets
...
Other materials:
Wheel Replacement
Replace any wheel that is bent, cracked, or badly rusted or corroded. If wheel
nuts keep coming loose, the wheel, wheel bolts, and wheel nuts should be replaced.
If the wheel leaks air, replace it. Some aluminum wheels can be repaired. See your
dealer if any of these conditions exist.
Your d ...
Battery Tray Replacement
Battery Tray Replacement
Callout
Component Name
Preliminary Procedures
Remove the battery. Refer to Battery Replacement.
Unclip the engine control module (ECM) bracket from the battery
tray and set aside.
Unclip the ...
Control Solenoid Valve and Transmission Control Module Assembly Replacement
Removal Procedure
Remove the transmission control valve body cover.
Refer to Control Valve Body Cover Replacement.
Disconnect the output speed sensor electrical connector (2).
Disconnect the shift position switch electrical connector (3).
Disconn ...

0.0076