Chevrolet Sonic Repair Manual: Engine Mount Replacement
|
Callout |
Component Name |
|---|---|
Preliminary Procedures
|
|
|
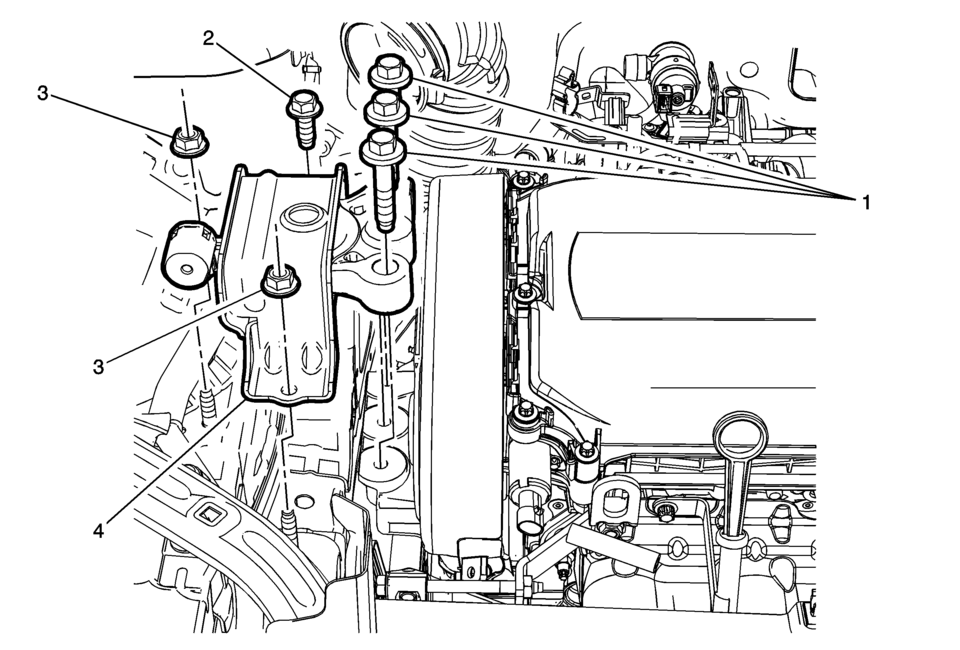
1 |
Engine Mount Bracket to Mount Bolt (Qty; 3) Caution: Refer to Fastener Caution. Note: Use NEW bolts whenever mount is removed.
58 Y (43 lb ft) Special Tools
EN-45059 Torque Angle Sensor Kit. For equivalent regional tools, refer to Special Tools |
|
2 |
Engine Mount Bracket Bolt (Qty; 1) Note: Ensure to use a NEW bolt whenever the mount is removed.
58 Y (43 lb ft) |
|
3 |
Engine Mount Nut (Qty; 2) Tighten
58 Y (43 lb ft) |
|
4 |
Engine Mount |
 Engine Mount Bracket Replacement - Right Side
Engine Mount Bracket Replacement - Right Side
Callout
Component Name
Preliminary Procedures
Remove the engine mount. Refer to Engin ...
 Engine Mount Replacement - Right Side
..
Engine Mount Replacement - Right Side
Callout
Component Name
Preliminary Procedures
Remove the air cleaner assembly. Refer to Air ...
Other materials:
Engine Mount Bracket Installation
Install the engine mount bracket (2).
Caution: Refer to Fastener Caution.
Install the 3 engine mount bracket bolts and tighten to 60 Y (45 lb ft) + 45?E0°.
...
Turbocharger Replacement
Special Tools
EN-49942 Holding Wrench
For equivalent regional tools, refer to Special Tools.
Removal Procedure
Disconnect battery negative cable. Refer to Battery Negative Cable Disconnection
and Connection.
Drain the cooling system. Refer to Cooling System Draining and Fi ...
Transmission Mount Replacement - Left Side
Removal Procedure
Remove the battery tray. Refer to
Battery Tray Replacement.
Install the engine support fixture. Refer to
Engine Support Fixture.
Remove and DISCARD the left transmission mount to
bracket bolts (1).
Remove the left transmission mo ...

0.0064