Chevrolet Sonic Repair Manual: Engine Mount Replacement - Right Side
|
Callout |
Component Name |
|---|---|
Preliminary Procedures
|
|
|
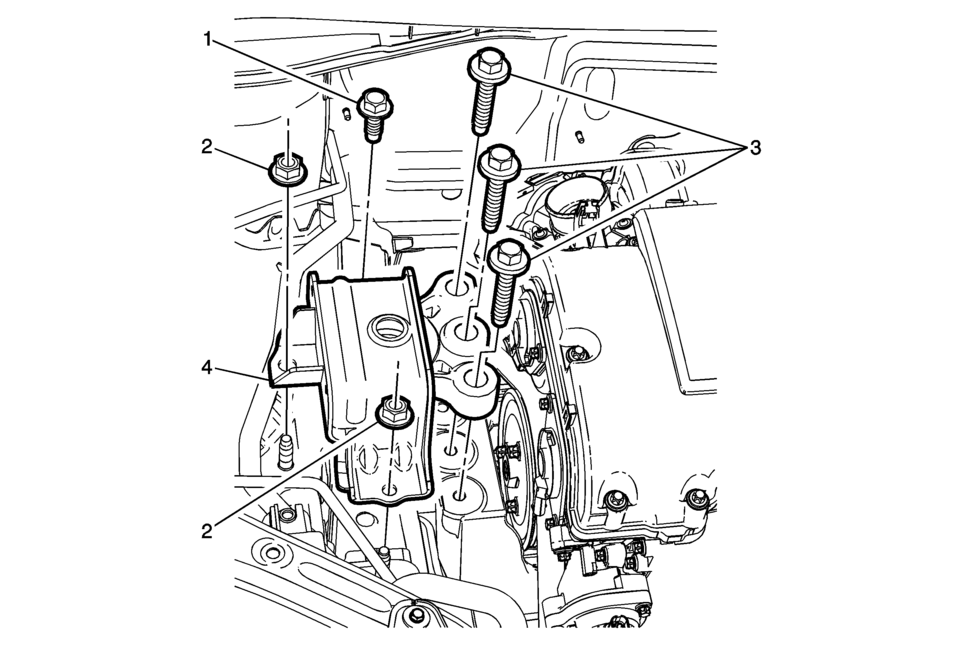
1 |
Engine Mount Bolt (Qty: 1) Caution: Refer to Fastener Caution.
62 Y (46 lb ft) |
|
2 |
Engine Mount Nut (Qty: 2) Tighten
62 Y (46 lb ft) |
|
3 |
Engine Mount Bracket to Mount Bolt (Qty: 3) Procedure
Ensure to use a NEW bolt whenever the mount is removed. . Tighten
50 Y+ 60° to 75° (37 lb ft + 60° to 75°) Special Tools
EN-470-B Angular Torque Wrench For equivalent regional tools, refer to Special Tools |
|
4 |
Engine Mount |
 Engine Mount Replacement
Engine Mount Replacement
Callout
Component Name
Preliminary Procedures
Remove the air cleaner assembly. Refer to Air Cleaner Assemb ...
 Engine Support Fixture
2-
Engine Support Fixture
Callout
Component Name
Preliminary Procedure
Remove the radiator opening upper cover. Refer to Front O ...
Other materials:
Instrument Panel Upper Trim Panel Replacement - Left Side
Instrument Panel Upper Trim Panel Replacement - Left Side
Callout
Component Name
Preliminary Procedure
Remove the instrument cluster assembly. Refer to Instrument Cluster
Replacement.
Remove the instrument panel center mo ...
Center Pillar Lower Trim Panel Replacement
Center Pillar Lower Trim Panel Replacement
Callout
Component Name
Preliminary Procedure
Remove the front side door opening floor carpet retainer. Refer
to Front Side Door Opening Floor Carpet Retainer Replacement.
Remove ...
Turbocharger System Description
12
(1)
Turbocharger Bypass Solenoid Valve
(2)
Multifunction Intake Air Sensor
(3)
Turbocharger Wastegate Regulator Solenoid Valve
(4)
Turbocharger
(5)
Turbocharger Bypass Valve
(6)
Turbocharger Was ...

0.0061