Chevrolet Sonic Repair Manual: Front Compartment Fuse Block Replacement
- Removal Procedure
-
- Disconnect the battery negative cable. Refer to Battery Negative Cable Disconnection and Connection.
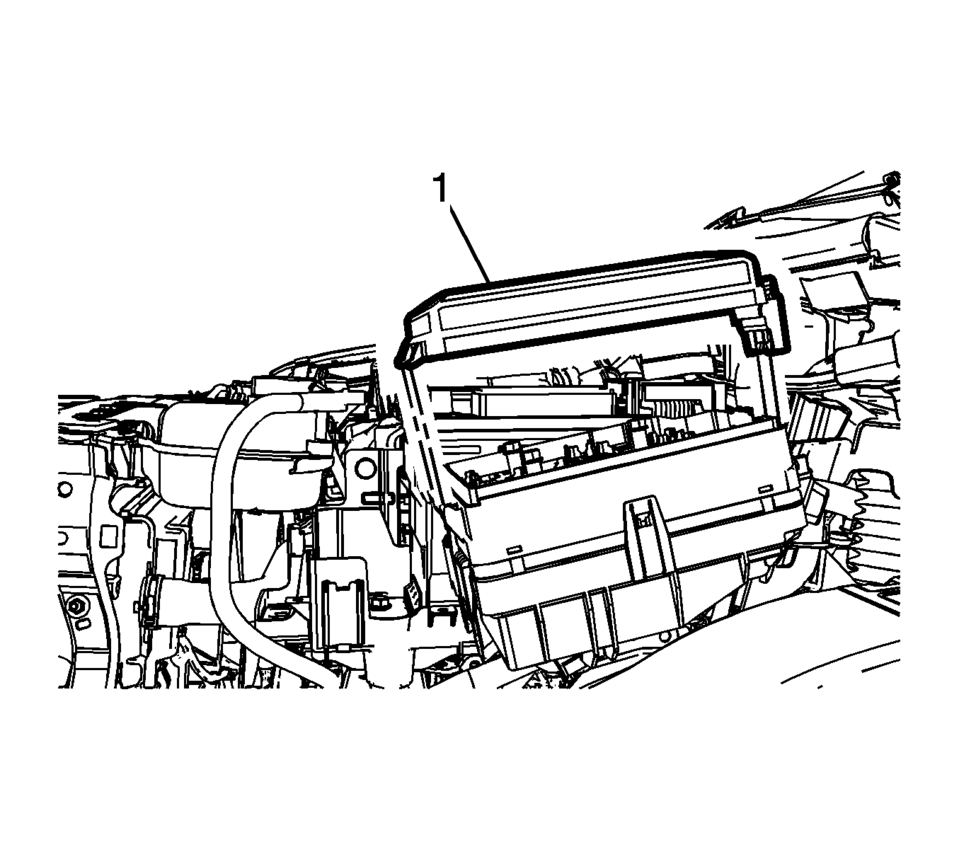
- Remove the junction block cover (1).
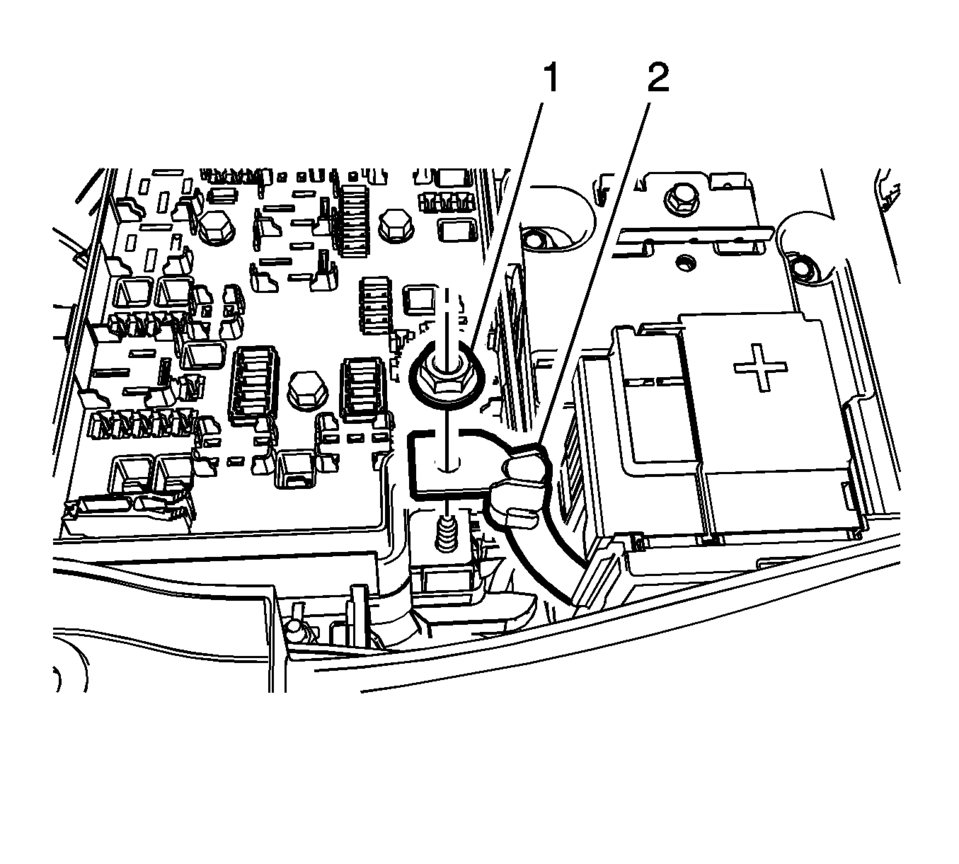
- Remove the positive battery cable nut (1) from the junction block.
- Remove the positive battery cable (2) from the junction block.
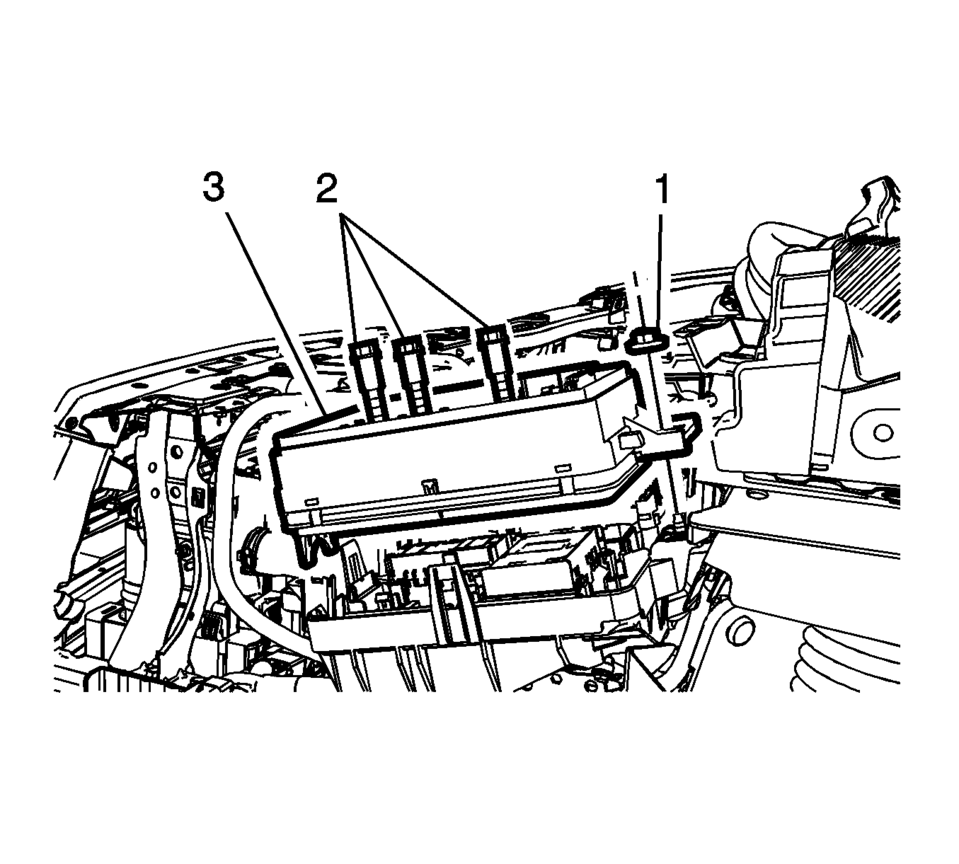
- Remove the junction block nut (1).
- Remove the junction block bolts (2).
- Disconnect the wiring harness from the junction block base.
- Remove the junction block (3) from the base.
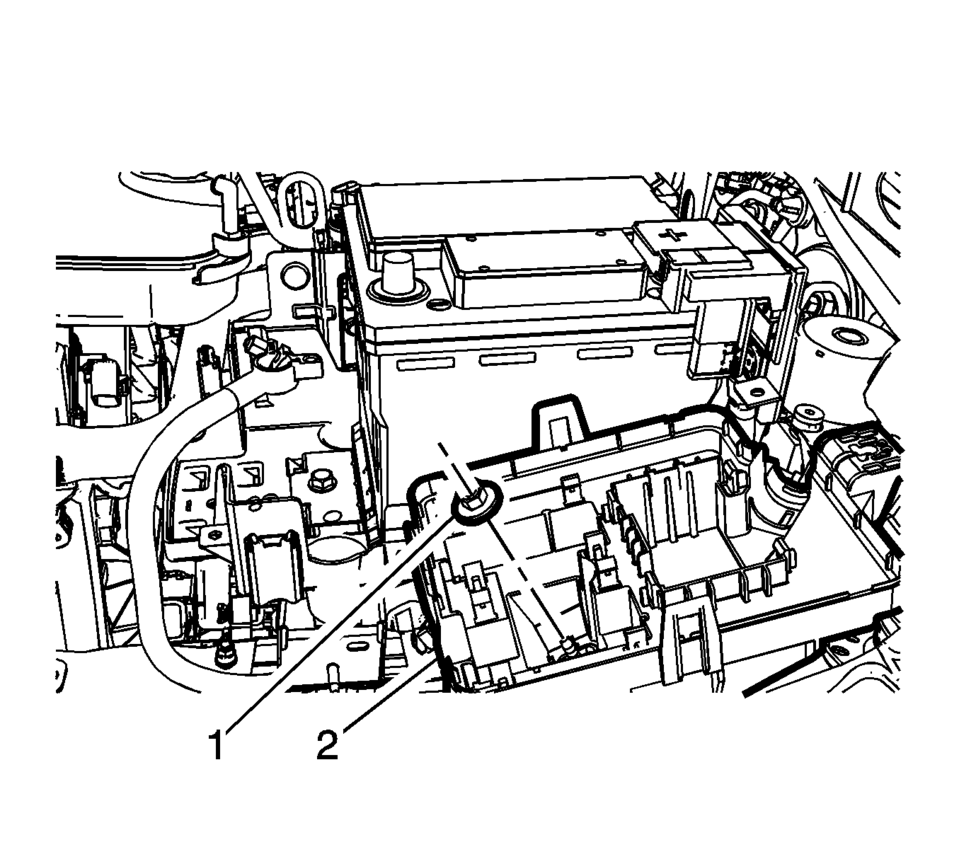
- Disconnect the wiring harness from the junction block base.
- Remove the junction block nut (1) from the block base.
- Remove the junction block base (2) from the inner wheelhouse.


- Installation Procedure
-
- Position the junction block base (2) to the inner wheelhouse stud.
- Install the junction block base nut (1) and tighten to 9 Y (79 lb in)
.
- Install the junction block to the base.
- Install the junction block bolts (2) and tighten to 9 Y (79 lb in)
.
- Install the junction block nut (1) and tighten to 7 Y (61 lb in)
.
- Position the positive battery cable to the junction block.
- Install the positive battery cable nut (2) and tighten to 5 Y (44 lb in)
.
- Install the junction block cover (1).
- Connect the battery negative cable. Refer to Battery Negative Cable Disconnection and Connection.

Caution:
Refer to Fastener Caution.


 Instrument Panel Fuse Block Access Hole Cover Replacement (With AAL)
Instrument Panel Fuse Block Access Hole Cover Replacement
Callout
Component Name
1
Instrument Panel Fuse Block Access Ho ...
Other materials:
Radio Front Side Door Speaker Replacement
Radio Front Side Door Speaker Replacement
Callout
Component Name
Preliminary Procedure
Remove the front side door trim. Refer to Front
Side Door Trim Replacement.
1
Radio Front Side Door Speaker ...
Internal Components Removal
Internal Components Removal
Callout
Component Name
1
1??? Clutch Backing Plate Retainer Ring
Warning: The retainer is under tension. Use care when removing
or installing the retainer. Personal injury could r ...
Clutch System Description and Operation
Clutch Spin Down Time
Inspect the clutch spin down time as follows:
Apply the parking brake and block the vehicle wheels.
Shift the manual transmission into NEUTRAL.
Start the engine. Run the engine at idle speed.
Engage the clutch.
Disengage the clutch. Wait 9 seconds.
...
0.0056

