Chevrolet Sonic Repair Manual: Front Lower Grille Replacement
|
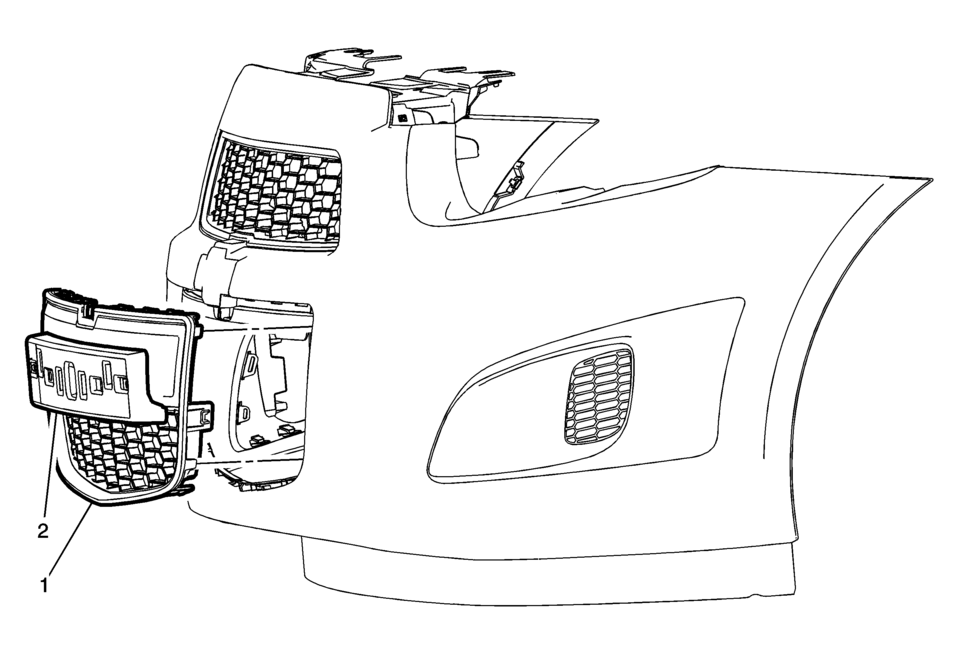
Callout |
Component Name |
|---|---|
Preliminary Procedures
|
|
|
1 |
Radiator Lower Front Grille Procedure
|
|
2 |
Front License Plate Bracket Assembly Procedure
Remove the four screws and the front license plate bracket to transfer to the new lower front grille assembly, (if equipped). |
 Air Inlet Grille Panel Replacement
Air Inlet Grille Panel Replacement
Callout
Component Name
Preliminary Procedure
Remove both wiper arm assemblies. Refer to Windshie ...
 Front Upper Grille Replacement
Front Upper Grille Replacement
Callout
Component Name
Preliminary Procedure
Remove the front bumper fascia. Refer to Front Bump ...
Other materials:
Seat Adjustment
Manual Seats
To adjust a manual seat:
Pull the handle at the front of the seat.
Slide the seat to the desired position and release the handle.
Try to move the seat back and forth to be sure it is locked in place.
See Seat Adjustment.
Seat Height Adjuster
...
Rear Window Wiper Arm Replacement
Rear Window Wiper Arm Replacement
Callout
Component Name
Preliminary Procedure
Using a small flat-bladed tool, release the locking tabs and lift the
end of the wiper arm nut cover in order to access and remove the rear wipe ...
Rear Wheel Speed Sensor Replacement
Removal Procedure
Warning: Refer to Brake Dust Warning.
Raise and support the vehicle. Refer to Lifting and Jacking the Vehicle.
Remove the tire and wheel assembly. Refer to Tire and Wheel Removal
and Installation.
Remove the rear wheel speed sensor ...

0.0054