Chevrolet Sonic Repair Manual: Front Side Door Replacement
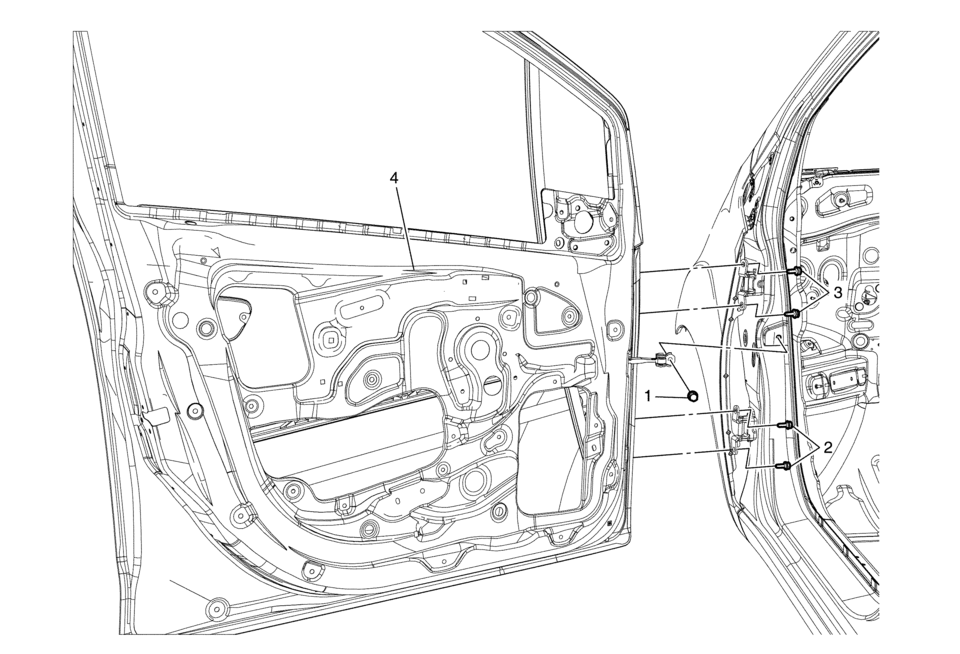
|
Callout |
Component Name |
|---|---|
|
Warning: Refer to SIR Warning.
|
|
|
1 |
Front Side Door Check Link Bolt to Body Caution: Refer to Fastener Caution.
22?€‰Y (16?€‰lb?€‰ft) |
|
2 |
Front Side Door Lower Hinge Bolt to Door (Qty:?€‰2) Tighten
25?€‰Y (18?€‰lb?€‰ft) |
|
3 |
Front Side Door Upper Hinge Bolt to Door (Qty:?€‰2) Tighten
25?€‰Y (18?€‰lb?€‰ft) |
|
4 |
Front Side Door Assembly Procedure
|
 Front Side Door Check Link Replacement
iii!
Front Side Door Check Link Replacement
Callout
Component Name
Preliminary Procedure
Remove the front side door trim panel. ...
 Front Side Door Upper Hinge and Lower Hinge Replacement
Front Side Door Upper Hinge and Lower Hinge Replacement
Callout
Component Name
1
Front Side Door Upper Hinge to Body Bol ...
Other materials:
Rear Axle Replacement
Removal Procedure
Raise and support the vehicle. Refer to Lifting and Jacking the Vehicle.
Remove the tires and wheel assembly. Refer to Tire and Wheel Removal
and Installation.
Remove the park brake cables from the rear axle. Refer to Parking Brake
Cable Replacement. ...
Transmission Control Replacement
Transmission Control Replacement
Callout
Component Name
Preliminary Procedures
Remove the front floor console. Refer to
Front Floor Console Replacement.
Disconnect the range selector lever cable. Refer
to Range Select ...
Input Shaft Support Replacement (Gen 1)
Input Shaft Support Replacement
Callout
Component Name
1
3-5 Reverse and 4-5-6 Clutch Fluid Seals (Qty: 4)
Note:
Discard the fluid seals. They are not reusable.
Refer to 3-5-Reverse an ...

0.0069