Chevrolet Sonic Repair Manual: Front Side Door Window Rear Guide Replacement
|
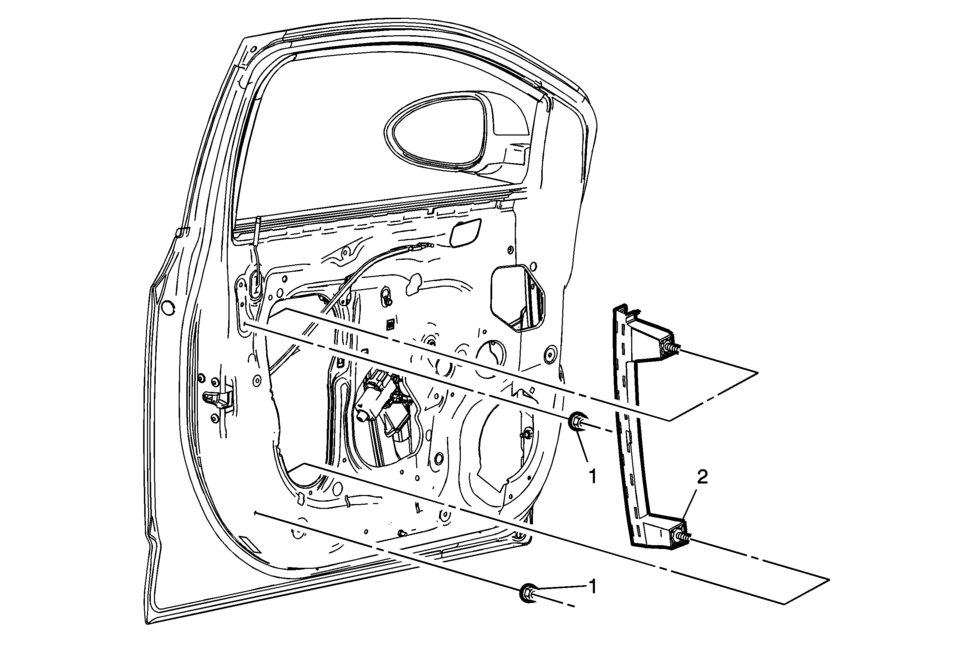
Callout |
Component Name |
|---|---|
|
Preliminary Procedure
Remove the front side door trim panel. Refer to Front Side Door Trim Replacement. |
|
|
1 |
Front Side Door Window Rear Guide Nut (Qty?€‰:2) Caution: Refer to Fastener Caution.
11?€‰Y (97?€‰lb?€‰in) |
|
2 |
Front Side Door Window Rear Guide Tip: Inspect the window for proper operation before installing the trim panel. |
 Front Side Door Window Outer Sealing Strip Replacement
Front Side Door Window Outer Sealing Strip Replacement
Callout
Component Name
1
Front Side Door Window Outer Sealing Str ...
 Front Side Door Window Replacement
Front Side Door Window Replacement
Callout
Component Name
Warning: Refer to Glass and Sheet Metal Handling Warning.
...
Other materials:
Engine Oil Pressure Indicator Switch Replacement
Engine Oil Pressure Indicator Switch Replacement
Callout
Component Name
1
Engine Oil Pressure Indicator Switch
Caution: Refer to Component Fastener
Tightening Caution.
Procedure
Place coll ...
Reading Lamp Replacement
Reading Lamp Replacement
Callout
Component Name
Preliminary Procedure
Remove the dome lamp bezel. Refer to Dome Lamp Bezel Replacement.
1
Reading lamp
Procedures
Release the clips retaining t ...
Front Seat Belt Anchor Plate Tensioner Cover Replacement (4 Way)
Front Seat Belt Anchor Plate Tensioner Cover Replacement
Callout
Component Name
1
Driver or Passenger Seat Belt Tensioner Cover
Procedure
Remove the tensioner cover by pushing downward on the rear and center
o ...

0.0058