Chevrolet Sonic Repair Manual: Fuel Tank Filler Pipe Replacement
- Removal Procedure
-
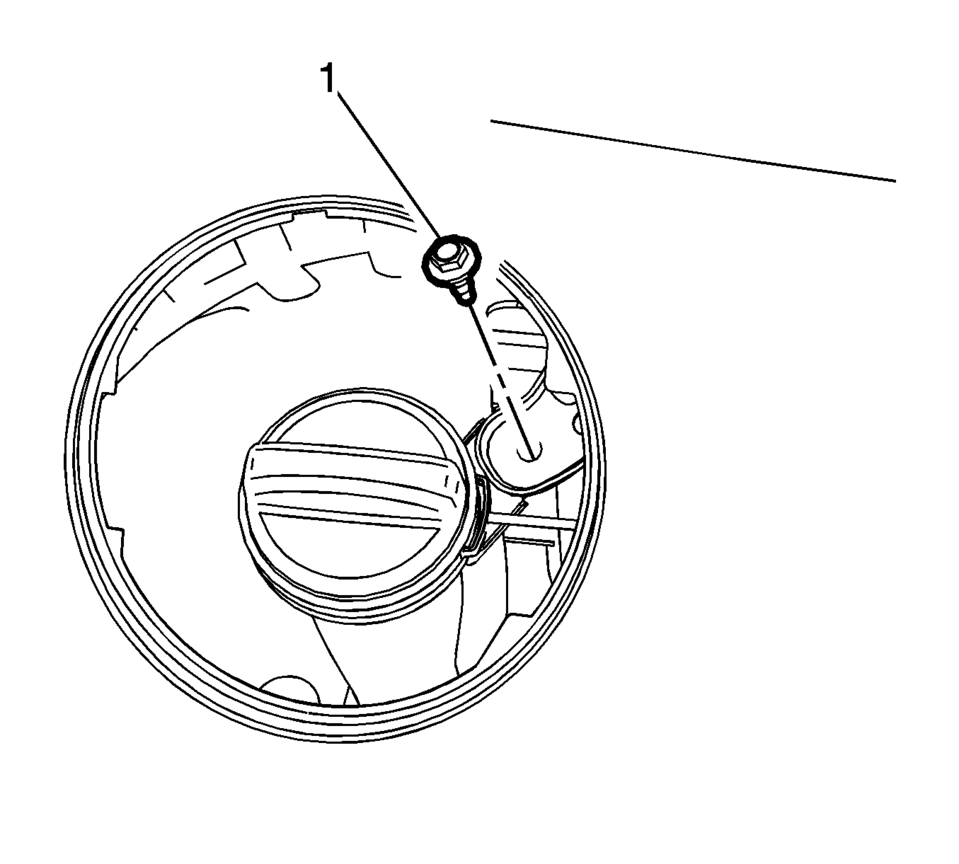
- Remove the bracket fastener (1).
- Lift and support the vehicle. Refer to Lifting and Jacking the Vehicle.
- Remove the fuel tank filler pipe bracket fastener (1).
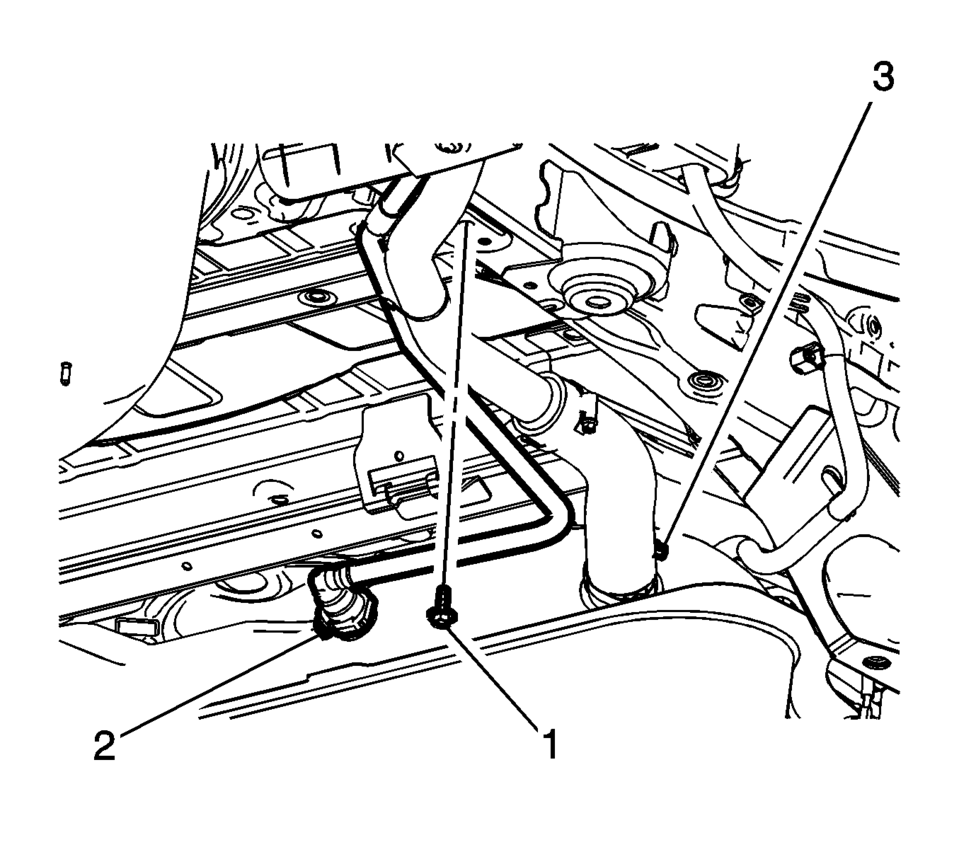
- Disconnect the vent hose (2). Refer to Plastic Collar Quick Connect Fitting Service.
- Loosen the filler pipe hose clamp (3).
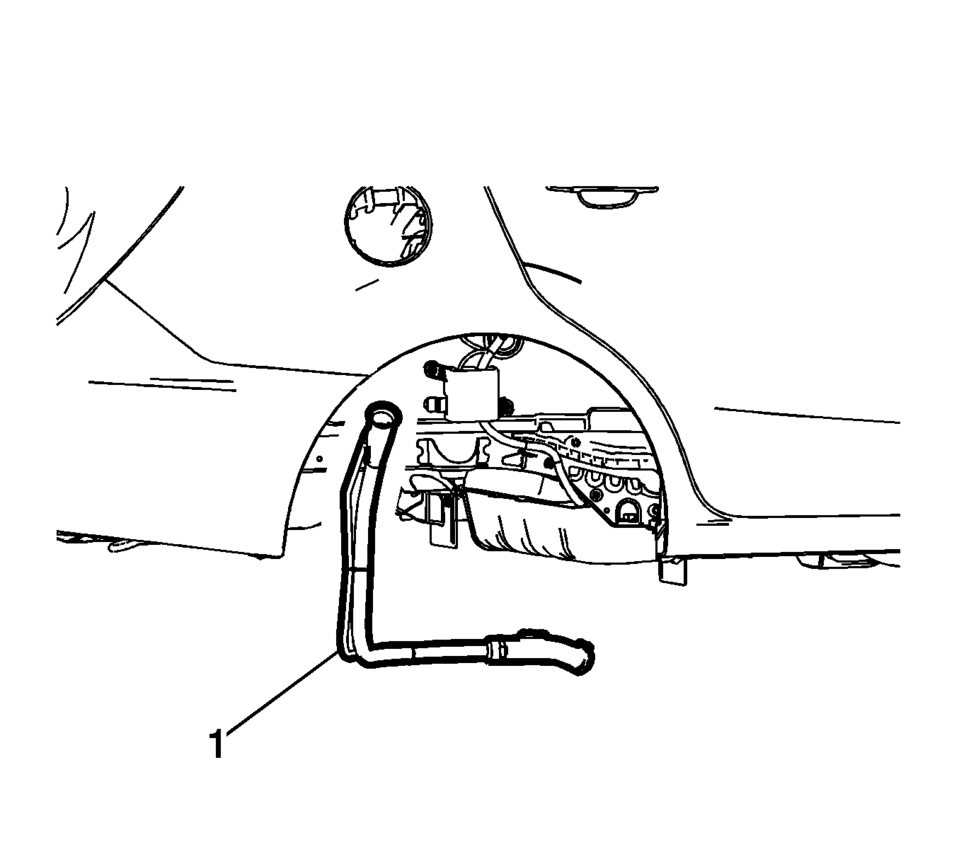
- Remove the fuel tank filler pipe (1).
- Installation Procedure
-
- Install the fuel tank filler pipe (1).
- Tighten hose clamp (3) to 4 Y(35 lb in)
.
- Connect the vent hose (2). Refer to Plastic Collar Quick Connect Fitting Service.
- Tighten the filler pipe bracket fastener (1) to
9 Y(89 lb in)
.
- Install the bracket fastener (1) and tighten to
9 Y(89 lb in).
Caution:
Refer to Fastener Caution.
 Fuel Tank Draining
Warning: Refer to Gasoline/Gasoline Vapors
Warning.
Note: The fuel tank must be drained with a suitable, commercially-available
fuel removal unit and suction hose - follow saf ...
 Fuel Tank Filler Pipe Replacement (Steel Tank)
Removal Procedure
Remove the fuel filler door housing. Refer to
Fuel Tank Filler Door Latch Housing Replacement.
Remove the bracket fastener (1).
Lift ...
Other materials:
Replacing LATCH System Parts After a Crash
Warning: A crash can damage the LATCH system in the vehicle. A damaged
LATCH system may not properly secure the child restraint, resulting in serious
injury or even death in a crash. To help make sure the LATCH system is working
properly after a crash, see your dealer to have the system ...
Battery Disconnect Warning
Warning: Unless directed otherwise, the ignition and start switch
must be in the OFF or LOCK position, and all electrical loads must be OFF before
servicing any electrical component. Disconnect the negative battery cable to
prevent an electrical spark should a tool or equipment come in c ...
Steering Assist with HD map data (a feature of ProPILOT Assist 2.1)
In the Nissan Armada equipped with ProPILOT Assist 2.1, Steering Assist is enhanced
by HD map data, enabling more advanced driving support. When all required conditions
are met, the system indicator turns blue, signaling that enhanced functionality
is active.
In this advanced mode, the Nissan ...

0.0092