Chevrolet Sonic Repair Manual: Fuel Tank Replacement
- Removal Procedure
-
- Disconnect the battery negative cable. Refer to Battery Negative Cable Disconnection and Connection.
- Relieve the fuel pressure. Refer to Fuel Pressure Relief.
- Drain the fuel Tank. Refer to Fuel Tank Draining.
- Lift and support the vehicle. Refer to Lifting and Jacking the Vehicle.
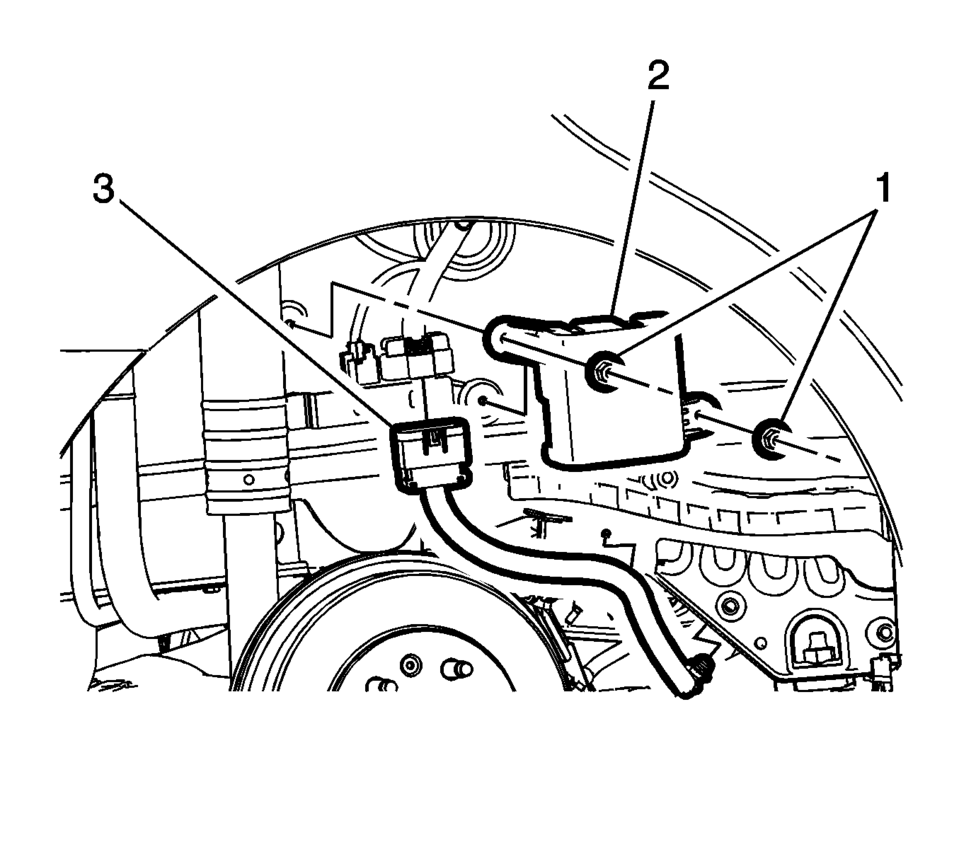
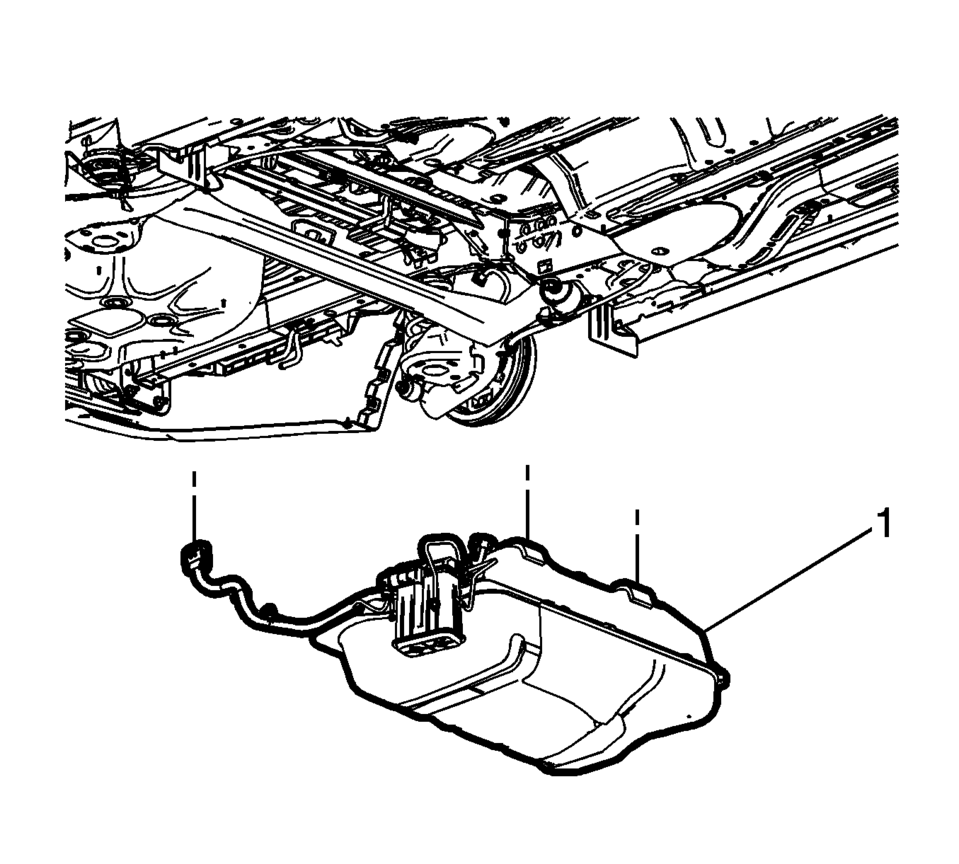
- Remove the harness cover fastener (1) and harness cover (2).
- Disconnect the fuel pump harness electrical connector (3).
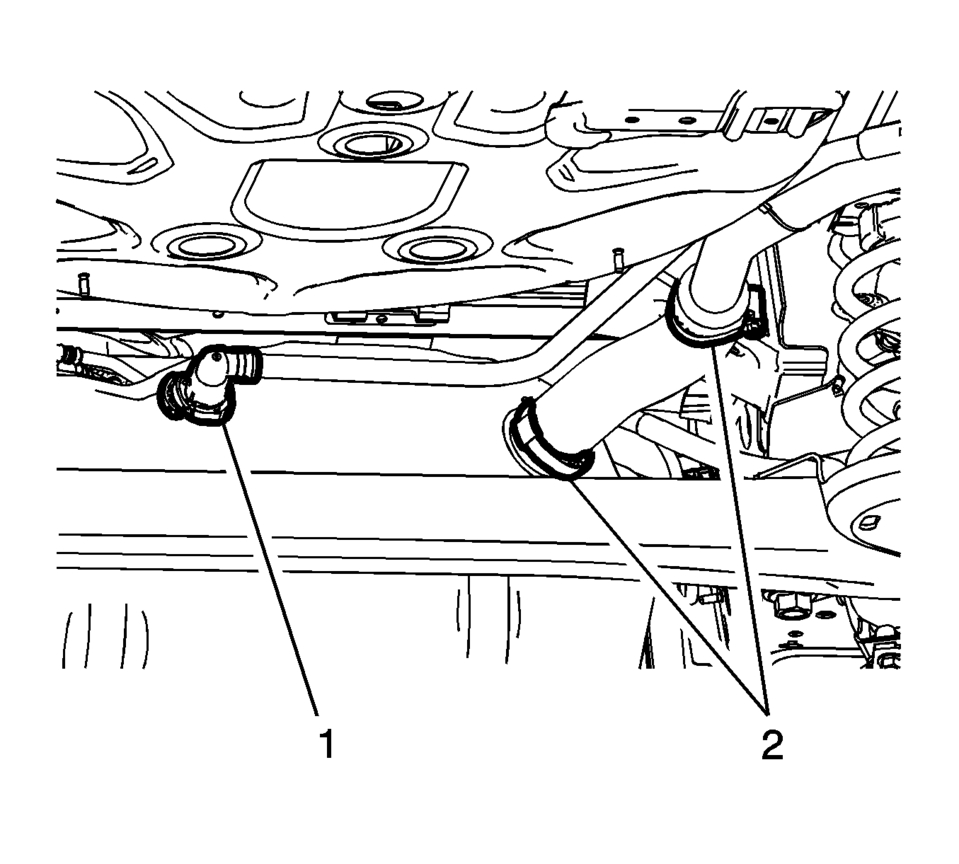
- Disconnect the vent hose (1)
- Loosen the hose clamps (2) and slide the filler hose off the fuel tank.
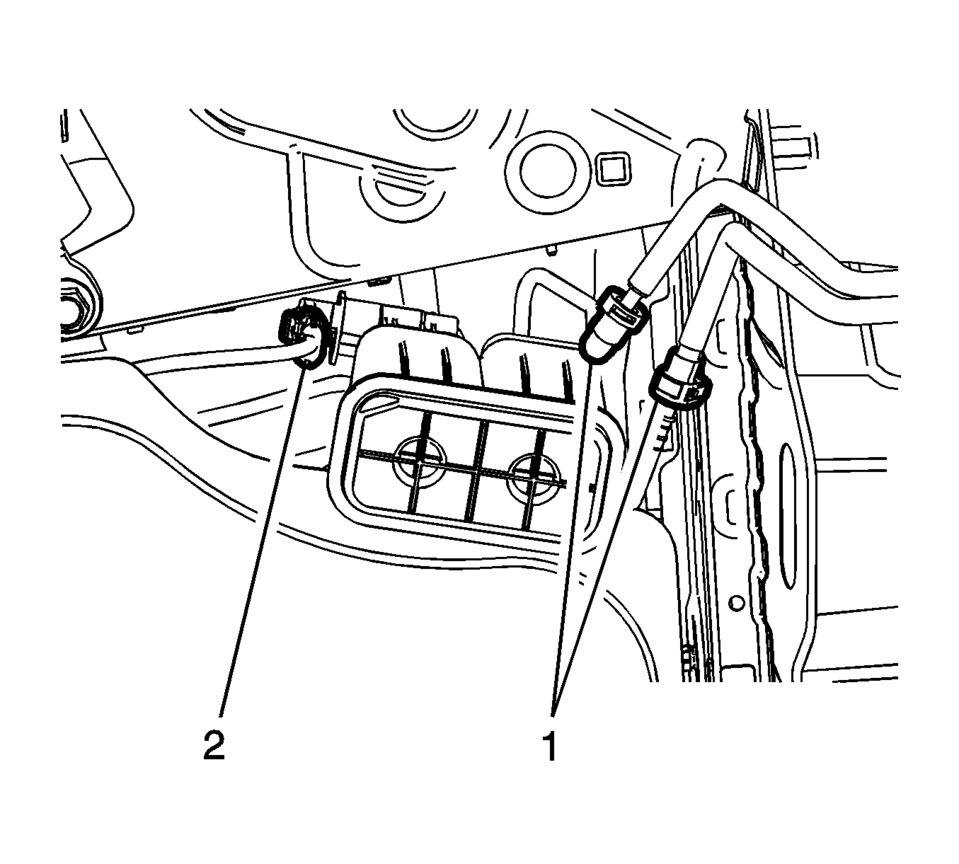
- Disconnect the fuel and evaporative emission connectors (1). Refer to Plastic Collar Quick Connect Fitting Service.
- Support the fuel tank with a suitable stand.
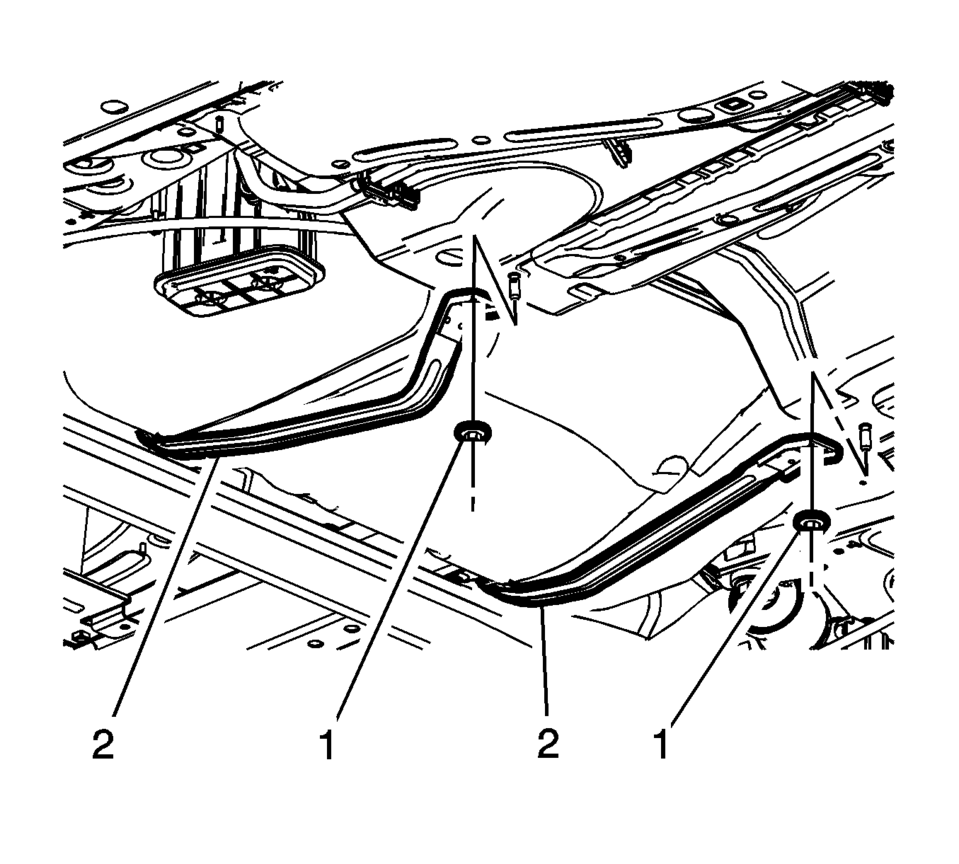
- Remove the fuel tank strap fasteners (1).
- Reposition the fuel tank straps (2) toward the back of the vehicle.
- Lower the fuel tank (1).
- Installation Procedure
-
- If replacing the tank, remove the fuel pump module and the evaporative emission canister. Refer to Fuel Tank Fuel Pump Module Replacement and Evaporative Emission Canister Replacement.
- Transfer parts as necessary.
- Raise the fuel tank (1).
- Support the fuel tank with a suitable stand.
- Position the fuel tank straps (2) onto the fuel tank.
- Install the fuel tank strap fasteners (1) and tighten to 22 Y(16 lb ft)
.
- Connect the fuel and evaporative emission connectors (1). Refer to Plastic Collar Quick Connect Fitting Service.
- Connect the vent hose (1) .
- Tighten the hose clamps (2) to 4.5 Y(40 lb in).
and slide the filler hose off the fuel tank.
- Connect the fuel pump harness electrical connector (3).
- Install the harness cover (2) and tighten the cover fasteners (1).
- Connect the battery negative cable. Refer to Battery Negative Cable Disconnection and Connection.
Caution:
Refer to Fastener Caution.
 Fuel Tank Heat Shield Replacement
Removal Procedure
Support the fuel tank with a suitable jack.
Remove the fuel tank strap fasteners (1) and lower the fuel tank straps (2).
Remove the ...
 Ignition System
...
Other materials:
Rear Bumper Fascia Replacement (Hatchback)
Rear Bumper Fascia Replacement
Callout
Component Name
Preliminary Procedures
Remove the screws from the rear wheelhouse liners to the rear fascia.
Refer to Rear Wheelhouse Liner Replacement.
Disconnect the rear electrical ...
Rear Brake Backing Plate Replacement
Removal Procedure
Warning: Refer to Brake Dust Warning.
Raise and support the vehicle. Refer to Lifting and Jacking the Vehicle.
Remove the tire and wheel assembly. Refer to Tire and Wheel Removal
and Installation.
Remove the rear wheel speed sensor, if equipped ...
Timing Belt Idler Pulley Replacement
Timing Belt Idler Pulley Replacement
Callout
Component Name
Preliminary Procedure
Remove the timing belt. Refer to Timing Belt Replacement.
1
Timing Belt Idler Pulley Bolt
Caution: Refer to ...

0.0052