
Chevrolet Sonic Repair Manual: Fuel Tank Replacement
- Removal Procedure
-
- Disconnect the battery negative cable. Refer to Battery Negative Cable Disconnection and Connection.
- Relieve the fuel pressure. Refer to Fuel Pressure Relief.
- Drain the fuel Tank. Refer to Fuel Tank Draining.
- Lift and support the vehicle. Refer to Lifting and Jacking the Vehicle.
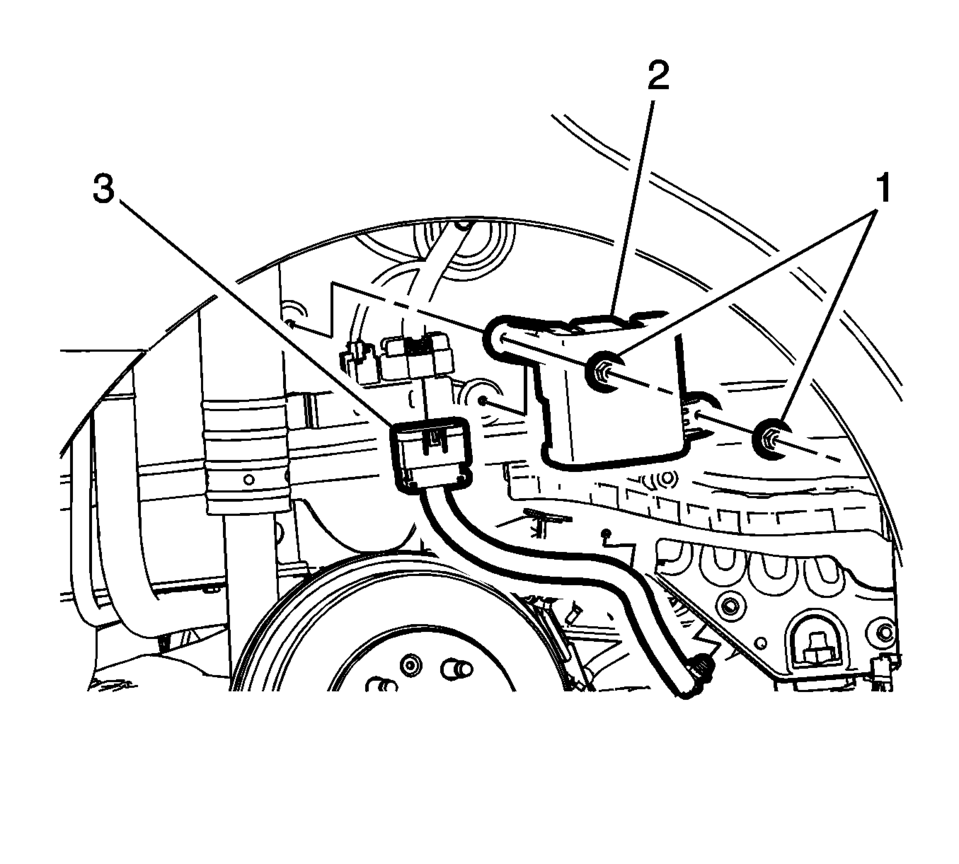
- Remove the harness cover fastener (1) and harness cover (2).
- Disconnect the fuel pump harness electrical connector (3).
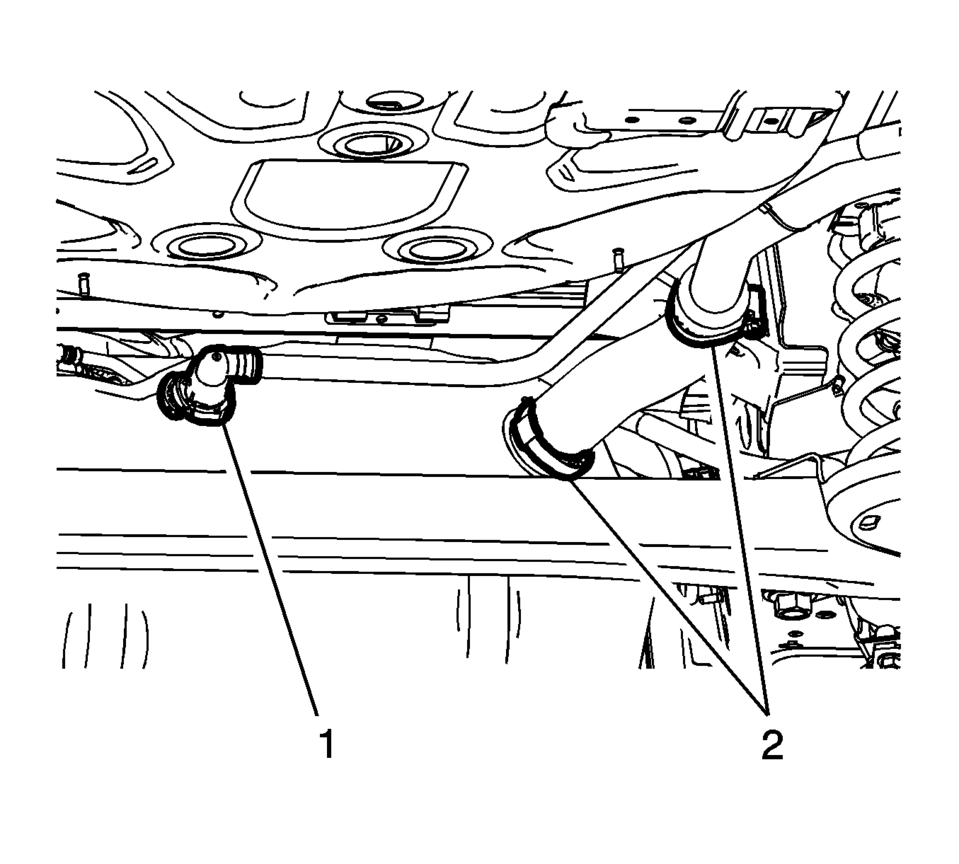
- Disconnect the vent hose (1)
- Loosen the hose clamps (2) and slide the filler hose off the fuel tank.
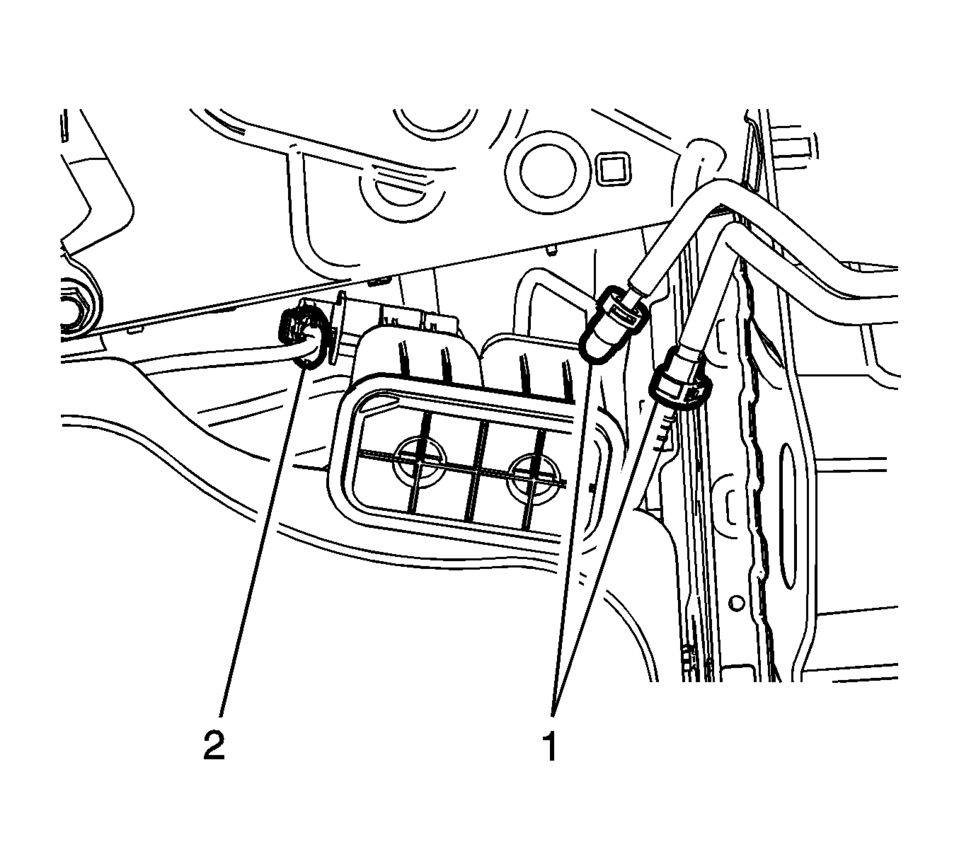
- Disconnect the fuel and evaporative emission connectors (1). Refer to Plastic Collar Quick Connect Fitting Service.
- Support the fuel tank with a suitable stand.
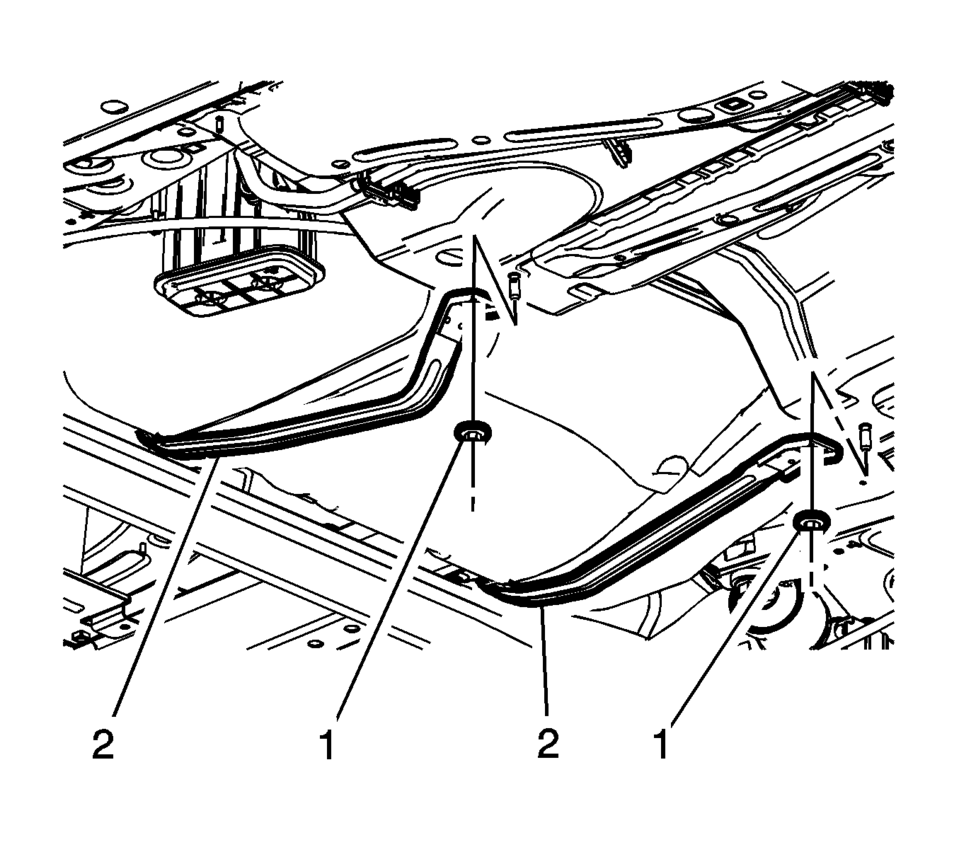
- Remove the fuel tank strap fasteners (1).
- Reposition the fuel tank straps (2) toward the back of the vehicle.
- Lower the fuel tank (1).
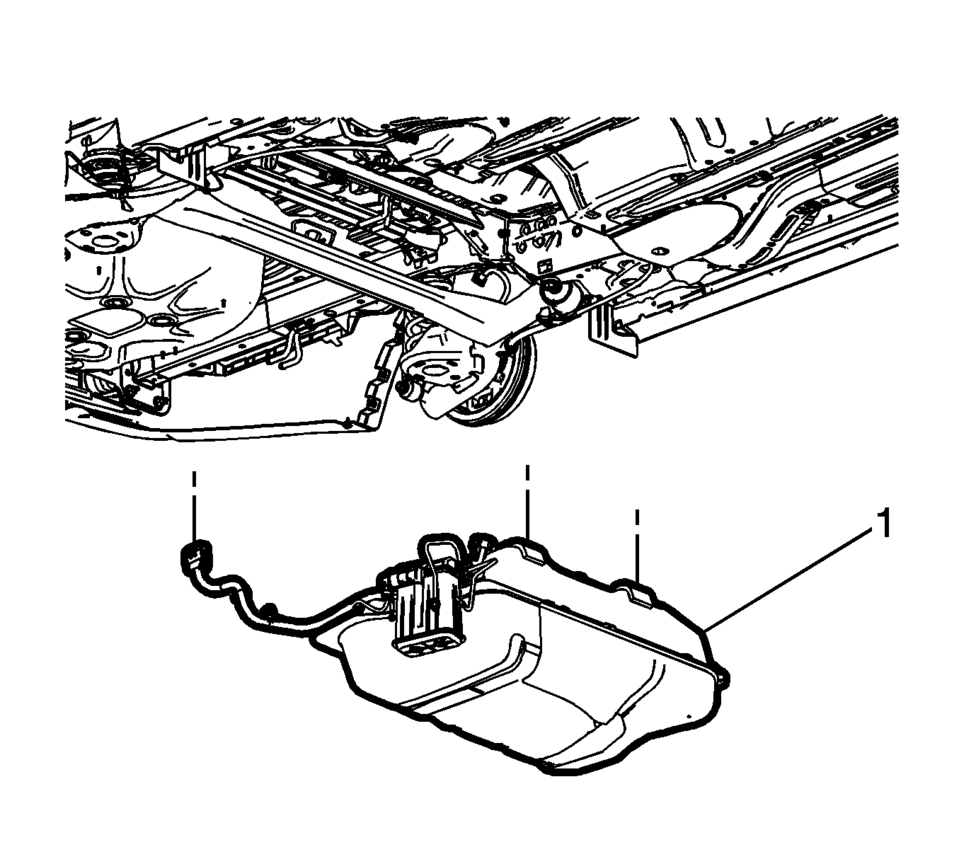
- Installation Procedure
-
- If replacing the tank, remove the fuel pump module and the evaporative emission canister. Refer to Fuel Tank Fuel Pump Module Replacement and Evaporative Emission Canister Replacement.
- Transfer parts as necessary.
- Raise the fuel tank (1).
- Support the fuel tank with a suitable stand.
- Position the fuel tank straps (2) onto the fuel tank.
- Install the fuel tank strap fasteners (1) and tighten
to 22 Y(16 lb ft)
.
- Connect the fuel and evaporative emission connectors (1). Refer to Plastic Collar Quick Connect Fitting Service.
- Connect the vent hose (1) .
- Tighten the hose clamps (2) to 4.5 Y(40 lb in).
and slide the filler hose off the fuel tank.
- Connect the fuel pump harness electrical connector (3).
- Install the harness cover (2) and tighten the cover fasteners (1).
- Connect the battery negative cable. Refer to Battery Negative Cable Disconnection and Connection.
Caution:
Refer to Fastener Caution.
 Fuel Tank Fuel Pump Module Replacement (Steel Tank)
Special Tools
EN-48279 Fuel Sender Lock Ring Wrench
For equivalent regional tools, refer to Special Tools.
Removal Procedure
Relieve the fuel system pressure. Refer to
Fuel Pres ...
 Ignition Coil Replacement
Special Tools
EN-6009 Remover and Installer Ignition Coil
For equivalent regional tools, refer to Special Tools.
Removal Procedure
Remove the engine wiring harness guide ...
Other materials:
Trim Height Inspection
Trim Height Measurement
Trim height is a predetermined measurement relating to vehicle ride height.
Incorrect trim heights can cause the vehicle to bottom out over bumps, damage
to the suspension components and symptoms similar to wheel alignment problems.
Check the trim heights wh ...
Antenna
Window antenna
In the Nissan Armada, the window antenna is seamlessly integrated into the rear
side glass, specifically within the third-row seat window. This design ensures reliable
signal reception while maintaining a clean and modern exterior appearance.
CAUTION
Avoid applying metallic ...
How to enable/disable the BSW system
Vehicle information display
Steering-wheel-mounted controls (right side)
To configure the Nissan Armada BSW system, follow these steps:
1. Press the
button until "Settings" appears in the vehicle information display, then confirm
using the scroll dial. Navigate to " ...

0.006