
Nissan Armada 2025-2026 Owner's Manual: Heated seats
Basic information
WARNING
In the Nissan Armada, avoid using seat heaters if occupants are unable to sense temperature changes or pain. Improper use may result in overheating and serious injury.
CAUTION
- Do not operate the heated seats in the Nissan Armada for extended periods when not in use.
- Avoid placing insulating materials such as blankets or cushions on the
seats, as this may cause overheating.
This can reduce system efficiency and increase risk.
- Do not place heavy or sharp objects on the Nissan Armada seats, as this may damage the internal heating elements.
- If liquid is spilled on the seat, dry it immediately using a clean cloth to prevent damage.
- Use only appropriate cleaning methods—never apply gasoline, solvents, or harsh chemicals to the Nissan Armada seats.
- If the heated seat system malfunctions, turn it off and have the Nissan Armada inspected by an authorized dealer.
The Nissan Armada front and second-row seats (if equipped) feature built-in heating elements designed to enhance passenger comfort during cold weather.
Controls are available via the touch screen display, instrument panel switches, or rear console (depending on configuration), allowing independent adjustment for each seat.
The Nissan Armada system uses a control module that automatically adjusts heat levels to maintain consistent comfort.
Temperature intensity can be customized through the touch screen display.
When the cabin is sufficiently warm or before exiting the Nissan Armada, it is recommended to turn off the seat heaters.
Operation with touch screen display
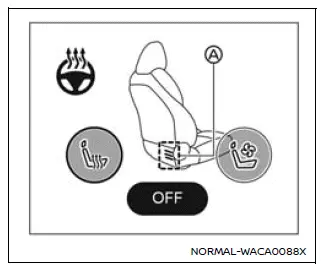
Example
1. Start the Nissan Armada engine.
2. Touch the
 key to select the desired heat level.
- High heat: touch once.
- Medium heat: touch twice.
- Low heat: touch three times.
- The indicator A illuminates according to the selected level.
3. To turn off the heated seat in the Nissan Armada, press the
 key repeatedly until the indicator A turns off.
Operation with switch
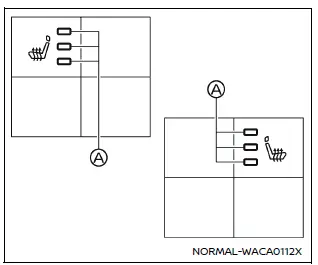
For front seats
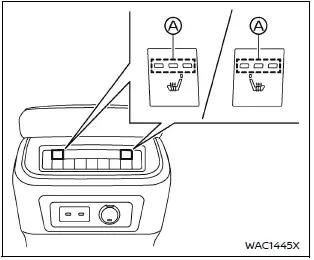
For 2nd row seats (if so equipped)
1. Start the Nissan Armada engine.
2. Press the heated seat switch to cycle through heat levels.
- High heat: press once.
- Medium heat: press twice.
- Low heat: press three times.
- The indicator light A will illuminate according to the selected intensity.
3. To turn off the system, continue pressing the switch until the indicator light turns off.
These features in the Nissan Armada provide enhanced comfort, especially during colder seasons, ensuring a premium driving experience for all occupants.
 Heated steering wheel
Example
Example
The Nissan Armada heated steering wheel can be controlled either via the touch
screen display or by using the dedicated switch on the instrument panel.
1. Start the engine ...
 Ventilated seats
Basic information
CAUTION
In the Nissan Armada, avoid using the ventilated seat system for long
periods when the seat is unoccupied to prevent unnecessary wear and energy consumption.
Do not ...
Other materials:
Door Lock and Ignition Lock Folding Key Blade Removal and Installation
Special Tools
BO-51098 Flip Key Blade Fixture
For equivalent region tools, refer to Special Tools.
Caution: Failure to properly support the Remote Keyless Entry
(RKE) transmitter assembly while replacing the key blade may cause internal
damage to the transmitter assembly. ...
Ignition Coil Installation
Special Tools
EN-6009 Remover and Installer Ignition Module
For equivalent regional tools, refer to Special Tools.
Install the ignition coil (1) and remove EN-6009 remover and installer
(2).
Caution: Refer to Fastener Caution.
Install the 2 ...
Torque Converter Housing with Fluid Pump Assembly Installation (6T30)
Torque Converter Housing with Fluid Pump Assembly Installation
Callout
Component Name
1
Fluid Pump Seal Assembly
2
Torque Converter Housing Gasket
3
Torque Converte ...

0.0047