Chevrolet Sonic Repair Manual: Heater Inlet Hose Replacement (LDE, LUW)
Special Tools
BO-38185 Hose Clamp Pliers
For equivalent regional tools, refer to Special Tools.
- Removal Procedure
-
- Drain the cooling system. Refer to Cooling System Draining and Filling.
- Disengage the heater inlet hose quick connect clip (1) at the heater core.
- Remove the heater inlet hose (2) from the heater core.
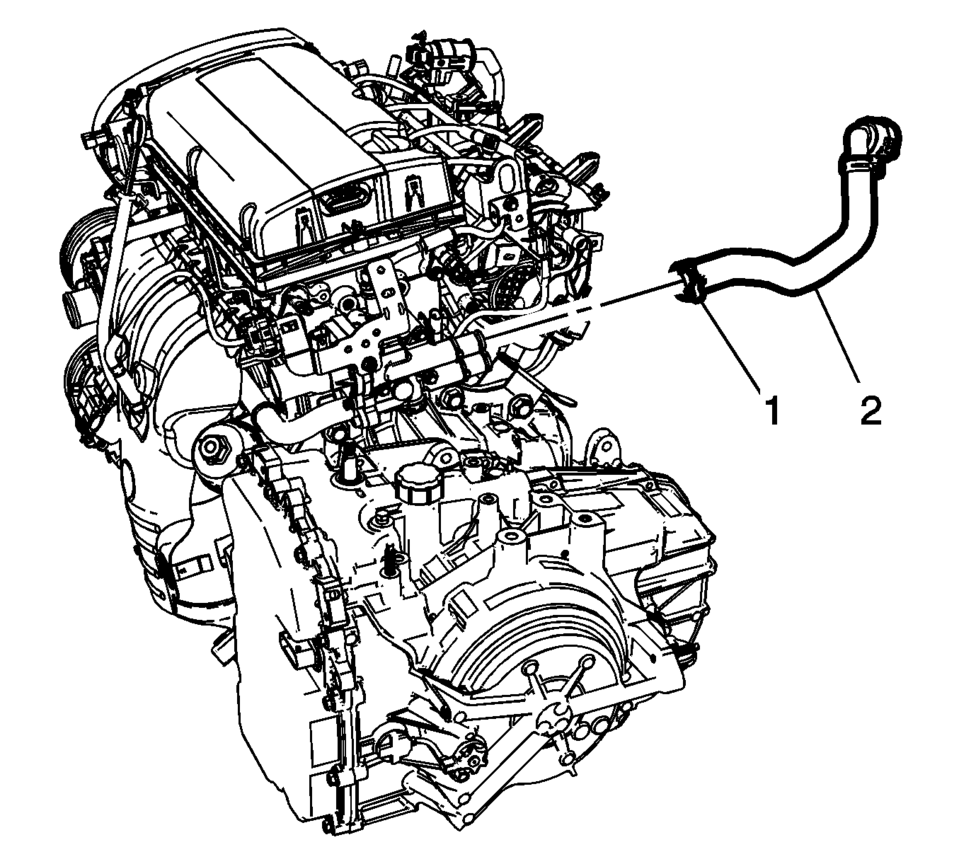
- Remove the heater inlet hose clamp (1) at the engine using BO-38185 Hose Clamp Pliers .
- Remove the heater inlet hose (2) from the engine.
- Remove the heater inlet hose from the vehicle.

- Installation Procedure
-
- Install the heater inlet hose to the vehicle.
- Install the heater inlet hose (2) to the engine.
- Install the heater inlet hose clamp (1) at the engine using BO-38185 Hose Clamp Pliers .
- Install the heater inlet hose (2) to the heater core.
- Engage the heater inlet hose quick connect clip (1) at the heater core.
- Fill the cooling system. Refer to Cooling System Draining and Filling.
Note:
The quick connector has an internal anti-rotation feature. The ensure the quick connector is properly aligned to the heater core pipe, position the white mark to the 12:00 O’clock position during installation.
 Heater Core Replacement
Heater Core Replacement
Callout
Component Name
Preliminary Procedures
Remove the Heater and Air Conditioning Evaporator and Blower ...
 Heater Inlet Hose Replacement (LUV)
Heater Inlet Hose Replacement
Callout
Component Name
Preliminary Procedures
Drain the engine coolant. Refer to Cooling System Drain ...
Other materials:
Communication Interface Module Replacement
Communication Interface Module Replacement
Callout
Component Name
Preliminary Procedure
Remove the instrument panel lower compartment.
Refer to Instrument Panel Lower Compartment
Replacement.
Remove the instrument pa ...
Instrument Panel Upper Trim Panel Replacement - Left Side
Instrument Panel Upper Trim Panel Replacement - Left Side
Callout
Component Name
Preliminary Procedure
Remove the instrument cluster assembly. Refer to Instrument Cluster
Replacement.
Remove the instrument panel center mo ...
Supplemental air bag warning light
In the Nissan Armada, the supplemental air bag warning light, identified by the
symbol
displayed in the instrument cluster, continuously monitors the integrity of the
air bag systems, pretensioners, and all associated wiring circuits.
When the ignition switch of the Nissan Armada is tur ...

0.005