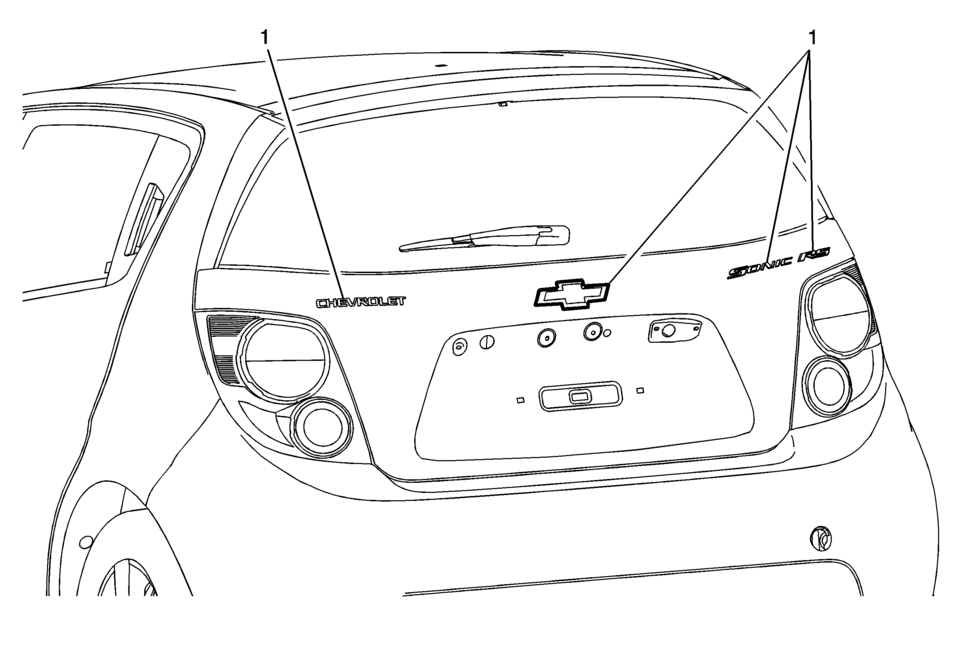
Chevrolet Sonic Repair Manual: Liftgate Emblem/Nameplate Replacement (Hatchback)
|
Callout |
Component Name |
|---|---|
|
1 |
Liftgate Emblem/Nameplate Assembly Caution: Refer to Exterior Trim Emblem Removal Caution.
|
 Exterior Trim Emblem Removal Caution
Caution: Use a plastic, flat-bladed tool to prevent paint damage when
removing an emblem/name plate.
...
 Paint Gauges
Paint thickness gauges measure the total thickness of the vehicle finish. It
is important to accurately measure the thickness of the finish on each vehicle as
the thickness of the finish will vary ...
Other materials:
Radio Reception
Frequency interference and static can occur during normal radio reception if
items such as cell phone chargers, vehicle convenience accessories, and external
electronic devices are plugged into the accessory power outlet. If there is interference
or static, unplug the item from the accessory p ...
Instrument Panel Upper Compartment Door Latch Replacement
Instrument Panel Upper Compartment Door Latch Replacement
Callout
Component Name
1
Instrument Panel Upper Compartment Door Latch
Procedures
Open the instrument panel compartment door.
Unsnap the instrument com ...
Floor Panel Carpet Replacement
Floor Panel Carpet Replacement
Callout
Component Name
Preliminary Procedures
Remove front seats. Refer to Driver or Passenger Seat Removal and
Installation.
Remove rear seat cushion. Refer to Rear Seat Cushion Removal and ...

0.005