Chevrolet Sonic Repair Manual: Liftgate Side Applique Replacement (Hatchback)
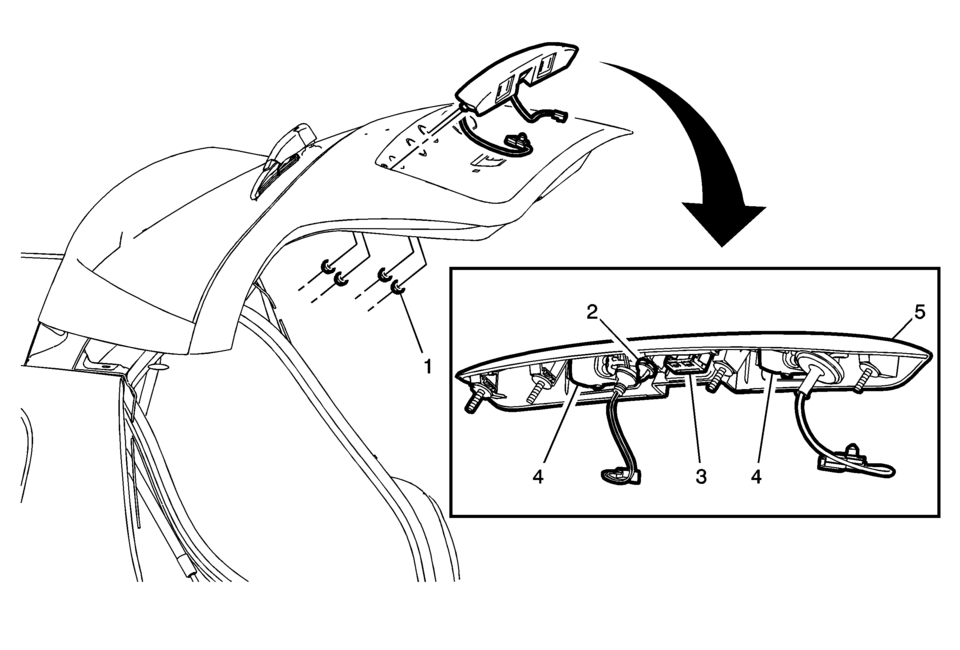
|
Callout |
Component Name |
|---|---|
Preliminary Procedure
|
|
|
1 |
Liftgate Side Applique Nut (Qty:?€‰4) Caution: Refer to Fastener Caution.
5?€‰Y (44?€‰lb?€‰in) |
|
2 |
Liftgate Side Applique Retainer |
|
3 |
Liftgate Release Switch Procedure
Remove the liftgate release switch. Refer to Liftgate Release Switch Replacement |
|
4 |
Rear License Plate Lamp (Qty:?€‰2) Procedure
Remove the rear license plate lamps. Refer to Rear License Plate Lamp Replacement. |
|
5 |
Liftgate Side Applique |
 Front Compartment Front Insulator Cover Replacement
Front Compartment Front Insulator Cover Replacement
Callout
Component Name
1
Front Compartment Front Insulator Cover Scr ...
 Rear Compartment Lid Applique Replacement
Rear Compartment Lid Applique Replacement
Callout
Component Name
Preliminary Procedure
Open and support the rear compartment lid.
...
Other materials:
Front Seat Back Recliner Handle Replacement
Front Seat Back Recliner Handle Replacement
Callout
Component Name
1
Front Seat Recliner Handle Cover Cap
Procedure
Use a flat-bladed tool to release the handle cover from the handle assembly.
...
Rear-facing child restraint installation using LATCH
Before installing a child restraint in the Nissan Armada, carefully review all
warnings and precautions provided in the "Child safety" and "Child restraints" sections
of this manual.
Do not use the LATCH lower anchors if the combined weight of the child and the
child restr ...
Intelligent Key operation
Example
Example
The Nissan Armada Intelligent Key system allows seamless locking and unlocking
of doors without removing the key from your pocket or bag, enhancing both convenience
and everyday usability.
When carrying the Nissan Armada Intelligent Key within the operating range, you ...

0.0064