Chevrolet Sonic Repair Manual: Manual Transmission Shift Lever and Selector Lever Cable Replacement
- Removal Procedure
-
- Remove the battery tray. Refer to Battery Tray Replacement.
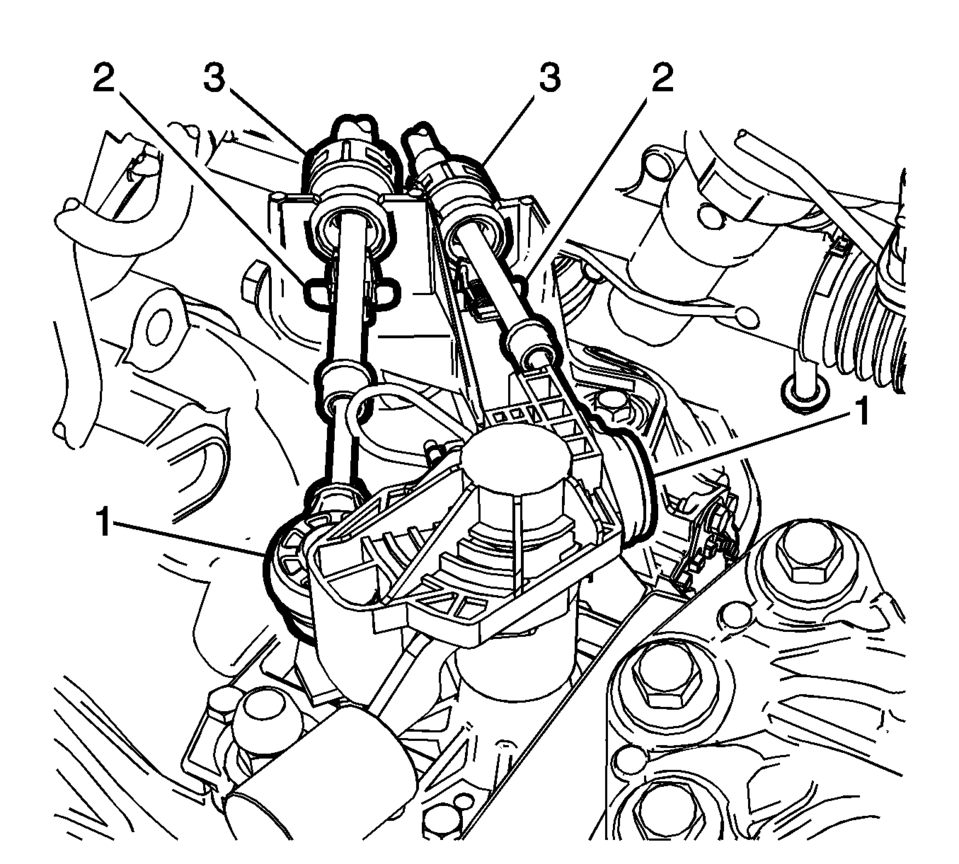
- Disconnect the shift lever and selector cable ends (1) from the transmission shift lever and selector levers.
- Pull the cable retainers (2) to release the shift lever and selector cable from the shift lever and selector cable bracket.
- Disconnect the shift lever and selector cables (3) from the shift lever and selector cable bracket.
- Remove the floor console. Refer to Front Floor Console Replacement.
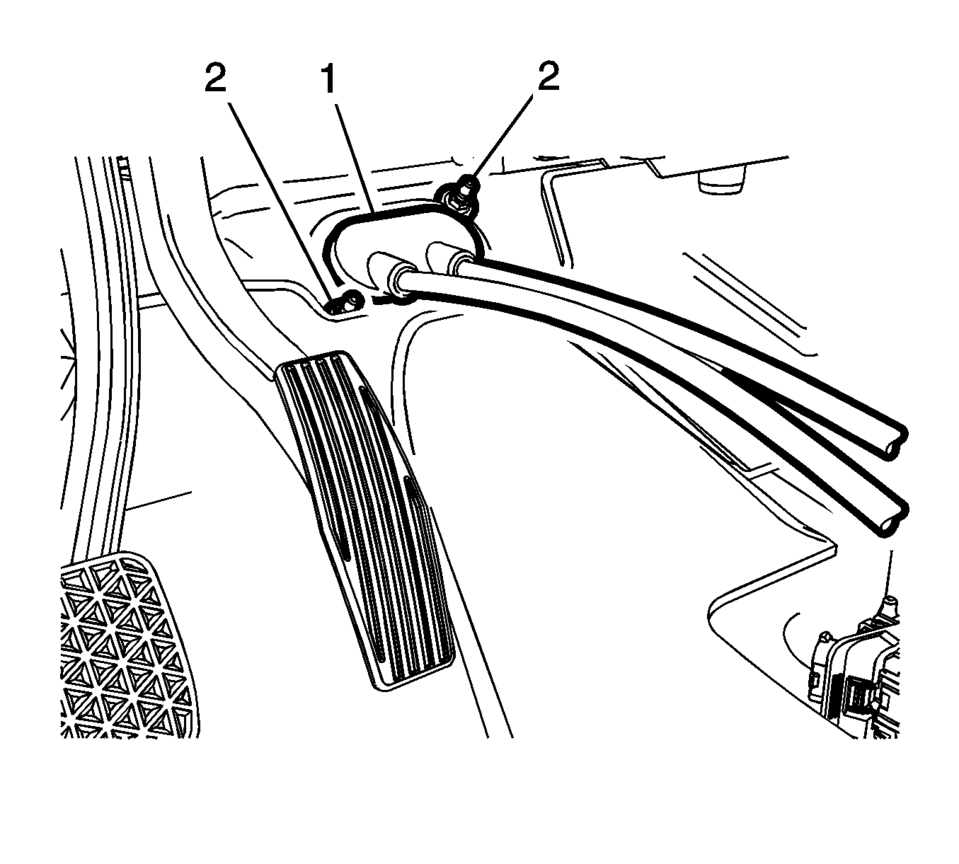
- Move the floor carpet in order to get access to the gear shift lever and selector cable grommet (1).
- Remove the grommet nuts (2).
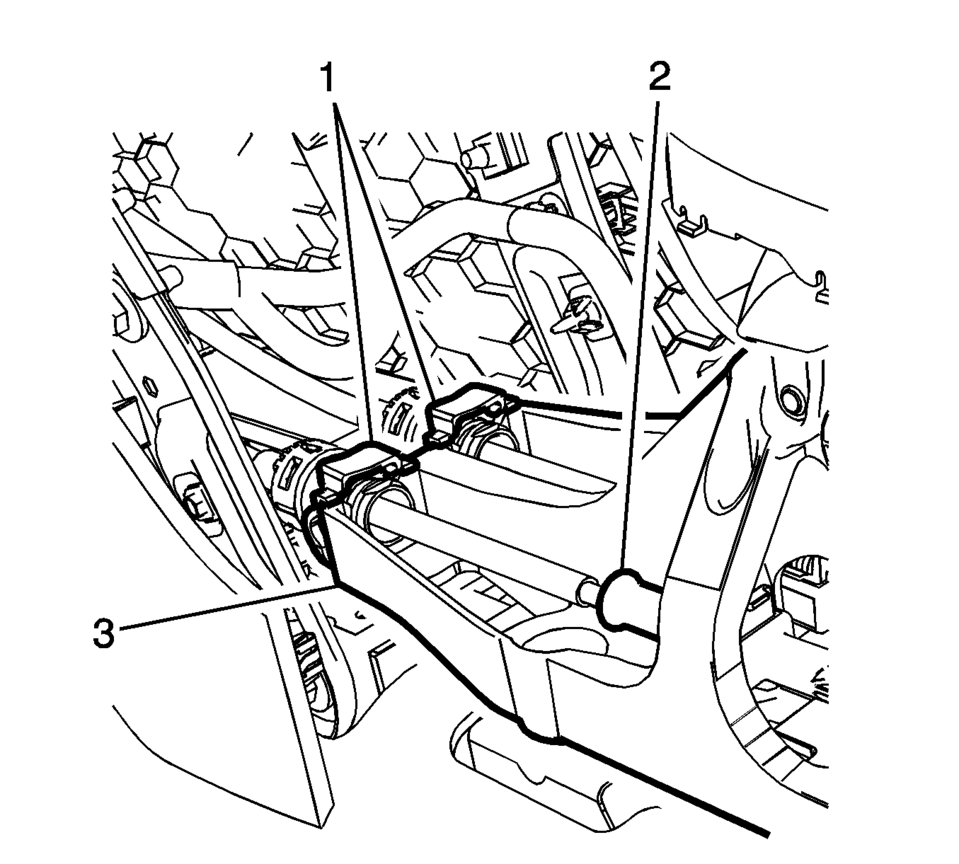
- Lift both cable adjustment retainers (1), one for each cable, to release the shift lever and selector cable.
- Pull the shift lever and selector cable retainers (1) from the transmission control assembly (3)
- Remove the shift lever and selector cable from the shift lever and selector control.
- Pull the shift lever and selector cable assembly through the cowl into the passenger compartment.
- Remove the shift lever and selector cable assembly from the vehicle.
\i

.1
- Installation Procedure
-
- Position the shift lever and selector cable assembly in the vehicle.
- Gently pull the shift lever and selector cable assembly through the cowl into the engine compartment.
- Connect the shift lever and selector cable ends (1) to the transmission shift lever and selector lever.
- Install the shift lever and the selector lever cable (3) to the shift lever and selector lever cable bracket.
- Move the floor carpet in order to get access to the shaft lever and selector lever cable grommet (1).
- Install the grommet nuts and tighten to 9 Y
(80 lb in)
- Connect the shift lever and selector lever cables to the shaft and selector control adjusters (2).
- Install the shift lever and selector lever cable retainers (1) to the transmission control (3).
- Press down and Lock both cable adjustment retainers (1) one for each cable, to adjust the shift lever and selector lever cable.
- Adjust the shift lever and selector lever cables. Refer to Manual Transmission Shift Lever Cable Adjustment.
- Install the floor console. Refer to Front Floor Console Replacement.
- Install the battery tray. Refer to Battery Tray Replacement.
- Verify correct operation of the transmission control assembly.
\i
Caution:
Refer to Component Fastener Tightening Caution.
.1
 Manual Transmission Shift Lever and Selector Lever Cable Adjustment
Remove the floor console. Refer to
Front Floor Console Replacement.
Lift upward and disengage (do not remove) both cable lock
adjusters (1) to release the internal cable asse ...
 Manual Transmission Shift Lever and Selector Lever Cable Replacement
Removal Procedure
Remove the battery tray. Refer to
Battery Tray Replacement.
Disconnect the shift lever and selector lever cable
end (1) from the transmissio ...
Other materials:
Fuses and Circuit Breakers
The wiring circuits in the vehicle are protected from short circuits by a combination
of fuses, circuit breakers, and fusible thermal links. This greatly reduces the
chance of fires caused by electrical problems.
Look at the silver-colored band inside the fuse. If the band is broken or melted, ...
Water Inlet Replacement (LUW)
Removal Procedure
Drain the engine coolant system. Refer to Cooling System Draining and
Filling.
Disconnect the engine coolant temperature sensor connector (1).
Remove the radiator outlet hose connector clip (2) and the radiator
outlet hose ...
Turbocharger System Description
12
(1)
Turbocharger Bypass Solenoid Valve
(2)
Multifunction Intake Air Sensor
(3)
Turbocharger Wastegate Regulator Solenoid Valve
(4)
Turbocharger
(5)
Turbocharger Bypass Valve
(6)
Turbocharger Was ...

0.0064