Chevrolet Sonic Repair Manual: Manual Transmission Shift Lever and Selector Lever Cable Replacement
- Removal Procedure
-
- Remove the battery tray. Refer to Battery Tray Replacement.
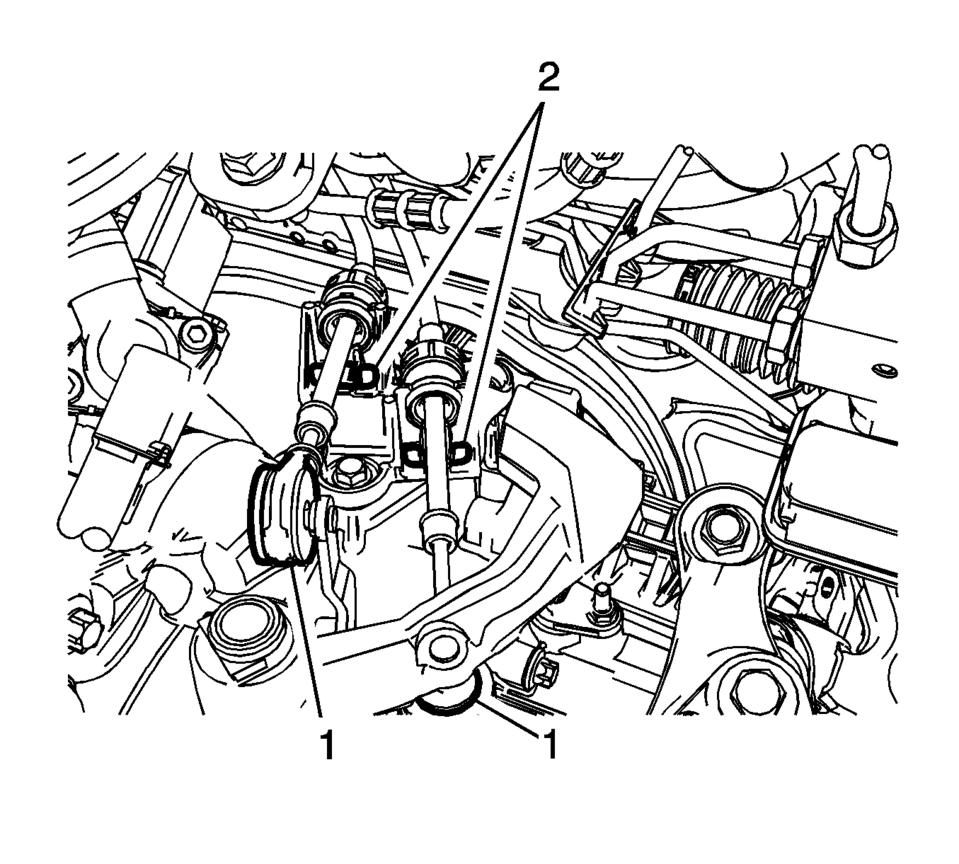
- Disconnect the shift lever and selector lever cable end (1) from the transmission shift lever and selector lever.
- Pull the cable retainers (2) to release the shift lever and selector lever cable from the shift lever and selector lever cable bracket.
- Disconnect the shift lever and selector lever cable from the shift lever and selector lever cable bracket.
- Remove the floor console. Refer to Front Floor Console Replacement.
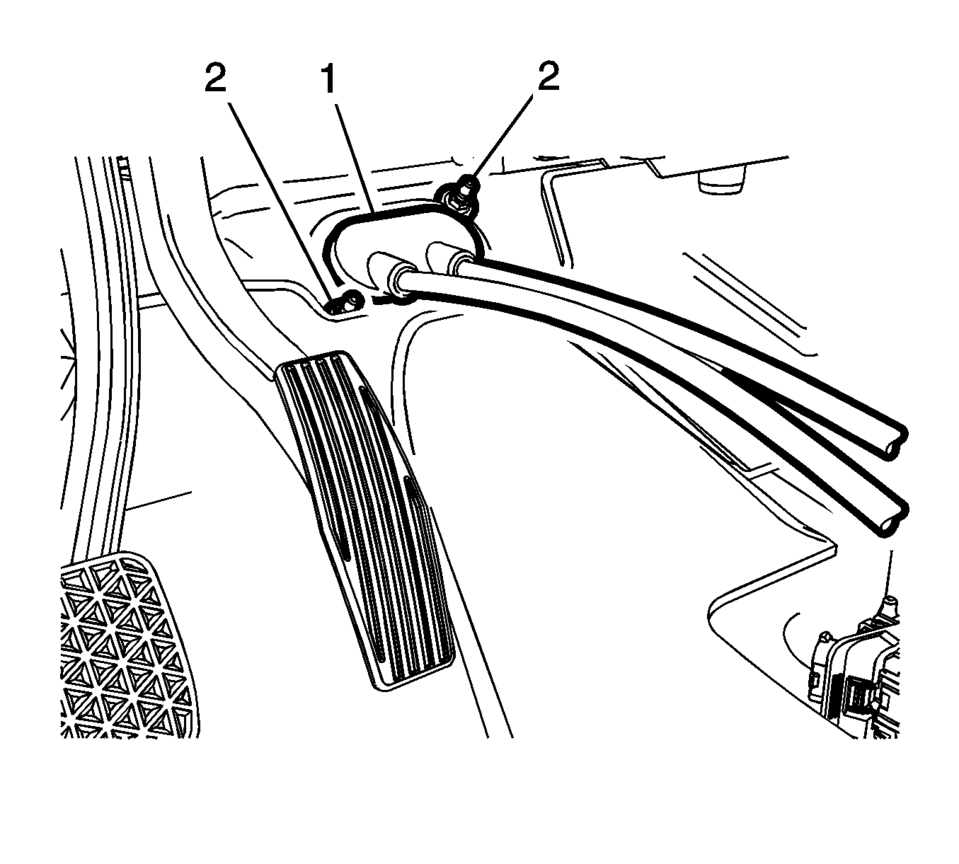
- Move the floor carpet in order to get access to the shift lever and selector lever cable grommet (1).
- Remove the grommet fasteners (2).
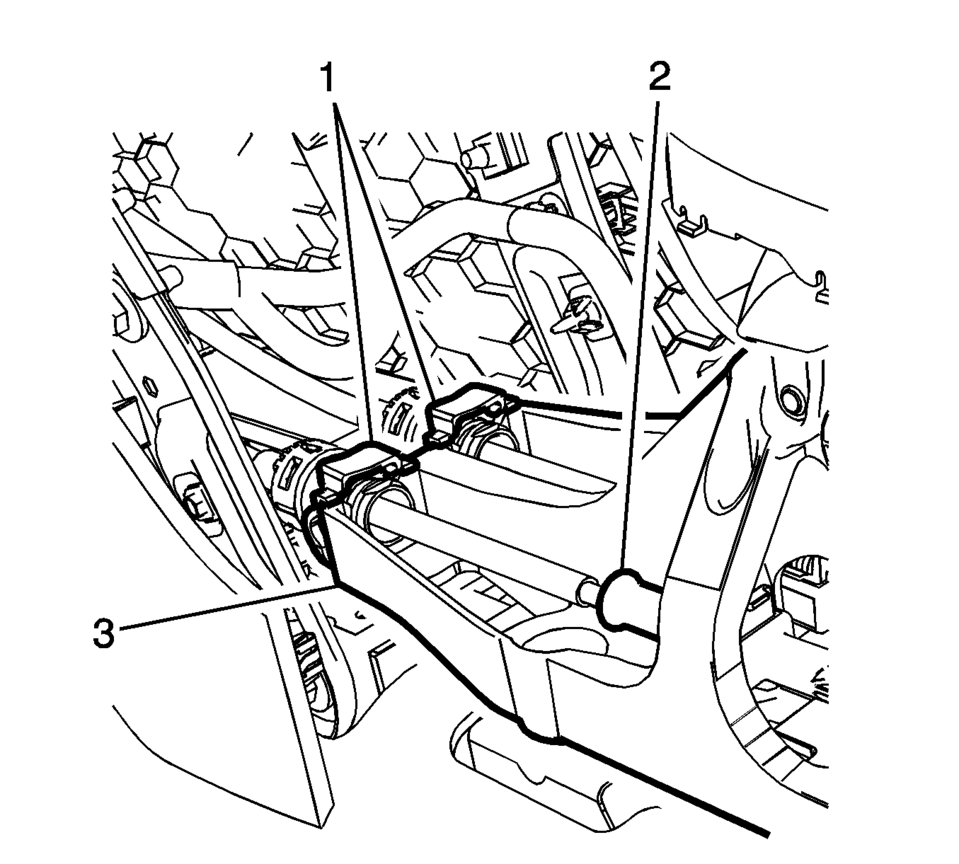
- Lift both cable adjustment retainers (1), one for each cable, to release the shift lever and selector lever cable.
- Pull the shift lever and the selector lever cable retainers (1) from the transmission control assembly (3), then remove the shift lever and selector lever cable from the shift and selector control.
- Pull the shift lever and the selector lever cable assembly through the cowl into the passenger compartment.
- Remove the shift lever and the selector lever cable assembly from the vehicle.

.1
- Installation Procedure
-
- Position the shift lever and the selector lever cable assembly in the vehicle.
- Gently pull the shift lever and the selector lever cable assembly through the cowl into the engine compartment.
- Connect the shift lever and the selector lever cable ends (1) to the transmission shift lever and the selector lever.
- Install the shift lever and the selector lever cable to the shift lever and the selector lever cable bracket.
- Move the floor carpet in order to get access to the shift lever and selector lever cable grommet (1).
- Install the grommet fasteners (2) and tighten to
9 Y (80 lb in)
.
- Connect the shift lever and selector lever cables to the shift and selector control adjusters (2).
- Install the shift lever and selector lever cable retainers (1) to the transmission control (3).
- Press down and lock both cable adjustment retainers (1), one for each cable, to adjust the shift lever and selector lever cable.
- Adjust the shift lever and selector lever cables. Refer to Manual Transmission Shift Lever and Selector Lever Cable Adjustment.
- Install the floor console. Refer to Front Floor Console Replacement.
- Install the battery tray. Refer to Battery Tray Replacement.
- Verify correct operation of the transmission control assembly.
Caution:
Refer to Fastener Caution.
.1
 Manual Transmission Shift Lever and Selector Lever Cable Replacement
Removal Procedure
Remove the battery tray. Refer to
Battery Tray Replacement.
\i
Disconnect the shift lever and selector cable ends (1)
from the transmission s ...
 Selector and Shift Lever Cable Bracket Replacement
Removal Procedure
Remove the battery tray. Refer to
Battery Tray Replacement.
Disconnect the shift lever and selector lever cable
end (1) from the transmissio ...
Other materials:
Traction Control System (TCS)/StabiliTrak® Light
The StabiliTrak or Traction Control System (TCS) indicator/warning light comes
on briefly when the engine is started.
If the light does not come on, have the vehicle serviced by your dealer. If the
system is working normally, the indicator light turns off.
If the light is on and not flashing ...
Overview (Radio with CD/USB)
91011121314151617
O /VOL (Power/Volume)
Turns the system on or off and adjusts the volume.
Z (Eject)
Removes a disc from the CD slot.
Buttons 1−6
Radio: Saves and selects favorite stations.
AUX Port
3.5 mm (1/8 in) connection for external devices.
...
Fuel Tank Pressure Sensor Replacement
Fuel Tank Pressure Sensor Replacement
Callout
Component Name
Preliminary Procedure
Remove the fuel tank. Refer to Fuel Tank
Replacement.
1
Fuel Tank Pressure Sensor
Procedure
Disco ...

0.0073