Chevrolet Sonic Repair Manual: Selector and Shift Lever Cable Bracket Replacement
- Removal Procedure
-
- Remove the battery tray. Refer to Battery Tray Replacement.
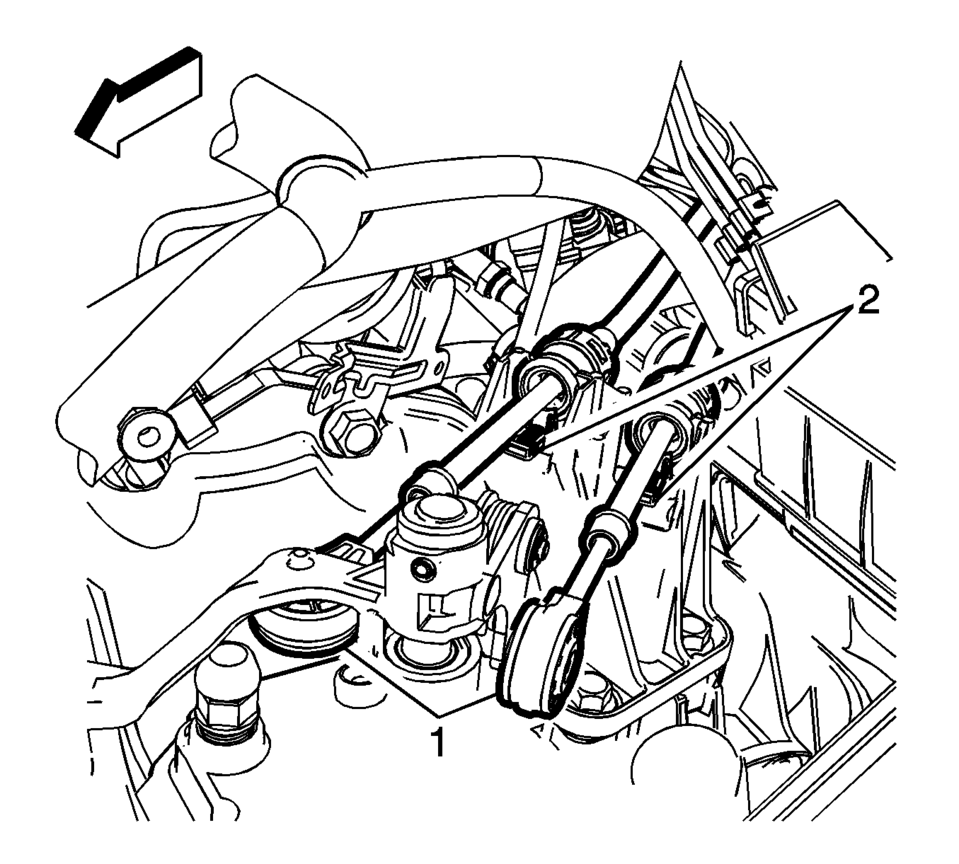
- Disconnect the shift lever and selector lever cable end (1) from the transmission shift lever and selector lever.
- Pull the cable retainers (2) to release the shift lever and selector lever cable from the shift lever and selector lever cable bracket.
- Disconnect the shift lever and selector lever cable from the shift lever and selector lever cable bracket.
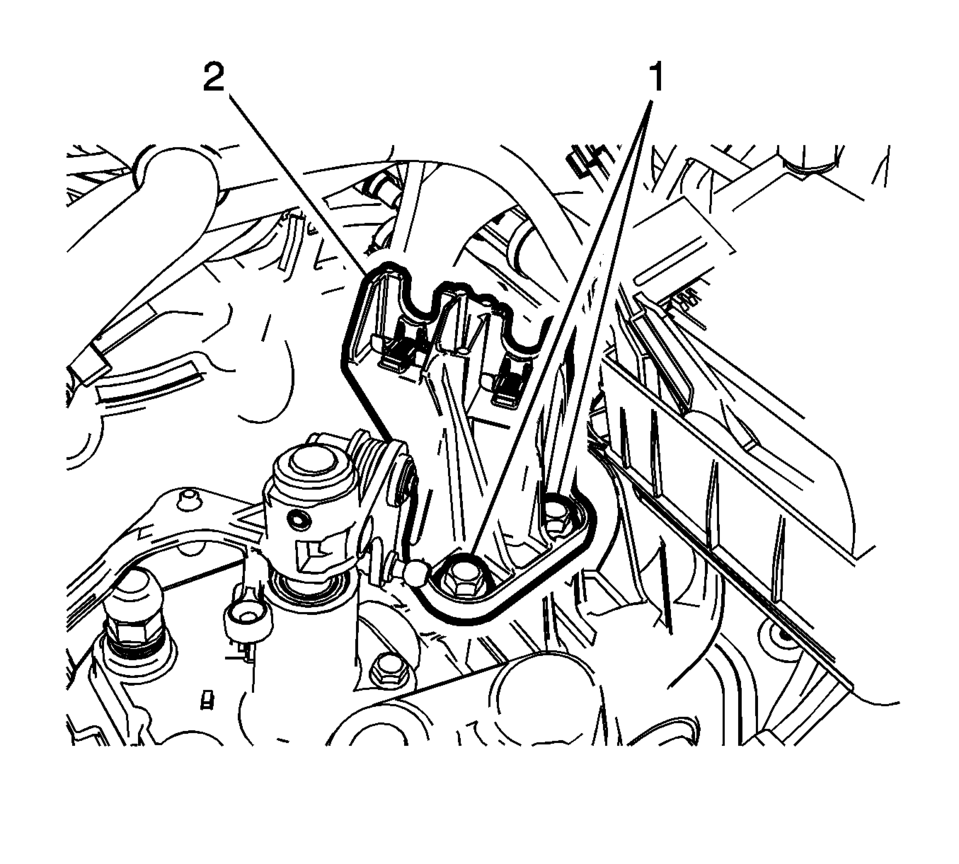
- Remove the 2 shift lever and selector lever cable bracket fasteners (1).
- Remove the shift lever and selector lever cable bracket (2) from the transmission.
- Installation Procedure
-
- Position the shift lever and selector lever cable bracket (2) on the transmission.
- Install the 2 shift lever and selector lever cable
bracket fasteners (1) and tighten to 58 Y
(43 lb ft)
.
- Connect the shift lever and selector lever cable ends (1) to the transmission shift lever and selector lever.
- Pull the cable retainers (2), then position the shift lever and selector lever cable in the shift lever and selector lever cable bracket.
- Release the cable retainers (2) to connect the shift lever and selector lever cable to the shift lever and selector lever cable bracket.
- Adjust the shift lever and selector lever cables. Refer to Manual Transmission Shift Lever and Selector Lever Cable Adjustment.
- Install the battery tray. Refer to Battery Tray Replacement.
- Verify correct operation of the transmission control assembly.
Caution:
Refer to Fastener Caution.
 Manual Transmission Shift Lever and Selector Lever Cable Replacement
Removal Procedure
Remove the battery tray. Refer to
Battery Tray Replacement.
Disconnect the shift lever and selector lever cable
end (1) from the transmissio ...
 Shift Control Housing Replacement
Removal Procedure
Set the parking brake.
Shift the transmission to the Neutral position.
Remove the battery tray. Refer to
Battery Tray Replacement.
Remove the brake master c ...
Other materials:
How to Identify Plastic Parts
saepvcsae
Plastic parts can be identified by the SAE code, which is usually found on the
rear of the part, and/or by the characteristics of the plastic. Knowing the type
of plastic aids in selecting the proper repair materials and in selecting the proper
repair procedure.
Look for the SAE ...
Side Window Defogger Outlet Grille Replacement
Side Window Defogger Outlet Grille Replacement
Callout
Component Name
1
Side Window Defroster Outlet Grille (Qty:?€‰2)
Procedure
Use a flat bladed plastic trim tool to aid in the removal of the grille
ass ...
The C300 competes well on fuel economy
Title: "2023 Mercedes-Benz C300: A Detailed Look at Efficiency, Interior, and Customization Options"
The 2023 Mercedes-Benz C300 presents a compelling choice for luxury sedan enthusiasts, offering a blend of performance, efficiency, and customizable features. Here's a breakdown of wh ...

0.0081